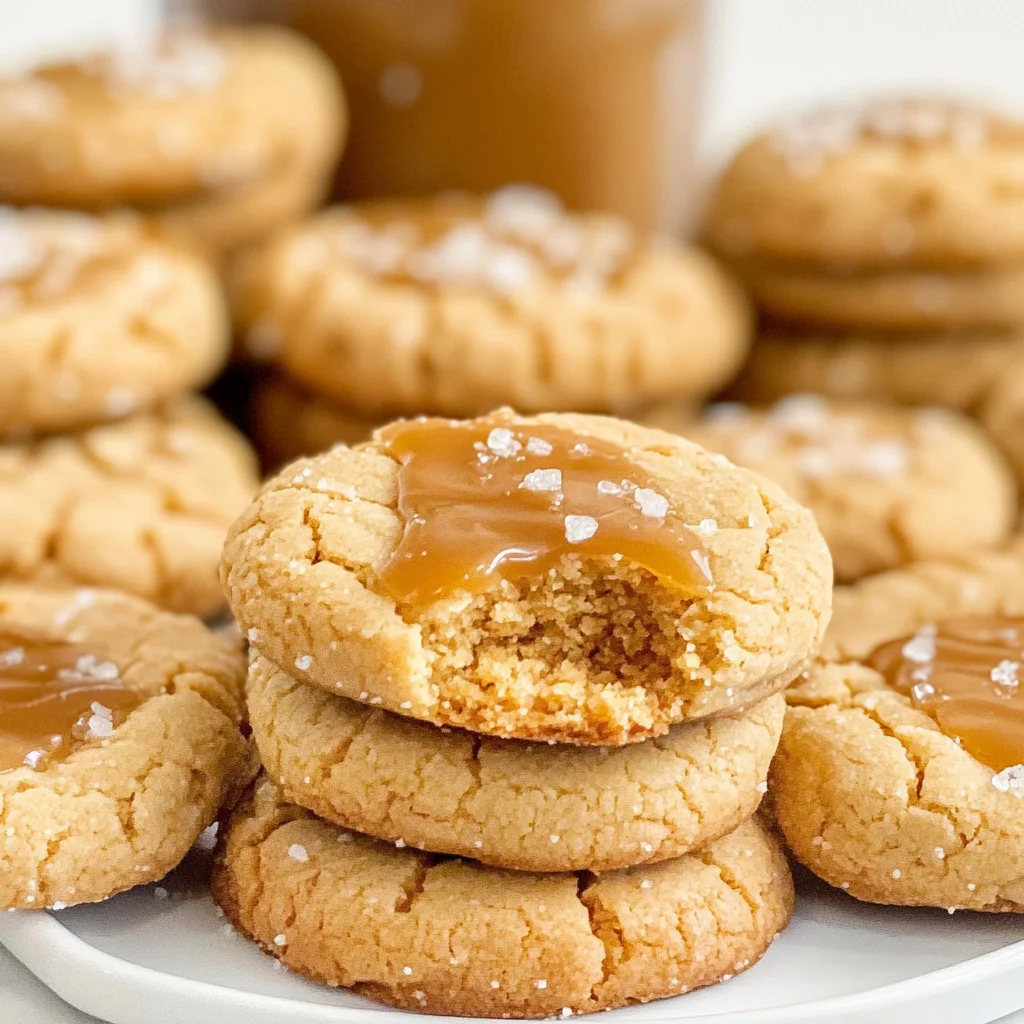
Simple Caramel Cookies
When I think of comfort food, one recipe that always comes to mind is my Simple Caramel Cookies. These little gems are more than just a sweet treat; they encapsulate the warmth of home and the joy of sharing something special with loved ones. Picture yourself standing in your cozy kitchen, the aroma of melting butter and caramel wafting through the air, wrapping around you like a warm blanket on a chilly evening. The golden brown cookies emerge from the oven with their edges crisp and centers soft, begging to be devoured. Each bite is a symphony of flavors, where the deep notes of vanilla dance harmoniously with the luscious sweetness of caramel. Honestly, there’s nothing quite like it!
I’ve always been captivated by how a simple combination of ingredients can create such an extraordinary experience. You know those moments when your heart swells with nostalgia? That’s what these cookies evoke for me. They remind me of family gatherings where laughter fills the air and everyone gathers around the table to share stories over freshly baked goods. It’s this recipe that invites you to slow down, savor each bite, and create memories that linger long after the last crumb has been enjoyed. Trust me on this—you’ll want to keep this recipe close at hand for all those moments when you need a little extra love in cookie form.
Simple Caramel Cookies: A Hug in Cookie Form
These Simple Caramel Cookies are incredibly easy to make, and they’ll quickly become your go-to dessert for any occasion! With just a handful of ingredients and minimal effort, you’ll find yourself whipping up batch after batch. The rich vanilla essence combined with sweet caramel creates a delightful treat that is sure to impress anyone lucky enough to taste them. Whether you’re hosting friends or simply indulging yourself (because we all deserve that!), these cookies will bring smiles all around.
Ingredients:
Let’s gather our ingredients for this delightful journey into baking! Each component plays a crucial role in crafting these scrumptious cookies, so let’s dive into what makes each one special.
- 9 tablespoons unsalted butter (about 127g), softened to room temperature. This ingredient is absolutely paramount in achieving that rich flavor and tender texture we adore in our Simple Caramel Cookies. Softened butter mixes beautifully with sugars, creating that signature creamy base which leads to cookies that are soft yet slightly chewy at their core. If you can find European-style butter with its higher fat content, it will elevate your cookies even further—transforming them into something utterly intoxicating!
- 1 tablespoon cream or whole milk. This small addition helps create that luscious texture while providing moisture to our dough. Cream adds richness which enhances the overall flavor profile, making every bite feel indulgent without being overly heavy. If you’re looking for alternatives due to dietary preferences, try using coconut cream for a subtly tropical twist or almond milk for a lighter option—just remember it might alter the final taste slightly!
- ½ cup granulated white sugar. This sugar brings sweetness but also contributes significantly to the cookie’s structure through its ability to caramelize during baking. That beautiful golden color we’re after? Thanks to this sugar! When selecting granulated sugar, opt for brands that don’t contain any additives if possible; purity truly matters here.
- 1 tablespoon dark brown sugar. The richness of dark brown sugar adds depth and moisture thanks to its molasses content—this is what gives our cookies their lovely caramel flavor! Not only does it enhance sweetness but also creates that chewy texture we crave in a good cookie. If you find yourself out of dark brown sugar, you can mix light brown sugar with a bit more molasses as a substitute!
- 1 teaspoon vanilla extract. Ah, vanilla—the aromatic essence that ties everything together! Including real vanilla extract is non-negotiable in my book; it adds complexity and elevates our cookies from ordinary to extraordinary. Always choose pure extract over imitation if possible; you’ll appreciate how much richer your baked goods taste.
- 1½ cups all-purpose flour. This ingredient provides structure and stability while ensuring our cookies hold their shape during baking. When measuring flour, be gentle—scooping directly from the bag can pack it down too tightly leading to dense cookies instead of airy delights! For best results, spoon your flour into your measuring cup before leveling off.
- 1 teaspoon baking soda. As our leavening agent, baking soda plays an essential role in helping our cookies rise beautifully in the oven! It reacts with acidic ingredients (like brown sugar), creating bubbles of carbon dioxide which gives us that lovely lift and softness we’re looking for in every bite.
Now that we’ve gathered everything we need let’s move on to the fun part!
Equipment You’ll Need:
Before diving into baking bliss, let’s talk about having the right tools at your fingertips! While these items may not be ingredients, they are essential partners on this culinary adventure, making everything smoother and more enjoyable.
- Mixing bowls – At least two should do nicely! A set of mixing bowls allows you to combine ingredients effectively without creating chaos in your kitchen space! Opt for durable materials like glass or stainless steel; they hold up well against heat when mixing warm mixtures like our caramel base.
- Saucepan – A medium-sized saucepan works perfectly here. This is where magic happens as we melt butter and combine sugars over medium heat! Choosing one with thick walls helps distribute heat evenly so nothing burns—more love infused into every morsel.
- Baking sheet lined with parchment paper – Absolutely essential! This silicone-coated wonder ensures your cookies don’t stick while also promoting even baking without unwanted browning on bottoms—no one likes burnt edges during cookie time!
- Cooling rack – This allows air circulation around those freshly baked beauties! Transferring your cookies onto a cooling rack prevents sogginess while letting them set properly after coming out hot from the oven; trust me—you want them cool enough before diving headfirst into indulgence!
With our ingredients prepped and equipment lined up neatly waiting patiently by our sides—we’re ready to embark on this delicious journey to make Simple Caramel Cookies together!
Step 1: Prepping Your Oven for Success
First things first; let’s preheat that oven to 350°F (175°C). Preheating is crucial because it ensures an even bake throughout our cookie dough once we place it inside; skipping this step can lead to unevenly cooked treats—which nobody wants! While waiting patiently for those magical temperatures (and maybe indulging in some kitchen dancing?), gather all remaining ingredients so they’re within reach when it’s time for action!
Step 2: Creating Your Golden Caramel Base
Next up comes perhaps one of my favorite parts—creating that warm caramel mixture that’s going to elevate our cookies from delightful snacks into heavenly bites! In your saucepan over medium heat combine softened butter along with cream (or whole milk), granulated white sugar, dark brown sugar, and vanilla extract—all those glorious flavors melding together beautifully as they warm up gently under watchful eyes (yours!). Stir constantly until bubbling begins—a sign things are coming together perfectly—and then allow cooking just long enough so it thickens slightly—about 30 seconds will do nicely before removing from heat altogether!
Step 3: Joining Forces with Flour
Now comes another pivotal moment as we sift together all-purpose flour alongside baking soda within another bowl until thoroughly combined before gently folding this mixture into cooled caramel goodness back in our saucepan! Mixing until there are no dry pockets left behind helps ensure even distribution throughout every cookie while preventing any tough bits from forming later on during baking—that would be utterly tragic—to achieve optimal tenderness throughout each bite instead.
Step 4: Scooping Up Sweetness
With dough now formed beautifully thanks largely due diligence paid earlier let’s scoop generous portions onto lined baking sheets—aiming roughly two inches apart since they will spread somewhat while baking away happily inside hot ovens soon enough! Use either floured hands or trusty ice cream scooper depending upon preference—it doesn’t have an exact science but whatever method feels most comfortable works best here…just remember not rush things along because patience pays dividends later down line when enjoying warm treats fresh outta’ those cooks’ hands!
I can’t wait for you all to try these Simple Caramel Cookies—they’re going to bring joy not just through taste but through cherished moments shared as well as sweet memories made along way… So grab those unique ingredients today & get started now—I promise you won’t regret it!!
The Joy of Mixing: Creating Your Cookie Dough
Step 5: The Art of Combining Ingredients
Now that your caramel mixture has cooled to a warm temperature—trust me, this step is crucial for achieving that perfect texture—it’s time to bring the dry ingredients into the fold. In a separate bowl, grab your trusty sieve or sifter and combine the all-purpose flour with the baking soda. This simple technique, often overlooked, serves a dual purpose: it aerates the flour and ensures that the baking soda is evenly distributed throughout your dough. You want these cookies to rise beautifully without any lumps of flour disrupting their lovely structure.
Once you’ve sifted those together, it’s time to add this dry mix into your cooled caramel concoction. As you do this, take a moment to appreciate how the sweet aroma of vanilla and caramel envelops your kitchen; it’s like a warm hug from the inside out! Using a sturdy spatula or wooden spoon, stir until everything is just combined. Avoid overmixing—the dough should be slightly sticky but cohesive. If you overdo it, you risk developing gluten in the flour which can lead to tough cookies instead of the tender bites you’re aiming for. Remember, we’re after soft and chewy Simple Caramel Cookies!
Step 6: Scooping and Shaping Your Cookies
With your beautiful dough ready, it’s now time for one of my favorite parts: shaping those little balls of joy! Using a cookie scoop or even just your hands—don’t worry if they get a bit sticky; that’s part of the charm—portion out about two tablespoons of dough for each cookie. Place them on a lined baking sheet, leaving enough space between each ball; they will spread out as they bake, creating that lovely round shape we all adore.
Now comes the fun part! To flatten those dough balls into delightful little discs, grab a floured glass or fork (or even your thumb if you’re feeling adventurous!). Press down gently but firmly until they’re about half an inch thick. This step is non-negotiable because it helps create an even bake while allowing those edges to crisp up nicely while keeping the center soft and chewy—a true masterpiece in every bite! Plus, there’s something incredibly satisfying about seeing those perfectly shaped cookies waiting for their turn in the oven.
Step 7: Into the Oven They Go!
Preheat your oven to 350°F (175°C) if you haven’t already done so—it’s essential for ensuring an even bake throughout your cookies. Once your oven is ready and those cookie disks are lined up like soldiers on the baking sheet, slide them into the warm embrace of that preheated space. Now, here’s where patience comes into play; I promise you that waiting for those 15 minutes will feel like an eternity, but trust me on this one!
As they bake, keep an eye on them through that oven window; you’ll see them puffing up ever so slightly and turning golden brown around the edges. This visual cue is paramount—once they reach that beautiful shade of golden perfection, you’ll know they are just moments away from being done! Remember not to open the oven door too early; doing so can cause sudden drops in temperature which could impact their puffiness. Let them work their magic!
Step 8: Cooling Down – The Anticipation Builds
After what feels like both an eternity and just a blink of an eye, when those cookies have reached their golden glory after about 15 minutes in the oven, it’s time to take them out—but hold on just a second! Allow them to rest on the baking sheet for about 5 minutes before transferring them to a wire rack. This resting period is essential; it lets them set up without falling apart when you try to move them.
During these precious moments on the baking sheet, you’ll notice how their edges continue to firm up while their centers remain delectably soft. You might find yourself engulfed in that intoxicating aroma wafting through your kitchen—you’re almost there! After they’ve cooled slightly but are still warm enough to melt in your mouth (oh yes!), gently transfer each cookie onto a wire rack using a spatula. This allows air circulation around them so they don’t become soggy—crispy edges and chewy centers are what we all crave in our Simple Caramel Cookies.
Final Touches – Enjoying Your Creation
Step 9: The Sweet Reward – Time to Enjoy!
Once all your cookies have cooled completely on that wire rack (if you can resist snatching one before then!), it’s finally time for my favorite part: indulging in these glorious treats! But let’s take a moment here—these Simple Caramel Cookies deserve some appreciation first; maybe gather your friends or family around? There’s something profoundly satisfying about sharing homemade treats with loved ones.
I encourage you to savor each bite slowly—the way they crumble just right while delivering waves of caramel sweetness alongside that aromatic vanilla essence truly makes each moment special. You can enjoy them fresh out of the oven with a glass of cold almond milk or store them in an airtight container where they’ll stay deliciously fresh for several days (if they last that long!). Either way—you’ve created something truly extraordinary here! So go ahead—take pride in this recipe filled with love and warmth; I promise you won’t regret it.
Whether it’s dessert after dinner or a cozy snack while curled up with a book, these Simple Caramel Cookies are bound to bring joy—not only in making but also in sharing. Happy baking!
Storage and Enjoyment Tips for Your Simple Caramel Cookies
Now that your Simple Caramel Cookies are baked to golden perfection, it’s time to revel in their sweet, buttery goodness! The delightful aroma wafting through your kitchen is just a taste of the joy these cookies will bring. But if you manage to have any left after sharing them with friends and family, I’ve got some great tips on how to store these treasures. Trust me; you don’t want to lose any of that deliciousness!
Storing Leftover Simple Caramel Cookies
To keep your Simple Caramel Cookies fresh and utterly delightful, I recommend storing them in an airtight container. This simple step is crucial as it prevents moisture from sneaking in and ruining their tender texture. You can keep them at room temperature for about a week—if they last that long! For optimal freshness, consider placing a slice of bread inside the container; the cookies will absorb moisture from the bread, ensuring they remain soft and chewy. After storage, you’ll find the flavor is still wonderful—the caramel notes meld beautifully with the rich butteriness, creating a truly satisfying treat. When you’re ready to enjoy them again, feel free to pop one in the microwave for a few seconds to warm it up; this little trick brings back that fresh-out-of-the-oven experience!
Freezing Simple Caramel Cookies for Later
If you find yourself overwhelmed with cookies (what a lovely dilemma!), freezing them is another fantastic option. To freeze your Simple Caramel Cookies properly, let them cool completely first—this helps prevent condensation from forming and turning your beloved treats soggy. Then, stack them gently between layers of parchment paper in a freezer-safe bag or container. They will stay deliciously fresh for up to three months! When you’re ready to indulge again, simply take out as many as you’d like and let them thaw at room temperature for about 15 minutes—or if you’re feeling impatient like I often do, give them a quick zap in the microwave for just a few seconds until warm. The convenience of having these sweet delights on hand makes life so much sweeter!
Simple Caramel Cookies

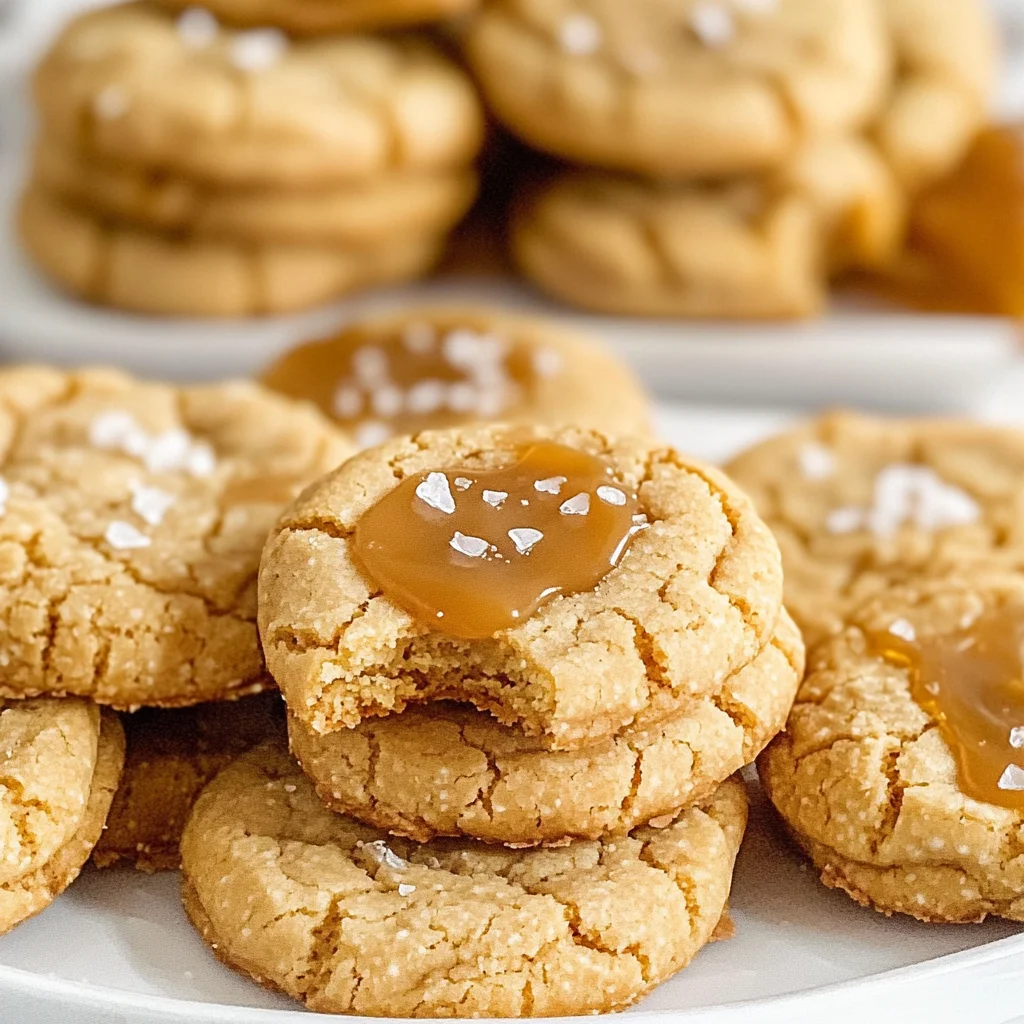
Indulge in the warmth and comfort of Simple Caramel Cookies, where each bite offers a delightful balance of buttery sweetness and rich vanilla. These easy-to-make cookies are perfect for any occasion, whether you’re hosting friends or enjoying a cozy evening at home. Picture yourself surrounded by loved ones, sharing these delicious treats that evoke nostalgia and joy. With a soft center and slightly crisp edges, these cookies not only satisfy your sweet tooth but also create cherished memories. Gather your ingredients and experience the simple pleasure of baking with this comforting recipe.
- Prep Time: 15 minutes
- Cook Time: 15 minutes
- Total Time: 30 minutes
- Yield: Approximately 20 cookies 1x
- Category: Dessert
- Method: Baking
- Cuisine: American
Ingredients
- 9 tablespoons unsalted butter, softened
- 1 tablespoon cream or coconut cream
- ½ cup granulated white sugar
- 1 tablespoon dark brown sugar
- 1 teaspoon vanilla extract
- 1½ cups all-purpose flour
- 1 teaspoon baking soda
Instructions
- Preheat your oven to 350°F (175°C).
- In a medium saucepan over medium heat, melt the butter with cream, granulated sugar, brown sugar, and vanilla extract until combined and slightly thickened.
- In a separate bowl, sift together flour and baking soda. Gradually fold into the caramel mixture until well combined.
- Scoop tablespoon-sized portions onto a lined baking sheet, spacing them about two inches apart. Flatten slightly to about half an inch thick.
- Bake for 12-15 minutes until golden around the edges. Allow to cool on the baking sheet for 5 minutes before transferring to a wire rack.
Nutrition
- Serving Size: 1 cookie (24g)
- Calories: 103
- Sugar: 7g
- Sodium: 54mg
- Fat: 5g
- Saturated Fat: 3g
- Unsaturated Fat: 2g
- Trans Fat: 0g
- Carbohydrates: 13g
- Fiber: <1g
- Protein: <1g
- Cholesterol: 10mg