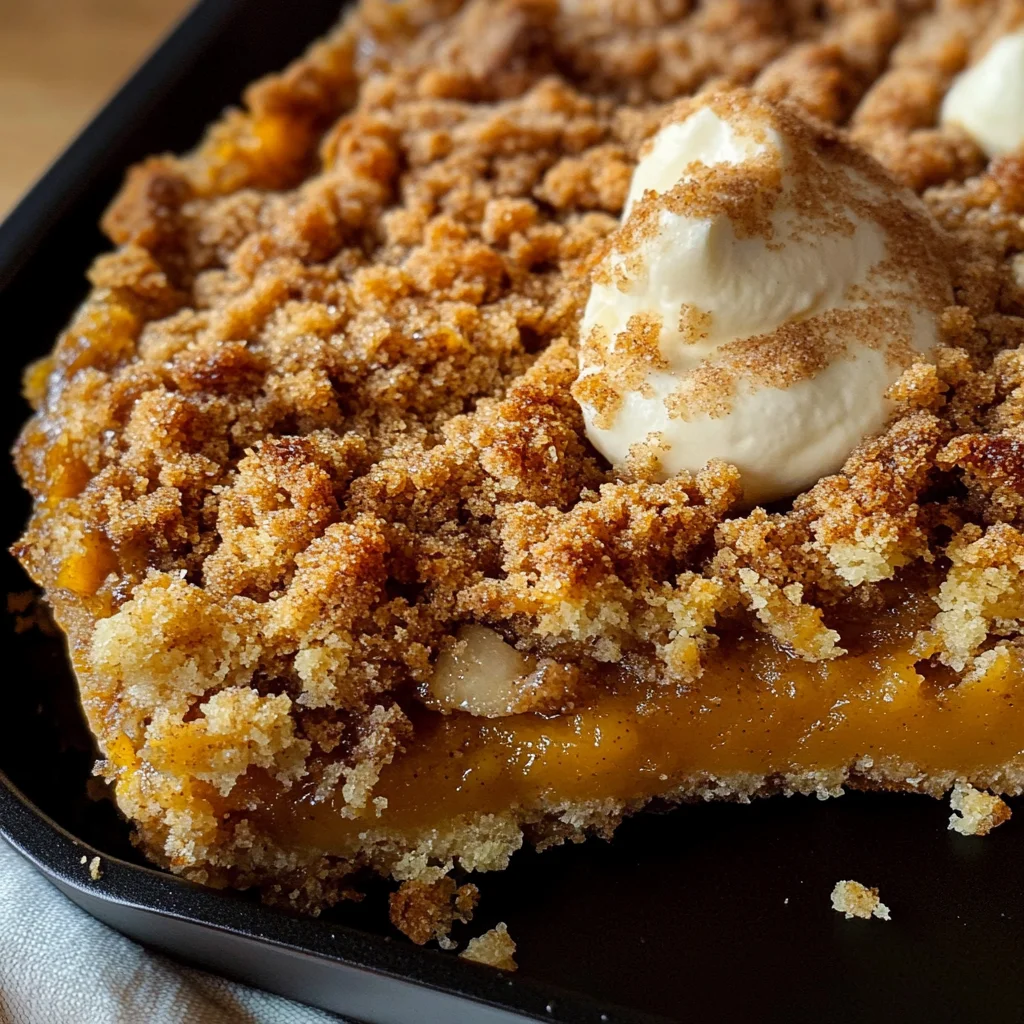
Pumpkin Crisp
If you’re looking for a cozy dessert that captures the essence of fall, you’ve come to the right place! This Pumpkin Crisp is a delightful twist on traditional pumpkin pie, with a creamy filling and a golden cinnamon streusel topping that will make your taste buds dance. It’s perfect for family gatherings, quiet evenings at home, or even busy weeknights when you want something special without all the fuss. Trust me, once you try this recipe, it will become a cherished favorite in your home!
Why You’ll Love This Recipe
- Easy to make: With just a few simple steps, you can whip up this delicious dessert in no time.
- Family-friendly: Everyone loves pumpkin! This dish brings smiles to both kids and adults alike.
- Make-ahead convenience: Prepare it in advance and pop it in the oven when you’re ready to serve.
- Warm and comforting: The creamy filling paired with the crunchy topping creates the ultimate cozy dessert experience.
Ingredients You’ll Need
Let’s gather our ingredients! You’ll find that these are simple, wholesome items that are easy to find at your local grocery store. Each one plays an important role in making this Pumpkin Crisp truly special.
For the Filling
- 1 (15 oz) can pumpkin puree
- 1 cup granulated sugar
- 3 large eggs
- 2 teaspoons pumpkin pie spice
- 1/2 teaspoon salt
- 2 teaspoons vanilla extract
- 2/3 cup heavy cream
For the Topping
- 2 cups all-purpose flour
- 1 1/2 cups granulated sugar
- 2 teaspoons cinnamon
- 1/2 teaspoon salt
- 12 tablespoons (1 1/2 sticks) unsalted butter (melted)
Variations
One of my favorite things about this recipe is how flexible it can be! Here are some fun variations you might consider trying:
- Add nuts: Toss in some chopped pecans or walnuts for extra crunch and flavor.
- Spice it up: Experiment with different spices like nutmeg or ginger to create your own unique twist.
- Fruit infusion: Mix in dried cranberries or raisins to give a sweet surprise with each bite.
- Gluten-free option: Substitute all-purpose flour with a gluten-free blend for those with dietary restrictions.
How to Make Pumpkin Crisp
Step 1: Preheat Your Oven
Begin by preheating your oven to 375°F. This step is crucial because it ensures that your Pumpkin Crisp bakes evenly and comes out perfectly golden brown. While the oven heats up, butter a 12-inch cast iron skillet or a medium casserole dish—this helps prevent sticking!
Step 2: Prepare the Pumpkin Filling
In a large bowl, whisk together the pumpkin puree, sugar, eggs, pumpkin pie spice, salt, and vanilla extract until it’s smooth. Adding heavy cream next is essential; it gives the filling that luscious texture we all love. Once mixed well, pour this beautiful mixture into your prepared skillet.
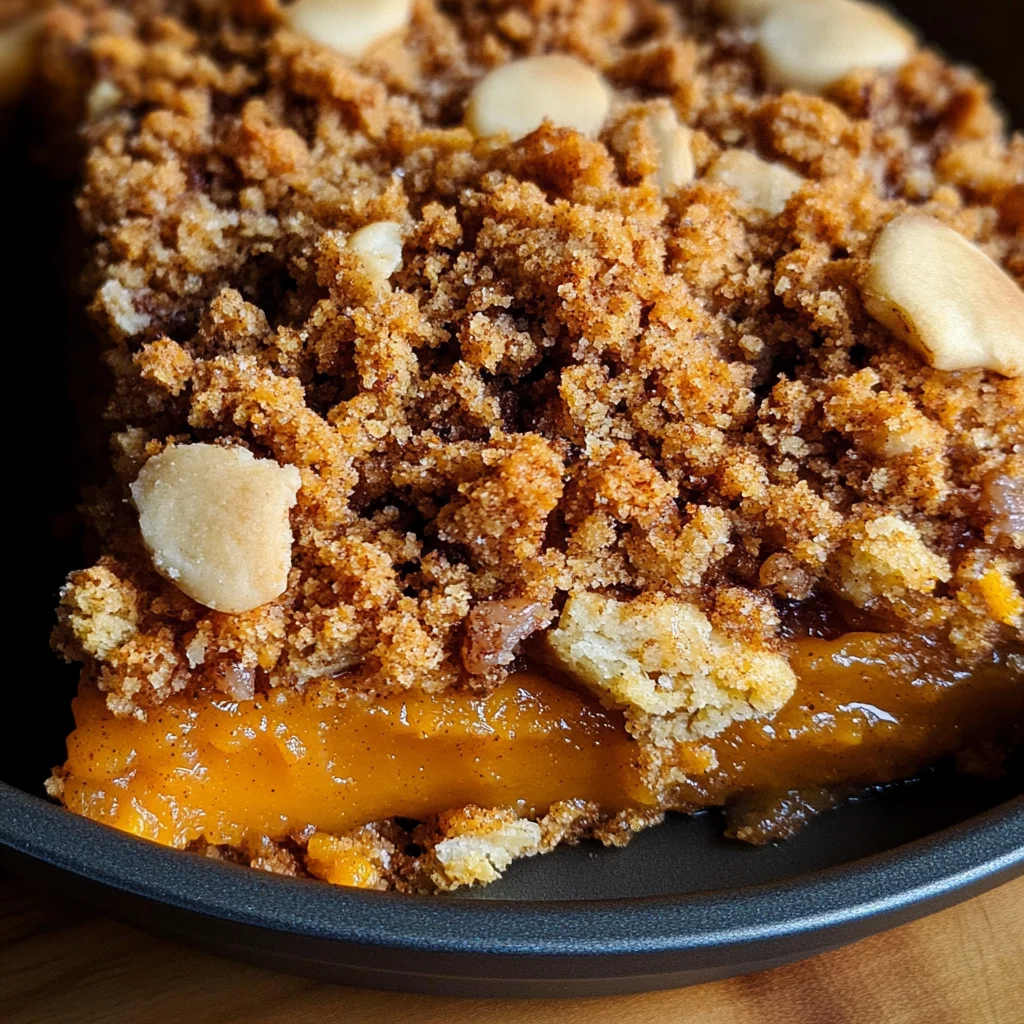
Step 3: Make the Crumb Topping
Now let’s move on to that irresistible crumb topping! In another bowl, whisk together flour, sugar, cinnamon, and salt. Pour in the melted butter and mix everything together until it becomes crumbly. This topping is what makes our Pumpkin Crisp so delightful—it’s both sweet and has just enough crunch!
Step 4: Bake It Up
Spread that glorious crumb topping over the pumpkin filling evenly. Now pop it into your preheated oven! Bake for about 40 to 45 minutes until the filling is set and the top is golden brown. If it starts browning too quickly, don’t worry; just cover it lightly with foil.
Step 5: Let It Cool (if you can wait!)
Once baked to perfection, let your Pumpkin Crisp cool for about 10 minutes. This allows the filling to firm up nicely—though I wouldn’t blame you if you couldn’t resist digging in right away! Serve warm topped with ice cream or whipped cream; I personally adore pairing it with cinnamon ice cream for an extra treat!
I hope this recipe brings warmth and joy to your home just as it does mine! Enjoy every delicious bite of this Pumpkin Crisp!
Pro Tips for Making Pumpkin Crisp
Creating the perfect Pumpkin Crisp is a delightful experience, and with a few helpful tips, you can ensure it turns out just right every time!
- Use Fresh Ingredients: Fresh spices and high-quality pumpkin puree can elevate the flavor of your crisp significantly. This ensures that every bite is bursting with warmth and richness.
- Don’t Overmix the Topping: When combining the streusel ingredients, aim for a crumbly texture rather than a smooth mixture. This will create that lovely crunchy topping that contrasts beautifully with the creamy filling.
- Check for Doneness: Ovens can vary in temperature, so keep an eye on your crisp as it bakes. The filling should be set, and the top should be golden brown. If you notice excessive browning, cover it loosely with foil to prevent burning.
- Let It Rest: Allowing your Pumpkin Crisp to cool for about 10 minutes before serving helps the filling firm up, making it easier to slice and serve without losing its shape.
- Experiment with Add-ins: Feel free to add chopped nuts or chocolate chips to the streusel topping for an extra crunch or sweetness. This personal touch can make your Pumpkin Crisp uniquely yours!
How to Serve Pumpkin Crisp
Serving your Pumpkin Crisp can be just as fun as making it! Here are some creative ways to present this delightful fall dessert that will impress your family and friends.
Garnishes
- Whipped Coconut Cream: A dollop of homemade coconut whipped cream adds a light and airy touch that complements the richness of the pumpkin.
- Chopped Pecans or Walnuts: Sprinkling some chopped nuts on top not only enhances the flavor but also adds a satisfying crunch.
- Dusting of Cinnamon Sugar: A light dusting of cinnamon sugar over your warm crisp elevates its appearance and provides an additional layer of flavor.
Side Dishes
- Apple Cider: A warm glass of apple cider provides a deliciously complementary drink option that captures the essence of fall.
- Roasted Brussels Sprouts: These savory bites offer a great balance to the sweetness of Pumpkin Crisp while adding nutritious greens to your meal.
- Butternut Squash Soup: A creamy bowl of butternut squash soup makes for a cozy pairing that echoes the flavors in the crisp itself.
- Mixed Green Salad: A fresh salad with seasonal produce brings brightness to your table and creates a lovely contrast against the rich dessert.
With these tips and serving suggestions, you’ll be all set to enjoy your delicious Pumpkin Crisp in style! Happy baking!
Make Ahead and Storage
This Pumpkin Crisp is perfect for meal prep! You can easily make it ahead of time, store it, and enjoy it fresh out of the oven whenever you crave a cozy dessert.
Storing Leftovers
- Allow the Pumpkin Crisp to cool completely before storing.
- Cover tightly with plastic wrap or aluminum foil.
- Store in the refrigerator for up to 3 days.
Freezing
- Ensure the Pumpkin Crisp is fully cooled before freezing.
- Wrap it tightly in plastic wrap, then in aluminum foil to prevent freezer burn.
- Freeze for up to 2 months. Thaw overnight in the refrigerator before baking.
Reheating
- Preheat your oven to 350°F (175°C).
- Remove any plastic wrap and cover with aluminum foil to prevent over-browning.
- Bake for about 15-20 minutes, or until heated through.
FAQs
Here are some common questions about making this delicious Pumpkin Crisp.
Can I use fresh pumpkin instead of canned pumpkin puree for Pumpkin Crisp?
Absolutely! If you prefer using fresh pumpkin, just cook and puree the pumpkin until smooth. It’s a delightful option that adds a fresh flavor!
How do I make my Pumpkin Crisp extra creamy?
To add extra creaminess to your Pumpkin Crisp, consider increasing the heavy cream slightly in your filling mixture. Just be cautious not to make it too runny!
What can I serve with Pumpkin Crisp?
Pumpkin Crisp pairs wonderfully with vanilla ice cream, whipped cream, or even cinnamon ice cream for an extra flavor boost.
Final Thoughts
I hope you find joy in making this delightful Pumpkin Crisp! It combines the comforting flavors of fall with an easy preparation method that anyone can master. Enjoy serving it warm to family and friends—there’s nothing quite like sharing a sweet treat on a cozy evening. Happy baking!
Pumpkin Crisp
Indulge in the warmth of autumn with this delightful Pumpkin Crisp, a comforting dessert that perfectly balances creamy pumpkin filling with a crunchy cinnamon streusel topping. It’s an easy-to-make recipe that will quickly become a family favorite, ideal for gatherings or quiet evenings at home. Whether you’re celebrating the season or just craving something sweet, this Pumpkin Crisp is sure to bring joy to your table.
- Prep Time: 15 minutes
- Cook Time: 45 minutes
- Total Time: 1 hour
- Yield: Approximately 12 servings 1x
- Category: Dessert
- Method: Baking
- Cuisine: American
Ingredients
- 1 (15 oz) can pumpkin puree
- 1 cup granulated sugar
- 3 large eggs
- 2 teaspoons pumpkin pie spice
- 1/2 teaspoon salt
- 2 teaspoons vanilla extract
- 2/3 cup heavy cream
- 2 cups all-purpose flour
- 1 1/2 cups granulated sugar (for topping)
- 2 teaspoons cinnamon
- 12 tablespoons unsalted butter (melted)
Instructions
- Preheat oven to 375°F and grease a 12-inch cast iron skillet or medium casserole dish.
- In a large bowl, whisk together pumpkin puree, sugar, eggs, pumpkin pie spice, salt, vanilla extract, and heavy cream until smooth. Pour into the prepared dish.
- In another bowl, combine flour, sugar, cinnamon, and salt. Stir in melted butter until crumbly. Sprinkle evenly over the pumpkin filling.
- Bake for 40 to 45 minutes until the filling is set and topping is golden brown. Cover with foil if browning too quickly.
- Allow to cool for about 10 minutes before serving.
Nutrition
- Serving Size: 1 slice (85g)
- Calories: 290
- Sugar: 24g
- Sodium: 180mg
- Fat: 14g
- Saturated Fat: 8g
- Unsaturated Fat: 5g
- Trans Fat: 0g
- Carbohydrates: 39g
- Fiber: 2g
- Protein: 4g
- Cholesterol: 75mg