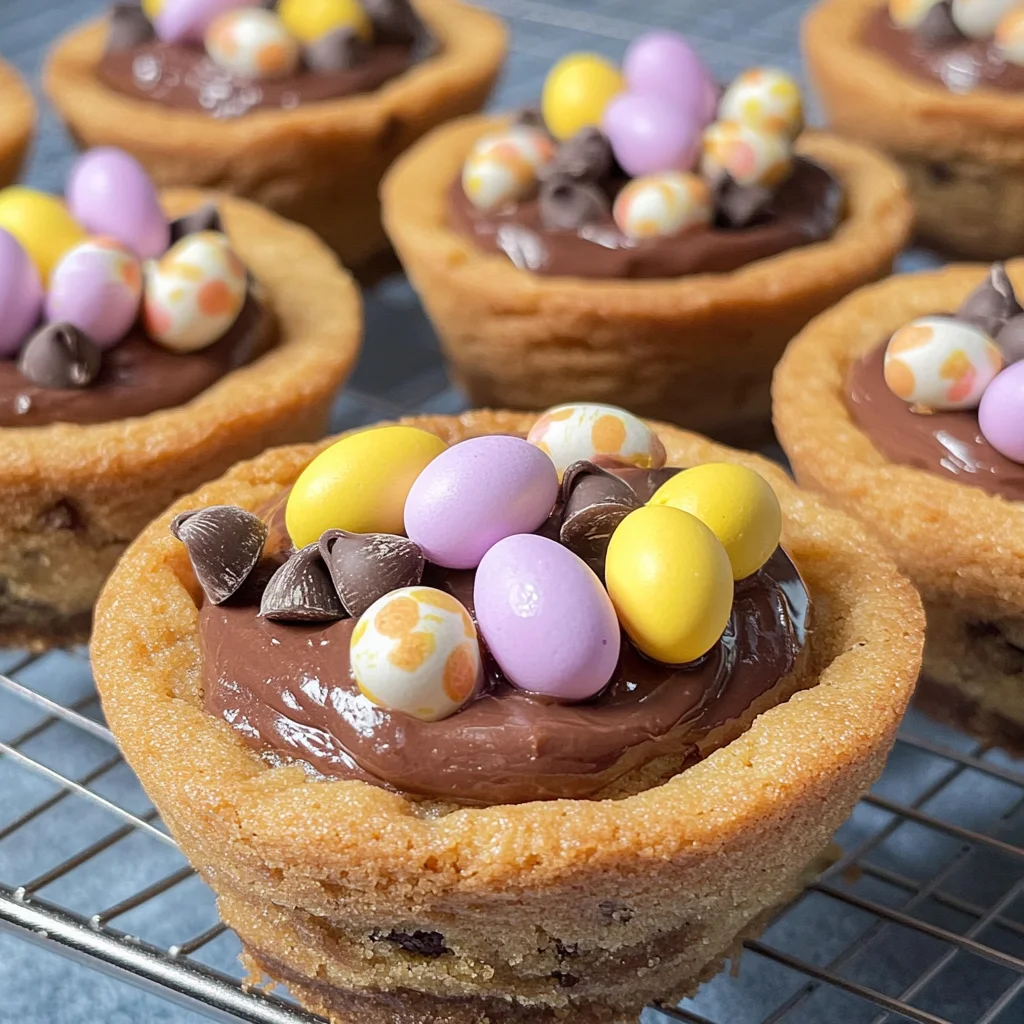
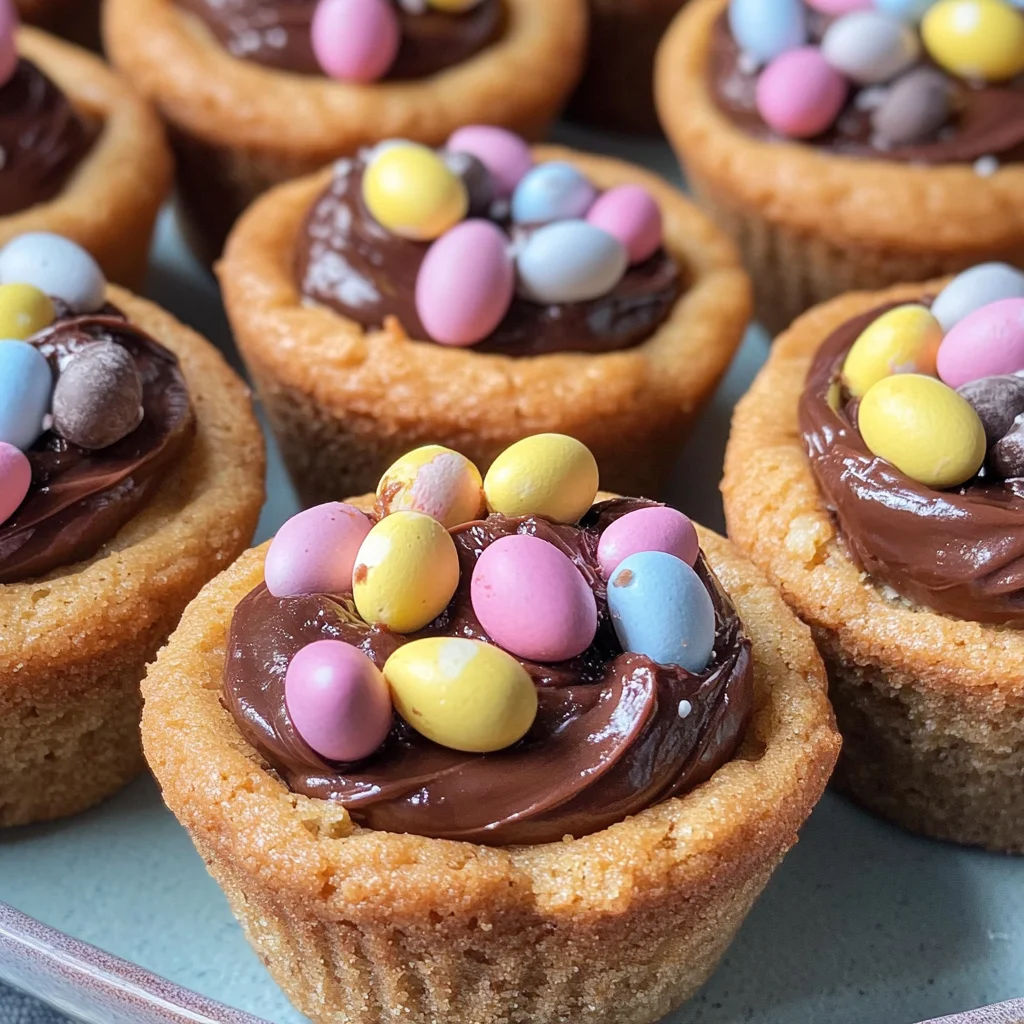
Mini Egg Cookie Cups
There’s something truly heartwarming about baking, isn’t there? The way the aroma of freshly baked goods fills your home, wrapping you in a cozy embrace, is unlike any other experience. Today, I’m beyond excited to share a recipe that has become a cherished favorite in my kitchen: Mini Egg Cookie Cups. These delightful treats are not just cookies; they are little cups of happiness filled with a smooth chocolate ganache and topped with colorful mini eggs, making them perfect for celebrations like Easter or just whenever you’re craving something sweet. I promise you, each bite delivers a symphony of flavors that dance across your taste buds, pulling you into a moment of pure bliss.
When I think back on my own childhood, it was always the simple joys of baking with family that sparked my love for the kitchen. I can still hear the laughter and see the flour dust settling as we created sweet memories together. That’s why sharing these Mini Egg Cookie Cups feels so special to me; they’re a bridge between those fond memories and present-day indulgence. Whether you’re making them for loved ones or simply treating yourself, these cookie cups bring warmth and joy—there’s a magic in gathering around something homemade, isn’t there? So let’s dive into this culinary adventure together—I can’t wait to guide you through every step!
Mini Egg Cookie Cups: A Delightful Springtime Treat
Imagine sinking your teeth into a soft cookie cup with gooey chocolate ganache spilling out and that delightful crunch of mini eggs on top; it’s pure joy! These Mini Egg Cookie Cups are not only visually stunning but also incredibly easy to make. They combine the comforting flavors of buttery cookies with rich chocolate and crunchy candy shells that make them utterly irresistible. Plus, who doesn’t love a dessert that looks as good as it tastes? Get ready to impress your friends and family with this delightful treat!
Ingredients:
Let’s embark on this culinary journey together! Each ingredient plays an essential role in crafting these delectable Mini Egg Cookie Cups, so let’s take a moment to appreciate what each one brings to the table.
- 100 g Butter (softened, unsalted). The foundation of our cookie cups starts here! Softened unsalted butter is crucial for achieving that light and airy texture we all adore in cookies. When creamed properly with sugar, it creates tiny air pockets that help the cookies rise beautifully while keeping them tender. Make sure your butter is at room temperature—too cold won’t cream effectively, while melted butter will lead to overly flat cookies.
- 100 g Caster sugar. This fine sugar dissolves easily when combined with butter, helping us achieve that lovely fluffy texture we aim for in our cookie cups. It gives sweetness while also contributing to the golden color during baking due to caramelization. If you can’t find caster sugar, you can pulse regular granulated sugar in a blender briefly—it works like magic!
- 65 g Light brown soft sugar. This ingredient adds depth and richness thanks to its molasses content. Not only does it infuse our cookie cups with an extra layer of flavor—think caramel notes—but it also retains moisture, ensuring our cookie cups stay soft longer. The combination of both sugars creates a harmonious balance between sweetness and complexity.
- 1 large Egg. Eggs are more than just binding agents; they add moisture and richness as well! The proteins in eggs help structure our cookie cups while also contributing to their chewiness. For this recipe, make sure your egg is at room temperature too; it integrates more smoothly into the batter.
- 1 tsp Vanilla extract. Ahh, vanilla—the secret ingredient that elevates the flavor profile! It adds warmth and depth that rounds out the sweetness beautifully. I highly recommend using pure vanilla extract if possible; its aromatic qualities are truly wonderful compared to artificial flavoring.
- 215 g Plain flour. Flour is where the magic happens! It provides structure to our cookie cups without being overly dense. For best results, spoon your flour into your measuring cup rather than scooping directly from the bag—this helps prevent packing too much flour which could lead to dry cookies.
- 1/2 tsp Baking powder & 1/4 tsp Bicarbonate of soda. Both these leavening agents work together to ensure our cookie cups rise perfectly without becoming too cake-like or fluffy—it’s all about balance! Baking powder gives an initial lift while bicarbonate soda reacts with acids in brown sugar for added lift during baking.
- 1/4 tsp Salt. Don’t skip on salt! It enhances all the sweet flavors in our cookie dough by providing contrast and depth—a little pinch makes all the difference.
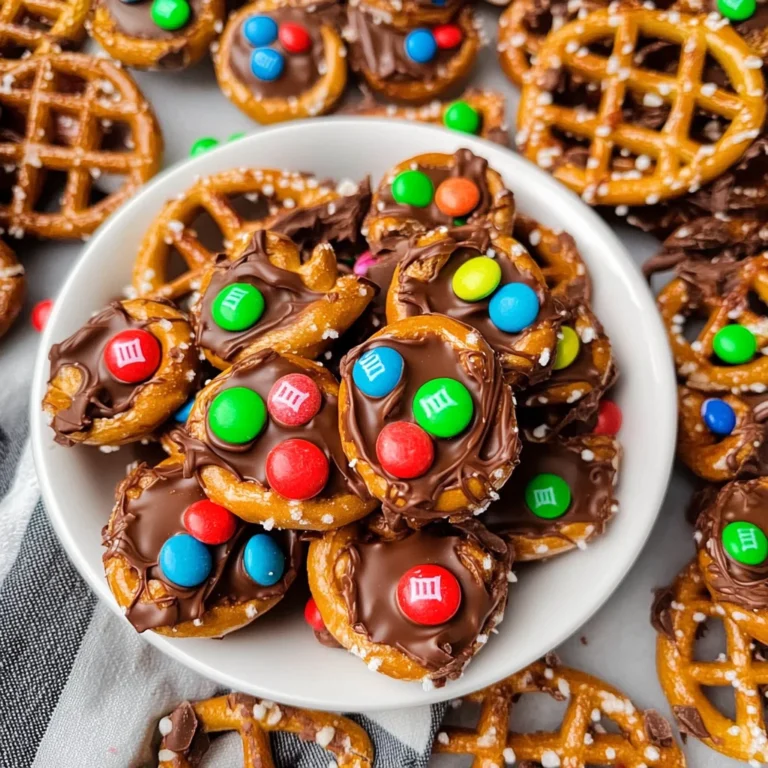
- 100 g Milk chocolate chips & 100 g Mini Eggs (crushed): These gems add bursts of chocolatey goodness throughout your cookie cups! Chocolate chips provide melty pockets of bliss while crushed mini eggs give crunch and color that reminds us why we adore these treats so much during festive occasions.
- 125 ml Double cream & 125 g Dark chocolate & 15 g Butter: Together they create an incredibly glossy ganache filling for our cookie cups that’s both luxurious and indulgent! Double cream provides richness (you could substitute heavy cream if needed), while dark chocolate ensures depth—creating that utterly intoxicating flavor contrast against sweet milk chocolate chips in the cookie base.
- 36 Mini Eggs: These colorful candies aren’t just for decoration; they add an element of fun! Nestled atop each filled cup, they bring whimsy to every bite and remind us how delightful springtime treats can be.
Equipment You’ll Need:
Before we dive into creating these delicious treats, let’s talk about some essential equipment you’ll want by your side! Having the right tools makes everything smoother—you’ll see how much easier it is when everything is set up perfectly before you start mixing away!
- 12-hole cupcake tin: This will be our mold for shaping those adorable cookie cups! A non-stick tin ensures easy removal after baking—you wouldn’t want your beautiful creations stuck inside!
- Stand mixer (or mixing bowl with hand mixer): While you can absolutely mix by hand if you prefer some arm workout (I do admire that spirit!), having a stand mixer saves time and energy when creaming butter and sugars until fluffy—a critical step for achieving our desired texture!
- Baking paper strips: These will line the cupcake tin helping prevent sticking further—trust me; it’s worth taking this extra step!
- Measuring scales or cups: Accurate measurements are non-negotiable in baking; they ensure consistent results every time!
With everything prepped and ready to go, let’s start creating these heavenly Mini Egg Cookie Cups!
Step 1: Preheat Your Oven
First things first—let’s get our oven preheating at 180°C Fan/Gas Mark 6 while we prepare our dough! Preheating creates an environment where your cookies will bake evenly from start to finish—this ensures they rise beautifully without becoming too dense or overbaked on the outside before cooking through inside.
Take out your trusty 12-hole cupcake tin now—it should be greased lightly using either butter or baking spread—and then line each hole with strips of baking paper for easy removal later on once they’re baked golden brown beauties ready for filling! This preparation sets you up for success right from the beginning—a small but crucial step towards achieving perfect results every time!
Step 2: Creaming Butter & Sugars
Now comes one of my favorite parts—the creaming process! In an ideal world (and if you have one), grab your stand mixer fitted with a paddle attachment because we’re going to beat together softened unsalted butter along with both caster sugar and light brown soft sugar until they’re lightened in color and fluffy—this typically takes about 3–5 minutes at medium speed.
Why is this step so important? This process introduces air into your mixture which helps create those tender textures we desire in baked goods like these delightful mini egg cookie cups; not only does it add fluffiness but contributes significantly toward achieving overall volume as well! You want creamy perfection here—so trust me on this part; don’t rush through—take time enjoying watching those ingredients transform before your eyes!
Step 3: Incorporating Eggs & Vanilla
Next up is adding one large egg along with one teaspoon vanilla extract into our creamed mixture—oh boy does this smell divine already! Mix gently until fully combined—the egg binds everything together nicely while enriching flavors even further thanks to deliciously fragrant vanilla notes permeating throughout.
Here’s where patience pays off again; be careful not over-mix after adding eggs since doing so might result tough cookies instead delicate ones—we’re looking for just enough blending until incorporated without losing all those lovely air bubbles created earlier during creaming phase!
Step 4: Combining Dry Ingredients
Now it’s time we introduce dry ingredients into this glorious mix—the plain flour alongside half teaspoon baking powder plus quarter teaspoon bicarbonate soda plus quarter teaspoon salt—all whisked together beforehand will ensure even distribution throughout dough upon incorporation later on!
Add slowly into wet mixture whilst mixing gently until just combined—you know you’ve reached glorious dough status when no dry bits remain visible anymore but still smooth—not overly worked though—that would risk developing gluten strands leading onto chewy rather than melt-in-your-mouth morsels we’d prefer here today…remember gentle folds are key here folks!
With each addition carefully watched over like precious jewels; soon enough our tantalizing dough is ready bringing forth anticipation bubbling up within hearts yearning toward tasting those sweet treasures waiting ahead…
Stay tuned as we continue crafting these mouthwatering delights together—it’s only going get better from here onwards!
Mini Egg Cookie Cups: A Sweet Symphony of Flavors
Step 5: The Joy of Incorporating Crunch and Creaminess
Now comes the moment where we infuse our delightful dough with a touch of magic—the crushed Mini Eggs and chocolate chips. These little gems not only provide a burst of flavor but also a delightful texture contrast that will make each bite an experience to savor. Gently fold in 100 grams of milk chocolate chips along with 100 grams of crushed Mini Eggs into your dough, using a spatula or wooden spoon. This is crucial because you want to maintain the airiness you’ve created in the previous steps while ensuring the chocolate and candy are evenly distributed throughout the mixture. Take a moment to appreciate how the colors blend—golden cookie dough speckled with glimmers of chocolate and pastel Mini Egg pieces waiting to transform into something extraordinary. Trust me, this is where your senses start to truly awaken, and it’s almost impossible not to sneak a taste!
As you mix, be careful not to overwork the dough; just enough until you see those vibrant bits scattered throughout. Overmixing can lead to tough cookie cups, which we absolutely don’t want! Remember, we’re aiming for soft, tender bites with a hint of crunch from those Mini Eggs. So be gentle here; it’s all about balance and allowing those lovely flavors to mingle without losing that light texture. Once everything is beautifully combined, set it aside for just a moment—your patience will be rewarded.
Step 6: Shaping Your Dough Masterpieces
Ready to bring those cookie cups to life? It’s time for shaping! Divide your luscious dough into 12 equal portions—each should weigh about 62 grams if you’re using a kitchen scale (which I highly recommend for precision). This step is essential; uniform portions ensure even baking and that every cup has that perfect size and shape. Once you’ve portioned out the dough, roll each piece into a smooth ball between your palms; this technique helps create surface tension which will give your cookie cups structure as they bake.
Now comes the fun part! Place each ball into the holes of your greased cupcake tin. You’ll want to gently press down with your fingers first before grabbing your shaping tool—a small rolling pin or even the base of a bottle works wonders here—to mold the dough into those lovely cup shapes. Aim for an even thickness along the bottom and sides, creating a slight dip in the center where we’ll later add our indulgent ganache filling. Don’t rush this step; take your time to shape them properly because this is where they begin to take on their final form. And trust me on this: an even cup means even baking, leading to consistently delicious results.
Step 7: The Art of Baking
Now that our beautiful cookie cups are shaped and ready for action, let’s slide them into that preheated oven at 180°C Fan/Gas Mark 6. Bake them for about 12 minutes, but keep an eye on them as every oven can act differently! You want them golden brown around the edges while still slightly soft in the middle—that’s when you know they’re just right! As they bake, you’ll notice how they start to puff up slightly in the center; this is completely normal and part of their charm.
Here’s where it gets exciting: as soon as they come out of the oven, use your trusty tool again—gently press down in the middle of each cup right away while they’re still warm. This step serves two purposes—it creates that signature well for our ganache filling and prevents any unwanted doming that could occur during cooling. Think of it as giving them a gentle hug! After shaping them back down, allow these beauties to cool in their tin until they’re cool enough to handle; then transfer them onto a cooling rack so they can fully cool off without getting soggy at the bottom. Just imagine that sweet aroma wafting through your kitchen as they cool—it’s pure bliss!
Step 8: Crafting Irresistible Ganache
With our cookie cups now perfectly baked and cooled, it’s time for what I consider one of life’s greatest pleasures: crafting ganache! In a microwave-safe bowl, combine 125 grams of dark chocolate, 15 grams of butter, and 125 ml of double cream—this trio is nothing short of liquid gold when combined correctly! Begin by microwaving it for 20 seconds on high (I use my trusty 900W microwave), then give it a good stir. Keep microwaving in 10-second bursts, stirring between each one until you achieve that silky smooth consistency that makes ganache utterly intoxicating.
This process matters greatly because properly heating chocolate ensures it melts evenly without seizing up—a common mistake if overheated or stirred too roughly! As you watch it transform from solid chunks into glossy liquid heaven, you’ll feel like a true chocolatier—it’s such an empowering moment! Once it reaches that ideal texture—smooth and shiny—set it aside for a few moments so it can cool slightly and thicken just enough for easy piping or spooning into those lovely cookie cups later on.
Conclusion:
What a delightful journey we’ve been on together creating these Mini Egg Cookie Cups! From crafting the buttery dough to filling each cup with velvety ganache and adorning it with colorful mini eggs, this recipe is not just about baking; it’s about creating memories and sharing joy through food. Each bite offers a symphony of flavors; the buttery sweetness of the cookie perfectly complements the rich chocolate ganache while those crunchy mini eggs add delightful pops of texture. Truly extraordinary!
These cookie cups are an absolute must-try not only because of their divine taste but also due to the sheer joy that comes with making them. Whether you’re celebrating Easter with loved ones or simply indulging in a cozy afternoon treat at home, these cookie cups shine brightly on any occasion. Just imagine pulling them out of the oven—the golden edges gently cradling that luscious ganache—your friends and family will be rushing over for a taste!
For serving suggestions, consider pairing one of these delightful cookie cups with a scoop of vanilla ice cream for an indulgent dessert experience that feels like pure magic. Alternatively, savor one alongside your afternoon coffee or tea; there’s something so comforting about enjoying a sweet treat while sipping on your favorite brew. For those special gatherings or festive occasions, try arranging them beautifully on a platter alongside some fresh berries for an inviting touch that everyone will adore.
Feeling adventurous? This recipe is wonderfully adaptable! You could swap out the milk chocolate chips for dark chocolate chunks or even throw in some chopped nuts for added crunch—each variation brings its own unique flair while still delivering that beloved essence of our cherished Mini Egg Cookie Cups. I encourage you to experiment and make this recipe your own; it’s all about bringing joy into your kitchen! So roll up those sleeves and dive into this scrumptious adventure—your taste buds await!
Mini Egg Cookie Cups

Mini Egg Cookie Cups are a delightful treat that combines the joy of baking with the indulgence of chocolate. These charming little cookie cups are filled with a rich chocolate ganache and topped with colorful mini eggs, making them not only visually appealing but also incredibly delicious. The soft cookie base, enriched with creamy milk chocolate chips and crunchy mini egg pieces, creates a perfect balance of textures and flavors. Whether you’re celebrating a special occasion or simply treating yourself, these mini egg cookie cups are sure to bring happiness to your table. Enjoy them fresh out of the oven or store them for later—either way, they’ll be a hit!
- Prep Time: 20 minutes
- Cook Time: 12 minutes
- Total Time: 32 minutes
- Yield: Makes 12 servings 1x
- Category: Dessert
- Method: Baking
- Cuisine: General
Ingredients
- 100 g softened unsalted butter
- 100 g caster sugar
- 65 g light brown sugar
- 1 large egg
- 1 tsp vanilla extract
- 215 g plain flour
- 1/2 tsp baking powder
- 1/4 tsp bicarbonate of soda
- 1/4 tsp salt
- 100 g milk chocolate chips
- 100 g crushed mini eggs (plus extra for topping)
- 125 ml double cream
- 125 g dark chocolate
- 15 g butter
Instructions
- Preheat your oven to 180°C Fan/Gas Mark 6. Grease a 12-hole cupcake tin and line with baking paper strips.
- In a stand mixer, cream together the softened butter, caster sugar, and light brown sugar until light and fluffy.
- Add in the egg and vanilla extract; mix until combined.
- Gradually add the flour, baking powder, bicarbonate of soda, and salt; mix until just combined.
- Fold in the milk chocolate chips and crushed mini eggs gently.
- Divide dough into 12 equal portions and press into the cupcake tin to form cups.
- Bake for about 12 minutes or until golden around the edges.
- Allow to cool slightly before pressing down centers to create wells for ganache.
- For ganache: Heat dark chocolate, cream, and butter in microwave until melted and smooth; fill each cookie cup once cooled.
Nutrition
- Serving Size: 1 cookie cup (62g)
- Calories: 305 kcal
- Sugar: 19g
- Sodium: 114mg
- Fat: 18g
- Saturated Fat: 10g
- Unsaturated Fat: 7g
- Trans Fat: <0.01g
- Carbohydrates: 30g
- Fiber: <1g
- Protein: 3g
- Cholesterol: 40mg