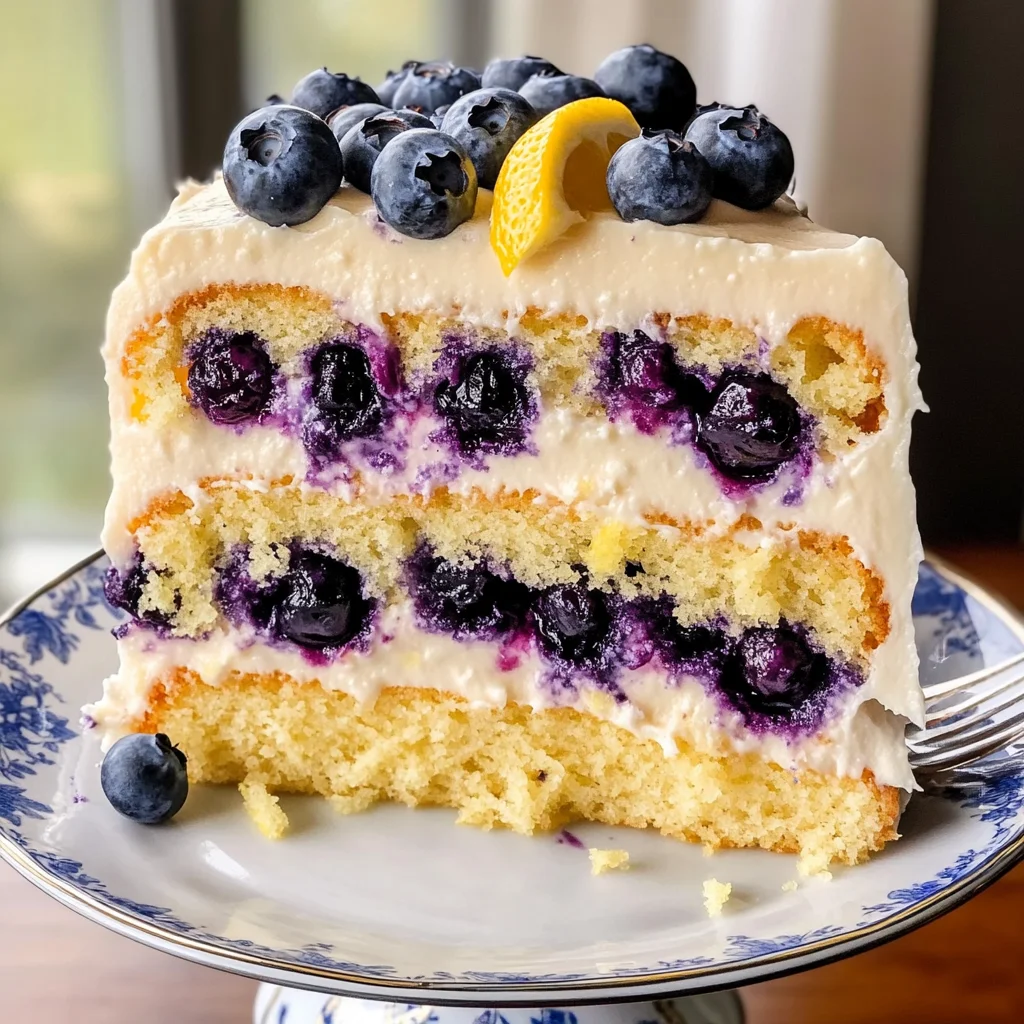
Lemon Blueberry Layer Cake
There’s something undeniably enchanting about the combination of lemon and blueberries, don’t you think? This Lemon Blueberry Layer Cake isn’t just a dessert; it’s a celebration in a slice. With each forkful, you’ll experience a delightful burst of bright citrus flavor mingling with the sweetness of juicy blueberries. Picture this: the cake is light and moist, layered with a creamy cream cheese frosting that has just the right amount of tang to perfectly balance the sweetness. It’s like sunshine on a plate, evoking memories of warm summer days and cherished gatherings with friends and family. I promise you, making this cake is not just baking; it’s an experience that transforms your kitchen into a haven of joy and warmth.
Every time I make this cake, I feel a deep connection to the seasons—especially spring when lemons are at their peak freshness and blueberries are bursting with flavor. The vibrant colors alone are enough to brighten any table setting or mood. It’s perfect for special occasions, like birthdays, bridal showers, or even just an afternoon tea with your closest pals. Trust me when I say that sharing this cake brings smiles and compliments in equal measure. So let’s roll up our sleeves and embark on this delicious journey together!
Lemon Blueberry Layer Cake: A Slice of Sunshine
This vibrant Lemon Blueberry Layer Cake is soft, moist, and full of bright citrus flavor and juicy blueberries. With tender layers infused with lemon zest and juice, it’s topped with a creamy, tangy cream cheese frosting—a refreshing dessert perfect for any celebration.

Ingredients:
As we set out on this delightful culinary adventure, it’s essential to gather all our ingredients. Each one plays a vital role in creating the symphony of flavors that is our Lemon Blueberry Layer Cake.
- ½ cup (113g) unsalted butter, softened. Butter is the cornerstone of our cake’s texture. When properly softened at room temperature, it allows for easy creaming with sugar, which incorporates air into our batter—resulting in that light and fluffy cake we all crave. Look for high-quality unsalted butter; it lets you control the saltiness in your recipe while imparting a rich flavor without overwhelming other ingredients.
- 1¼ cups (250g) granulated sugar. This ingredient not only sweetens our cake but also contributes to its structure by helping to aerate the butter during creaming. The fine granules dissolve quickly while mixing, ensuring an even sweetness throughout every layer. Don’t skimp on quality here; opt for pure cane sugar for the best results.
- ½ cup (100g) packed light brown sugar. Brown sugar brings depth to our cake with its subtle caramel notes due to the molasses content. It adds moisture as well—so we achieve that wonderfully tender crumb—while also enhancing color and flavor complexity in contrast to white sugar’s straightforward sweetness.
- 6 tablespoons (90ml) vegetable oil (or canola/avocado oil). Oil helps keep our cake moist longer than butter alone would as it remains liquid during baking while contributing richness without affecting structure significantly. Choose light oils like canola or avocado for their neutral flavors; they won’t interfere with our lemony brightness.
- 4 large eggs (room temperature). Eggs are the building blocks of our batter—they provide structure through proteins while adding moisture richness from their yolks! Room temperature eggs blend more easily into the mixture than cold ones do; they help create an emulsion that leads to a beautifully cohesive batter.
- 1 tablespoon pure vanilla extract. This ingredient might seem simple yet adds an aromatic warmth that enhances all other flavors present in the cake without overpowering them! Always go for pure vanilla extract over imitation; its nuanced profile elevates baked goods immensely!
- 3 cups (375g) all-purpose flour (spooned & leveled). Flour gives structure to our cake but can lead to dryness if overmeasured! Spoon your flour into measuring cups instead of scooping directly from the bag—a crucial step that prevents packing down too much flour into your measurements!
- 2 teaspoons baking powder & ½ teaspoon baking soda: These two leavening agents work together to create lift in your cake—baking powder activates immediately upon mixing while baking soda requires acidity (like lemon juice) for activation later during baking! They are absolutely paramount for achieving that dreamy height.
- ½ teaspoon salt. Salt enhances sweetness and balances flavors beautifully! It’s often overlooked but trust me—it’s non-negotiable if you want full-bodied taste!
- ¾ cup (180ml) buttermilk (room temperature). Buttermilk adds tenderness because of its acidic nature reacting with baking soda—it creates that delightful tang we associate with classic cakes! If you don’t have any on hand, you can easily substitute by mixing regular milk with a tablespoon of vinegar or lemon juice!
- 2 tablespoons lemon zest & ½ cup (120ml) lemon juice (about 3–4 lemons). The real stars here—the vibrant zest packs a concentrated punch of citrus aroma while fresh juice provides brightness! Use fresh lemons for both; bottled juices cannot replicate their fragrant oils found in zest nor offer true flavor depth!
- 1½ cups (210g) fresh blueberries & 1 tablespoon all-purpose flour (for tossing blueberries): Fresh berries add bursts of juicy sweetness throughout each bite—but tossing them lightly in flour prevents sinking during baking! This little tip makes sure those beautiful berries stay suspended within layers so they’re evenly distributed!
- 8 oz (226g) full-fat brick cream cheese, softened & ½ cup (113g) unsalted butter, softened: Together they create that luscious frosting we dream about—smooth yet sturdy enough to hold shape when spread between layers! Ensure both ingredients are at room temperature before mixing so they blend seamlessly without lumps!
- 3½ cups (420g) confectioners’ sugar: This sweet dust ensures our frosting achieves that silky smooth consistency we adore! Sifting it helps eliminate clumps ensuring incorporation happens easily without graininess!
- 1 tablespoon (15ml) heavy cream, 1 teaspoon pure vanilla extract, & pinch of salt: A splash of cream helps adjust consistency while also adding richness; vanilla offers aromatic allure contrasting beautifully against tangy cream cheese while salt balances out sweetness perfectly!
Equipment You’ll Need:
Having the right tools at your disposal makes this experience more enjoyable—trust me on this! While these items aren’t ingredients themselves, they are essential partners in crafting something wonderful together.
- Mixing bowls – A good set allows you flexibility when preparing different components simultaneously—from wet mixtures to dry ingredients—you’ll appreciate having more than one bowl handy as things get busy!
- Electric mixer or whisk – An electric mixer dramatically reduces labor time when creaming butter/sugar together yielding better aeration than manual whisking would provide alone; however—a sturdy hand whisk serves perfectly well if you enjoy getting some arm workout too!
- Measuring cups/spoons – Accurate measurements are key here! Invest in quality sets so you can ensure precision as this will lead directly towards success every time!
- Rubber spatula – Ideal for scraping down sides during mixing processes ensuring no lumps remain behind—plus perfect for folding delicate mixtures like whipped cream gently into frostings later on!
- Cake pans – Make sure they’re round pans specifically designed for baking cakes—lightly greased prior helps release those delicious layers effortlessly once baked!
- Cooling rack – Critical for cooling baked goods evenly without trapping moisture which could lead to sogginess instead of that lovely texture we seek!
Preparing the Lemon Blueberry Layer Cake
Step 1: Creaming the Butter and Sugars
Let’s start this beautiful process by creaming together our softened butter, granulated sugar, and brown sugar. This step is crucial—by combining these ingredients, we’re not just blending them; we’re incorporating air into the mix, which will create a light and fluffy cake. Imagine the sound of your mixer whirring as it transforms those solid lumps into a smooth, creamy mixture that’s almost liquid gold. You’ll want to blend them together until the mixture is pale and fluffy—this should take about 3-5 minutes on medium speed. Don’t rush this step; it’s during this magical moment that we set the stage for all that delightful texture to follow.
As you’re mixing, take a moment to enjoy the sweet aroma wafting from your bowl; it’s the promise of deliciousness yet to come! If you notice any bits of butter sticking to the sides, don’t hesitate to scrape them down with your rubber spatula—ensuring everything is well incorporated will only enhance your final product. Once you’ve reached that ideal fluffy consistency, it’s time to add in our room-temperature eggs one at a time. This gradual incorporation helps maintain that airy structure you’ve worked so hard to achieve while also enriching flavor with each addition.
Step 2: Incorporating the Wet Ingredients
Now that we have our butter and sugar mixture singing in harmony, let’s gently fold in our wet ingredients—this includes the buttermilk, lemon juice, and vanilla extract. With every pour of lemon juice, you’ll notice how it brightens up not just the flavor but also the overall texture of our batter. This process of adding liquid ingredients is critical; it helps balance out dry components while ensuring an even distribution throughout.
Be mindful as you mix—use a spatula here rather than your electric mixer to prevent overmixing! We want everything combined but still maintaining some airiness. When mixed properly, your batter should be smooth with just a hint of tang from lemon juice peeking through! Remember: overmixing can lead to tough cakes so keep it gentle and loving here.
Step 3: Combining Dry Ingredients
Next up is our dry ingredients—flour, baking powder, baking soda, and salt. Before introducing these dry elements into our batter, let’s whisk them together in a separate bowl first. This ensures even distribution of leaveners throughout which leads to consistently lifted layers! Gradually add this dry mixture into your wet ingredients in two or three additions while folding gently with your spatula between each addition—this method prevents clumping and guarantees that every bite will be perfectly balanced!
As you’re mixing in those floury clouds, watch closely for any pockets of dry flour hiding away; they need love too! Once everything is combined perfectly—you’ll notice a thickened batter forming—don’t be alarmed if it feels heavier than traditional batters; this richness comes from that wonderful buttermilk coupled with luscious oil we’ve incorporated earlier.
Step 4: Tossing in Blueberries
Finally! The moment we’ve been waiting for: let’s add those gorgeous fresh blueberries! Prior to doing so, toss them lightly in a tablespoon of flour—a small yet impactful trick that helps prevent sinking during baking! Gently fold these beautiful little gems into your batter using careful motions because we don’t want them bursting prematurely—imagine their juice swirling through layers making each bite burst forth with flavor!
The anticipation builds as each berry gets enveloped within its luscious lemony surroundings—the vibrant colors speckling throughout like little jewels awaiting their time under heat’s embrace! Once evenly distributed without too much mixing—we’re ready for the next step towards creating this masterpiece together.
This journey doesn’t just end here; stay tuned as we dive deeper into baking instructions and frosting tips that’ll elevate your cake experience even further!
Step 5: Whisking Together the Dry Ingredients
Now that our butter and sugars are beautifully creamed together, it’s time to focus on the dry ingredients. In a separate bowl, combine the all-purpose flour, baking powder, baking soda, and salt. I can’t stress enough how important it is to properly measure your flour—spooning it into your measuring cup and leveling it off with a knife ensures you don’t end up with a dense cake. The right balance of dry ingredients is absolutely paramount because they provide structure to our Lemon Blueberry Layer Cake while allowing it to rise perfectly in the oven.
Gently whisk these ingredients together until they’re thoroughly combined; this air incorporation is going to make your cake light as a cloud! After that, we’ll set this bowl aside for just a moment. Don’t rush this step! Allowing the leavening agents (the baking powder and baking soda) to mingle with the flour now will ensure an even rise later—trust me, this little detail will reward you with a cake that’s not only fluffy but also beautifully airy.
Step 6: The Buttermilk and Citrus Fusion
Next, let’s bring in those wet ingredients! In another bowl, combine the buttermilk, lemon juice, and lemon zest. This mixture is where the magic begins—creating a vibrant citrusy flavor that’s going to shine through each slice of your cake. Buttermilk is an excellent addition here because its acidity reacts with the baking soda to help our cake achieve its fluffy texture while also imparting moisture—yes, moisture is key for that melt-in-your-mouth experience we’re aiming for!
Whisk these together until well combined; you’ll notice how fragrant your kitchen has become already! The tartness of the lemon juice paired with the creamy buttermilk creates such an intoxicating aroma, stirring up excitement for what’s to come. This mixture not only adds flavor but also balances out the sweetness from our sugars. It’s that perfect symphony of flavors that makes this cake so special.
Step 7: Marrying Wet and Dry Ingredients
Now comes one of my favorite parts: bringing everything together! Gradually add your dry ingredient mixture into the bowl with your creamed butter and sugars. This step should be approached with gentle care; you want to fold them together rather than vigorously whisking them—overmixing can lead to a tough cake texture which we definitely want to avoid. Use a spatula or wooden spoon and mix until you see no more streaks of flour; it’s okay if there are still some lumps as they will bake out beautifully.
Once incorporated, pour in that luscious buttermilk-citrus mixture we whisked earlier. This step is crucial because it introduces moisture into our batter while ensuring that all those incredible flavors meld seamlessly together. Continue folding gently until just combined; resist the urge to overdo it! You’re looking for a batter that’s thick yet pourable—a visual cue would be when it flows slowly off your spatula like molten gold.
Step 8: Folding in Juicy Blueberries
Ah, now let’s add in those gorgeous fresh blueberries! First, toss them in about one tablespoon of all-purpose flour before gently incorporating them into your batter. This small step ensures they don’t sink to the bottom during baking; we want those delightful bursts of berry goodness evenly distributed throughout each layer of our cake! Fold them in delicately—think of cradling each blueberry rather than smashing them—and you’ll start seeing speckles of blue throughout your golden batter.
You may find yourself tempted to eat some raw blueberries at this stage—they’re so sweet and delicious—but I promise you, waiting just a bit longer will be worth every moment as they burst open during baking, releasing their juices into your cake and creating pockets of flavor that are nothing short of extraordinary. At this point, preheat your oven if you haven’t done so already; we want it nice and hot at 350°F (175°C) so that our cakes can rise beautifully when they hit that heat!
Conclusion:
What a wonderful journey we’ve had together through this delightful recipe for Lemon Blueberry Layer Cake! I hope my excitement has been contagious because each step of making this cake brings such joy and satisfaction. From the zesty bursts of lemon juice mingling with sweet blueberries to the creamy frosting enveloping each layer, this dessert truly stands out as something extraordinary that’s perfect for any celebration—or even just a quiet afternoon treat at home.
This recipe is more than just delicious; it’s an experience waiting to happen! The joy of baking this cake transcends mere taste; it’s about gathering loved ones around the table and sharing moments filled with laughter and love. Whether it’s a birthday bash or simply a sunny day spent with friends over coffee, there’s something profoundly satisfying about pulling this gorgeous cake from your oven and watching everyone’s eyes light up with anticipation. The aroma wafting through your kitchen alone is enough to make hearts flutter!
Imagine savoring one slice alongside your favorite cup of tea or coffee; perhaps even pairing it with fresh whipped coconut cream for an indulgent twist! For an afternoon pick-me-up or dessert after dinner, there’s nothing quite like enjoying this refreshing treat as you reminisce about cherished memories or create new ones together. And if you’re feeling particularly adventurous, consider serving it with homemade lemon curd on the side—an utterly intoxicating combination that elevates every bite.
Feeling adventurous? This recipe is wonderfully adaptable! You could swap out blueberries for raspberries or strawberries when they are in season—each variation brings its own unique charm while still celebrating that bright lemony essence we all adore. Or perhaps add a hint more zest or even fold in some chopped nuts for texture—there are endless possibilities waiting just beyond your mixing bowl! So put on your apron and dive into making this Lemon Blueberry Layer Cake; I can’t wait for you to share your creations with me and hear how they turned out!
Lemon Blueberry Layer Cake
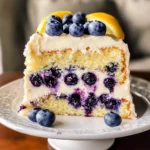
Lemon Blueberry Layer Cake is a delightful treat that encapsulates the essence of spring with its vibrant flavors and stunning presentation. This moist cake features soft layers infused with zesty lemon and sweet blueberries, all generously topped with a creamy cream cheese frosting. Whether it’s for a birthday celebration, a bridal shower, or just an afternoon tea with friends, this cake brings joy and smiles to every gathering. Picture each slice revealing luscious blueberry pockets amidst bright, citrusy layers—it’s not just dessert; it’s an experience. Enjoy baking this cake and share it with loved ones for an unforgettable sweet moment.
- Prep Time: 30 minutes
- Cook Time: 30 minutes
- Total Time: 1 hour
- Yield: Approximately 12 servings 1x
- Category: Dessert
- Method: Baking
- Cuisine: American
Ingredients
- ½ cup (113g) unsalted butter, softened
- 1¼ cups (250g) granulated sugar
- ½ cup (100g) packed light brown sugar
- 6 tablespoons (90ml) vegetable oil
- 4 large eggs (room temperature)
- 1 tablespoon pure vanilla extract
- 3 cups (375g) all-purpose flour (spooned & leveled)
- 2 teaspoons baking powder
- ½ teaspoon baking soda
- ½ teaspoon salt
- ¾ cup (180ml) buttermilk (room temperature)
- 2 tablespoons lemon zest
- ½ cup (120ml) lemon juice
- 1½ cups (210g) fresh blueberries
- 1 tablespoon all-purpose flour (for tossing blueberries)
- 8 oz (226g) full-fat brick cream cheese, softened
- ½ cup (113g) unsalted butter, softened
- 3½ cups (420g) confectioners’ sugar
- 1 tablespoon (15ml) heavy cream
- 1 teaspoon pure vanilla extract
- pinch of salt
Instructions
- Preheat your oven to 350°F (175°C). Grease and flour two 9-inch round cake pans.
- In a large mixing bowl, cream together softened butter, granulated sugar, and brown sugar until light and fluffy. Add eggs one at a time, mixing well after each addition.
- In another bowl, whisk together buttermilk, lemon juice, and lemon zest.
- In a separate bowl, combine flour, baking powder, baking soda, and salt.
- Gradually add the dry mixture to the wet mixture alternately with the buttermilk mixture until just combined.
- Gently fold in floured blueberries until evenly distributed.
- Pour the batter into prepared pans and bake for 25–30 minutes or until a toothpick inserted in the center comes out clean.
- Allow cakes to cool in pans for 10 minutes before transferring to wire racks to cool completely.
- For frosting, beat cream cheese and softened butter together until smooth; gradually add confectioners' sugar followed by heavy cream and vanilla extract.
- Assemble by layering cakes with frosting in between and on top.
Nutrition
- Serving Size: 1 slice (85g)
- Calories: 320
- Sugar: 35g
- Sodium: 180mg
- Fat: 15g
- Saturated Fat: 7g
- Unsaturated Fat: 7g
- Trans Fat: 0g
- Carbohydrates: 43g
- Fiber: 1g
- Protein: 3g
- Cholesterol: 55mg