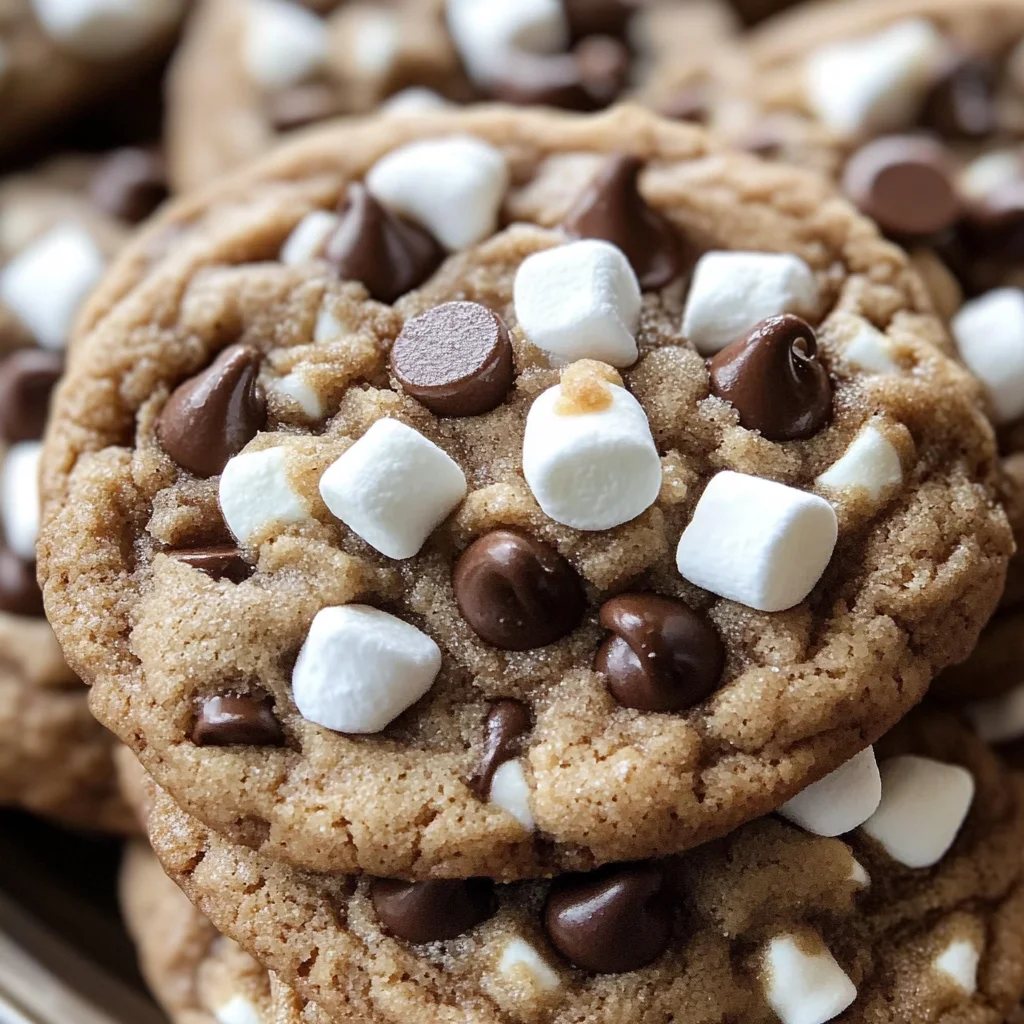
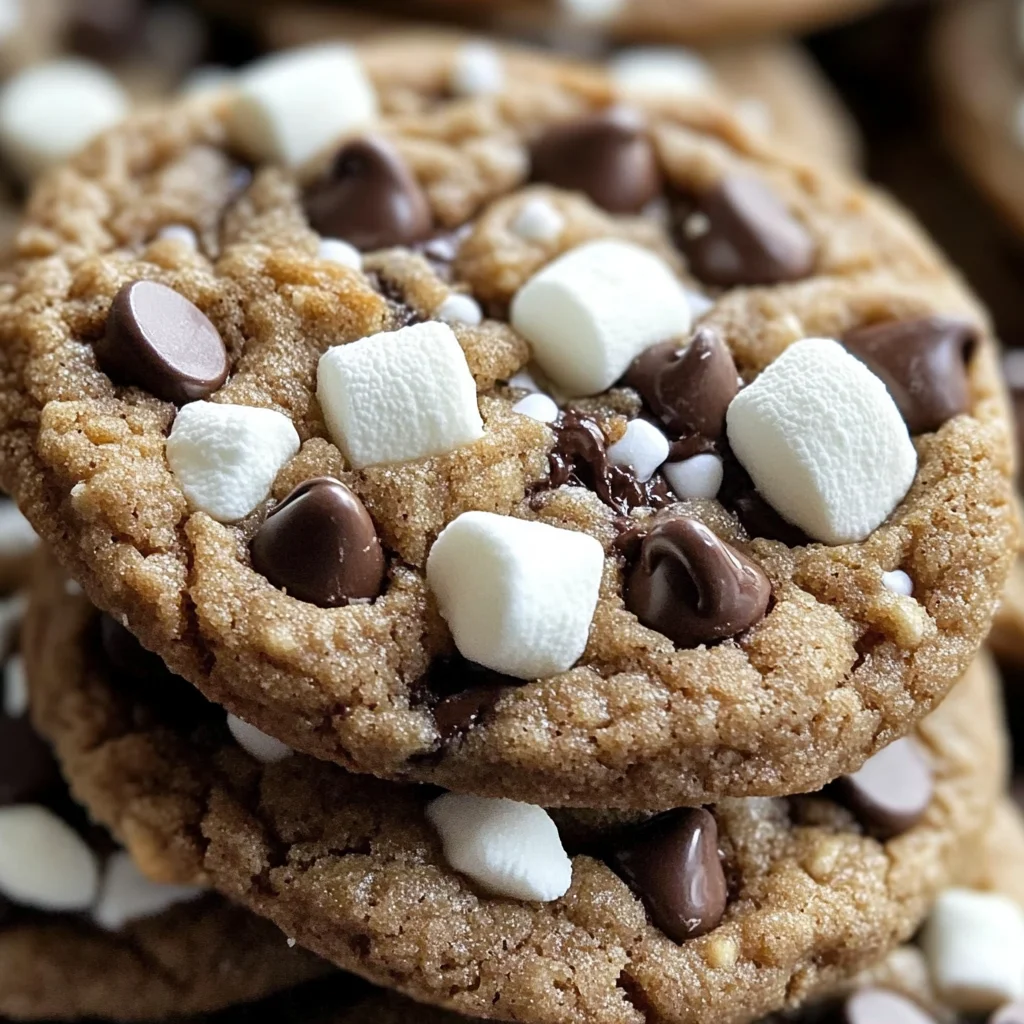
Hot Cocoa Cookies
There’s something undeniably magical about the aroma of freshly baked cookies wafting through the house, isn’t there? It’s like a warm hug after a long day, an invitation to pause and savor the moment. Today, I’m thrilled to share with you one of my absolute favorite recipes: Hot Cocoa Cookies. These delightful treats are not just cookies; they’re a cozy embrace of flavors that remind me of snowy days spent curled up with a good book and a steaming cup of cocoa in hand. Imagine biting into a soft, chewy cookie that bursts with rich chocolate flavor and is studded with bits of gooey marshmallows—each bite is an experience that transports you back to your happiest memories. I promise you, these cookies will become a cherished part of your baking repertoire.
What makes these Hot Cocoa Cookies so special is more than just their taste; it’s the way they evoke feelings of comfort and nostalgia. This recipe has its roots in those childhood days when hot cocoa was the ultimate winter treat. With every batch, you’re not just creating cookies; you’re crafting moments to share with loved ones, whether around the dinner table or during festive gatherings. Plus, they’re incredibly easy to make! Trust me on this—once you’ve tasted these cookies fresh out of the oven, you’ll be dreaming up reasons to bake them again and again.
Hot Cocoa Cookies: A Sweet Escape into Comfort
Let’s dive into making these scrumptious Hot Cocoa Cookies together! They’re perfect for sharing or simply indulging yourself—because who doesn’t deserve a little sweetness in their life? The combination of rich chocolate chips and fluffy vegan marshmallow bits creates an utterly intoxicating flavor profile that’s sure to please everyone around you. So roll up your sleeves, pour yourself a cup of cocoa (or coffee if that’s your vibe), and let’s embark on this delightful culinary journey!
Ingredients:
As we prepare to create these delightful cookies, let’s take a moment to appreciate each ingredient we’ll be using. Each one plays a crucial role in achieving that perfect balance of flavor and texture.
- 1 1/4 cups (284g) unsalted butter, softened to room temperature. The quality and temperature of the butter are absolutely paramount in cookie baking. Softened butter allows for proper creaming with the sugars, leading to light and fluffy cookies that don’t turn out dense or flat. If you can find European-style butter with higher fat content, it will give your cookies an even richer flavor profile. Make sure to take it out ahead of time so it reaches that ideal consistency—too cold won’t cream properly, while melted butter will lead to excessive spreading.
- 1 cup (200g) granulated sugar. This sweet component not only adds delightful sweetness but also contributes to our cookie’s texture through caramelization during baking. It helps create those lovely edges that contrast beautifully with the chewy interior. When purchasing sugar, opt for fine granulated sugar for best results as it dissolves quickly when creamed with butter.
- 2/3 cup (140g) brown sugar packed firmly. Brown sugar brings moisture into our cookies thanks to its molasses content, resulting in a wonderfully chewy texture. It also deepens the flavor profile beautifully—think of it as nature’s way of adding complexity without any extra effort from us! When selecting brown sugar, go for light brown for subtlety or dark brown if you desire deeper notes.
- 2 large eggs at room temperature. Eggs are vital here; they act as binding agents and provide richness while helping our cookies rise beautifully into soft pillows of chocolatey goodness. Room temperature eggs blend more evenly into our mixture than chilled ones do—this step enhances the overall consistency of your dough!
- 1 teaspoon pure vanilla extract. Vanilla is like the secret handshake among ingredients—it elevates flavors without stealing the spotlight! Using pure vanilla extract rather than imitation will offer more depth and warmth in every bite.
- 3 1/4 cups (405g) all-purpose flour. Flour is what gives our cookies structure; it’s essential for achieving that perfect balance between chewy and crumbly textures we crave in baked goods. Make sure to scoop your flour gently using a spoon before leveling it off in your measuring cup—flour that’s packed too tightly can lead to dry cookies!
- 4 packets (approximately 1/2 cup) instant hot cocoa mix. This is where our Hot Cocoa Cookies get their signature flavor! The hot cocoa mix adds sweetness along with rich chocolate undertones that are simply irresistible. Keep an eye out for brands without added preservatives or artificial flavors for the best results.
- 1 1/4 teaspoons baking soda. Baking soda is our leavening agent—it helps our cookies rise by producing carbon dioxide bubbles during baking which gives them their lovely height! Ensure your baking soda is fresh by checking expiration dates; otherwise, it’ll lose its effectiveness.
- 1 teaspoon baking powder. Similar to baking soda but works slightly differently by creating additional lift in our dough due to its acid-base reaction when combined with wet ingredients! This step ensures we achieve those perfectly puffy cookie shapes we desire.
- 1 cup (170g) semi-sweet chocolate chips. Chocolate chips add bursts of melty goodness throughout each cookie bite—a non-negotiable element if we’re aiming for decadent Hot Cocoa Cookies! Choose high-quality chocolate chips here; they should melt beautifully without losing their shape entirely.
- 1 cup Jet-Puffed vegan marshmallows Bits. These little gems add that nostalgic marshmallow fluffiness reminiscent of classic hot cocoa topped with marshmallows! Being vegan means they cater widely while still offering that delightful chewiness when baked into our cookies.
Equipment You’ll Need:
As we gear up for this delicious adventure in cookie-making, having the right tools at hand transforms what could be a struggle into sheer joy! Each piece plays an important role in ensuring everything goes smoothly—from mixing dough to serving those heavenly treats straight from oven to table.
- Mixing bowls: You’ll want at least two large mixing bowls: one for combining wet ingredients and another for dry ones before they meet each other! Using separate bowls helps ensure even distribution and prevents clumping—this technique sets you up for success right from the start!
- Electric mixer or whisk: An electric mixer makes quick work of beating butter and sugars until light and fluffy—a crucial step for achieving airy textures—but if you prefer some arm workout while whisking manually? Go ahead! Just know it may take longer without electric assistance.
- Baking sheet: A sturdy baking sheet lined with parchment paper ensures even cooking while keeping clean-up simple afterward! Opt for heavy-duty sheets that won’t warp under heat—the last thing we want is unevenly cooked cookies due to flimsy equipment!
- Cookie scoop: A medium-sized cookie scoop helps ensure consistent sizing across all your cookie dough balls—this means even baking time throughout which leads directly toward uniformity in taste & texture once outta-the-oven!
Now that we’ve gathered all our ingredients and tools together like old friends reuniting after years apart let’s dive headfirst into preparing these incredible Hot Cocoa Cookies!
Preparing the Hot Cocoa Cookies
Step 1: Preheat Your Oven
Let’s kick things off by preheating your oven to 350°F (175°C). This step might seem insignificant initially but trust me—it’s absolutely crucial! Preheating ensures that once those glorious dough balls hit the oven, they start cooking immediately at optimal temperatures leading us straight toward perfectly baked goods every single time! While that’s happening, line two baking sheets with parchment paper—this not only prevents sticking but also facilitates easier removal once baked!
Step 2: Creaming Butter and Sugars
In a large mixing bowl (the bigger, the better!), combine your softened unsalted butter along with granulated sugar and brown sugar using either an electric mixer on medium speed or by hand if you’re feeling strong today! Creaming should take about 2–3 minutes until it becomes light-colored & fluffy—which indicates air has been incorporated successfully—a key factor contributing towards tender texture later on when baked! As you mix away… breathe deeply—the aroma wafting from those sugary buttery clouds is nothing short of divine!
Step 3: Add Eggs & Vanilla
Next up? Crack those room-temperature eggs straight into our creamed mixture along with that fragrant teaspoonful of vanilla extract you lovingly prepared earlier—mix again until fully incorporated! At this stage feel free channel any inner baker vibes because seeing everything blend together seamlessly gives such satisfaction doesn’t it? Eggs bring moisture & binding properties while enhancing flavors further… think liquid gold enriching every aspect within this delightful concoction!
Step 4: Combine Dry Ingredients
Now let’s move on over toward our medium bowl where we’ll whisk together flour, instant hot cocoa mix alongside both baking soda & powder until fully combined—they need each other like peanut butter needs jelly after all! This important step ensures no clumps exist whatsoever before integrating them later on—it promotes uniformity ensuring every bite will burst forth evenly balanced taste sensations rather than pockets unexpectedly lacking certain flavors… nobody wants sad half-cooked bites lurking amidst joyfully delicious ones!
And there we have it—the first few steps towards crafting these dreamy Hot Cocoa Cookies filled with warmth & love ready just waiting patiently alongside us as we continue down this path together… stay tuned because soon enough we’ll be folding everything together inviting all those chocolaty morsels & marshmallow bits into this heavenly dough mixture destined for greatness ahead!
Step 5: The Magical Mixing Moment
Now that your butter and sugars are whipped into a delightful cloud of sweetness, it’s time to introduce the eggs and vanilla into our mixture. Crack those eggs into the bowl one at a time—this allows each egg to fully incorporate before adding the next, ensuring a cohesive batter that will yield cookies with the perfect texture. Once you’ve added both eggs, pour in that luscious teaspoon of vanilla extract. This is where the magic happens! The aroma enveloping your kitchen will be utterly intoxicating, setting the stage for an extraordinary treat. Beat everything together until the mixture is smooth and slightly lighter in color; this is crucial as it means you’re incorporating air, which is vital for that light, tender bite we all crave in a cookie.
Why do we take this step so seriously? Eggs act as binders and leaveners in baking—they help hold everything together while creating a soft lift. If you rush through this part or skip the mixing, you might end up with dense cookies instead of the wonderfully fluffy treats we’re aiming for. So trust me on this: take your time to get that perfect blend! You should see small bubbles forming on the surface when it’s ready—this is your cue to move forward.
Step 6: Dry Ingredients – The Foundation of Flavor
With our wet ingredients ready to shine, let’s turn our attention to the dry ingredients—where all those magical flavors come together! In a separate medium bowl, whisk together the flour, hot cocoa mix, baking soda, and baking powder. This step isn’t just about combining; it’s about creating a harmonious blend of flavors and ensuring that your leavening agents are evenly distributed throughout. As you whisk, you’ll notice a rich chocolatey scent wafting up; that’s from the hot cocoa mix releasing its deep flavor profile.
Gradually incorporate this dry mixture into your wet ingredients using a spatula or wooden spoon. I recommend doing this in batches—start with about one-third of your dry mix to prevent flour clouds from erupting everywhere! Folding gently as you go is key; overmixing can lead to tough cookies due to gluten development. You want just enough mixing until no streaks remain visible—this means you’ve achieved perfect incorporation without compromising texture. When it’s done right, you’ll have a thick dough that clings beautifully together—a truly satisfying sight!
Step 7: The Sweetest Additions
Now comes one of my favorite parts: folding in the chocolate chips and Jet-Puffed vegan marshmallow bits! This is where we’re elevating our Hot Cocoa Cookies from delicious to truly extraordinary! Using a spatula, gently fold in these gems until they’re evenly distributed throughout your dough—this allows pockets of melted chocolate and gooey marshmallows to form when baked. Just imagine biting into one of these cookies and encountering that molten chocolate alongside sweet marshmallow fluff—it’s like capturing winter warmth in every bite!
Be sure not to overmix at this point; you want those delightful morsels nestled delicately within rather than crushed into oblivion. If you find yourself feeling impatient (and who wouldn’t?), take a moment to appreciate how each addition contributes something special—chocolate brings richness while marshmallows offer fluffy sweetness reminiscent of cozy evenings around a warm fire. At this stage, your dough should feel thick but pliable—a true testament to what’s about to become glorious cookies!
Step 8: Scooping Perfection
With your cookie dough now brimming with promise, it’s time for one last prep before baking joy ensues! Grab your trusty cookie scoop (or two tablespoons if that’s what you’ve got handy) and start portioning out generous dollops of dough onto your lined baking sheet. Each ball should be roughly two tablespoons in size—I like using my scoop because it ensures uniformity among my cookies, leading to even baking all around.
Place them about two inches apart on the sheet; remember these little beauties will spread as they bake! You might start feeling an anticipation bubbling up inside—you’re so close! Bake them in an oven preheated at 350 degrees Fahrenheit for about nine minutes. Here’s where patience really matters; don’t rush or peek too soon! The cookies will look slightly puffy and set around the edges but still soft in the middle when they’re done—this is exactly what we want! It’s crucial not to overbake at this stage because they’ll continue cooking on the pan after being removed from heat.
Baking Your Perfect Hot Cocoa Cookies
The aroma wafting through your kitchen at this point will be nothing short of heavenly—the comforting smell of hot cocoa mingling with sweet vanilla is an experience worth savoring!
Step 9: The Final Touches
As soon as those cookies emerge from the oven with their golden edges and soft centers, grab some extra chocolate chips and Jet-Puffed vegan marshmallow bits. While they’re still warm (and slightly melty), gently press these toppings onto each cookie’s surface—this simple step transforms them from wonderful treats into showstoppers! Not only does it enhance their visual appeal, but it also ensures every bite has an extra burst of flavor.
Allow them to cool on the baking sheet for five minutes before transferring them to wire racks for complete cooling—it’s tempting to dive right in but trust me when I say letting them rest helps maintain their perfect chewy texture while allowing those marshmallows’ gooeyness to settle just right. Once cooled completely, these Hot Cocoa Cookies are ready for indulgence—a delightful treat that’ll make any gathering feel like home!
So there you have it—the recipe for Hot Cocoa Cookies bursting with warmth and joy! Enjoy every moment spent making these cherished delights and share them generously with friends and family; after all, great food deserves great company!
Storage and Enjoyment Tips for Your Hot Cocoa Cookies
Now that your Hot Cocoa Cookies have baked to perfection, it’s time to revel in the deliciousness you’ve created! Each bite is like a warm hug on a chilly day, and I can’t wait for you to share these with friends and family—or keep them all to yourself! But if you’re like me, you’ll want to make these delightful cookies last as long as possible. Let’s talk about how to store these treasures so they stay soft, chewy, and utterly inviting.
Storing Leftover Hot Cocoa Cookies
To maintain the freshness of your Hot Cocoa Cookies, you’ll want to store them in an airtight container. A simple plastic or glass container will do wonders for preserving their delightful texture—just make sure it’s sealed tightly. Keep them at room temperature away from direct sunlight, and they’ll stay fresh for about 5 to 7 days. If you’re worried about them drying out, here’s my favorite little trick: toss a slice of bread into the container with the cookies! This non-negotiable tip helps keep moisture levels just right, ensuring your cookies remain soft and chewy. After a few days, the marshmallows will still be gooey, and the chocolate chips will melt ever so slightly in your mouth—a truly extraordinary experience that only gets better with time. If you decide to enjoy a cookie after a few days, simply pop it in the microwave for about 10-15 seconds; this warms them up beautifully and brings back that just-baked goodness.
Freezing Hot Cocoa Cookies for Later
If you find yourself with an abundance of these scrumptious cookies—or if you simply want to prepare ahead—freezing is an excellent option! To freeze your Hot Cocoa Cookies properly, allow them to cool completely before transferring them into a freezer-safe bag or container. Make sure to layer parchment paper between the cookies if you’re stacking them; this prevents sticking and ensures they maintain their lovely shape. These cookies can be kept frozen for up to three months without losing their charm. When you’re ready to indulge again, simply let them thaw at room temperature or warm them in the oven at 350 degrees for about 5-7 minutes. The convenience of having a stash of these delectable delights ready at your fingertips is absolutely irresistible. You can whip out these cookies anytime you crave something sweet or when unexpected guests stop by!
Hot Cocoa Cookies
Indulge in the warmth and nostalgia of Hot Cocoa Cookies, a delightful treat that brings together soft, chewy cookie goodness with rich chocolate flavors. Each bite is studded with melty chocolate chips and fluffy vegan marshmallows, making them the perfect companion for cozy nights or festive gatherings. These cookies not only evoke comforting memories but are also an easy recipe to whip up in your kitchen. Whether you’re sharing them with friends or enjoying them solo, these Hot Cocoa Cookies are sure to become a cherished favorite.
- Prep Time: 15 minutes
- Cook Time: 9 minutes
- Total Time: 24 minutes
- Yield: Approximately 24 cookies 1x
- Category: Dessert
- Method: Baking
- Cuisine: American
Ingredients
- 1 1/4 cups unsalted butter, softened
- 1 cup granulated sugar
- 2/3 cup brown sugar, packed
- 2 large eggs
- 1 teaspoon pure vanilla extract
- 3 1/4 cups all-purpose flour
- 4 packets instant hot cocoa mix
- 1 1/4 teaspoons baking soda
- 1 teaspoon baking powder
- 1 cup semi-sweet chocolate chips
- 1 cup vegan marshmallow bits
Instructions
- Preheat your oven to 350°F (175°C) and line two baking sheets with parchment paper.
- In a mixing bowl, cream together softened butter, granulated sugar, and brown sugar until light and fluffy.
- Add the eggs one by one, mixing well after each addition, then stir in the vanilla extract.
- In a separate bowl, whisk together flour, hot cocoa mix, baking soda, and baking powder.
- Gradually incorporate the dry ingredients into the wet mixture until just combined.
- Fold in the chocolate chips and vegan marshmallow bits until evenly distributed.
- Use a cookie scoop to drop dough onto prepared baking sheets about two inches apart.
- Bake for 9 minutes or until edges are golden and centers are soft; let cool on the sheet for 5 minutes before transferring to wire racks.
Nutrition
- Serving Size: 1 cookie (approximately 30g)
- Calories: 150
- Sugar: 10g
- Sodium: 70mg
- Fat: 7g
- Saturated Fat: 4g
- Unsaturated Fat: 3g
- Trans Fat: 0g
- Carbohydrates: 19g
- Fiber: <1g
- Protein: 2g
- Cholesterol: 25mg