Homemade Samoas Cookies
The Heartwarming Experience of Homemade Samoas Cookies
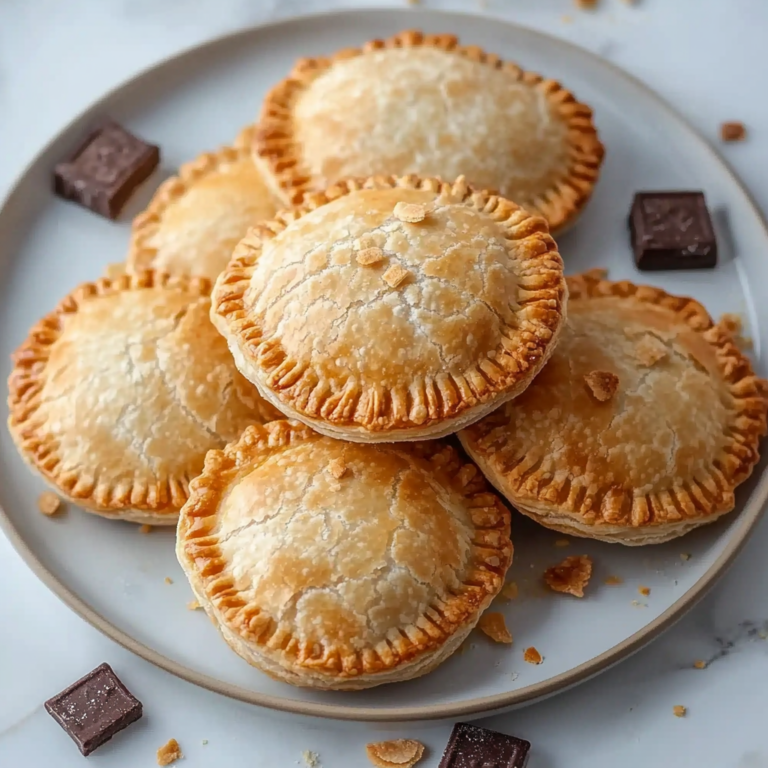
There’s something utterly magical about the scent of freshly baked cookies wafting through the house, isn’t there? It’s a warm embrace that pulls you into a comforting bubble of nostalgia and joy. Now, let me tell you about a recipe that truly encapsulates this feeling: Homemade Samoas Cookies. Picture this—sweet caramel, toasted coconut, and rich dark chocolate all coming together in perfect harmony. This isn’t just any dessert; it’s an experience that bridges cherished childhood memories with the thrill of creating something special in your own kitchen. As I prepare these delightful treats, I can’t help but think of the smiles they’ll bring to my friends and family. They’re more than cookies; they’re little bites of joy that invite everyone to gather around the table.
What makes these cookies so special is not just their deliciousness but also the craftsmanship behind them. You see, every step in making Homemade Samoas Cookies is infused with care—whether it’s creaming the butter to perfection or patiently melting the caramels until they’re silky smooth. And trust me when I say that every bit of effort is worth it once you take that first bite; it’s like a symphony of flavors dancing on your palate. Perfect for any occasion or simply as a sweet treat at home, these cookies are bound to become a beloved staple in your kitchen just like they are in mine.
Homemade Samoas Cookies: A Sweet Journey Awaits
Now that we’re all warmed up and excited about making these delectable treats, let’s dive into the recipe! I promise you, once you make these Homemade Samoas Cookies, you’ll never want to go back to store-bought again. They are absolutely packed with love and flavor, and I can’t wait for you to share them with your loved ones!
Ingredients:
As we embark on this culinary journey together, let’s gather our ingredients! Each one plays a vital role in creating those irresistibly delightful Homemade Samoas Cookies.
- 1 cup (2 sticks or 226g) unsalted butter, softened to room temperature. This is crucial for creaming properly and creating that light, airy texture we’re aiming for in our Homemade Samoas Cookies. If your butter is too cold, it won’t cream effectively; if it’s melted, your cookies will spread too much. The quality of butter matters here—European-style butter with higher fat content will give you even richer results.
- 1/2 cup sugar. This humble ingredient does more than just add sweetness; it helps create a beautiful texture by contributing to the creaming process alongside the butter. When sugar is beaten with butter until fluffy, tiny air pockets form which will expand during baking, giving us those tender yet slightly crisp edges we adore.
- 2 cups all-purpose flour. Flour provides structure and stability to our cookies while allowing them to hold their shape without becoming too dense or crumbly. Make sure to measure it correctly—spooning it into your measuring cup and leveling off with a knife ensures you’re not adding too much weight which could lead to dry cookies.
- 1/4 teaspoon baking powder. This leavening agent plays an essential role in ensuring our cookies rise just enough to achieve that perfect balance between chewy and crisp. It activates when combined with moisture and heat during baking, helping our treats puff up beautifully.
- 1/2 teaspoon salt. Don’t skip this one! Salt is like magic—it enhances flavors and balances sweetness while adding depth to our cookie dough. It elevates each bite from ordinary to extraordinary—a non-negotiable addition!
- 2 Tablespoons milk. Milk introduces moisture into our dough, helping everything come together smoothly while also contributing richness. It gives us a tender crumb which we crave in every bite of these delightful cookies.
- 1/2 teaspoon vanilla extract. Ah, vanilla—the essence that brings warmth and complexity! It adds aromatic notes that harmonize beautifully with our other flavors while making every bite feel like a cozy hug.
- 3 cups shredded sweetened coconut. This is where the magic really happens! Coconut lends its tropical flair and chewy texture that define what makes these cookies so special—its sweetness pairs perfectly with caramel’s richness!
- 15 ounces store-bought or homemade soft caramels. Caramel is truly the heart of these cookies! Opt for soft caramels that can melt down easily; this will coat each cookie generously without overpowering them. If you’re feeling adventurous, homemade caramel can elevate this treat even more!
- 3 Tablespoons whole milk (for caramel). Similar to before, this milk helps soften our caramels as we melt them down for drizzling over our cookies—trust me when I say this step takes those flavors over the top!
- 1/4 teaspoon salt (for caramel). Just like before! A touch of salt enhances all those sweet notes in the caramel while cutting through its richness—it’s such an important detail!
- 8 ounces dark chocolate (See Kelly’s Notes). Chocolate wraps each cookie in a luscious layer that’s both indulgent and satisfying—use high-quality dark chocolate for optimal results! The slight bitterness balances out all that sweetness beautifully.
Equipment You’ll Need:
Before diving into mixing and baking away, let’s talk about the essential tools you’ll need on this flavorful adventure! Having the right equipment not only makes cooking smoother but also sparks joy as you create something wonderful.
- **Mixing bowls – A good set of mixing bowls allows you to separate ingredients easily while giving you plenty of room for combining everything later on without messiness! Opt for glass or stainless steel which are durable and easy-to-clean materials ideal for baking adventures.
- **Electric mixer – An electric mixer saves time while creaming butter and sugar effortlessly compared to doing it by hand! The speed ensures proper aeration which means fluffier cookies—trust me when I say it’s worth investing in one if you’re serious about baking!
- **Measuring cups & spoons – Precision matters greatly when baking so having reliable measuring tools ensures consistency across batches! Invest in dry measuring cups specifically designed for flour & sugar along with liquid measures perfect for milk & extracts—a baker’s best friends indeed!
- **Baking sheets – A solid set of baking sheets ensures even heat distribution during baking which contributes significantly toward achieving perfectly golden-brown bottoms on your cookies without burning them!
With everything gathered and ready at hand—you’re well-equipped for success as we move forward into preparing those scrumptious Homemade Samoas Cookies!
Final Touches: Caramel Bliss & Chocolate Drenching
Step 9: Crafting That Irresistible Caramel Layer
Now comes one of my favorite parts—the caramel! In a small saucepan over low heat (trust me—low heat is non-negotiable here!), combine those soft caramels with three tablespoons of whole milk and a pinch of salt. Stir gently until everything melts together into a silky smooth caramel sauce that feels like liquid gold in your hands. It’s essential not to walk away during this process; caramel can go from perfect to burnt in an instant if left unattended!
Once melted and beautifully glossy (that rich amber color will have you swooning!), remove it from heat and let it cool slightly until it’s manageable but still pourable. You’ll want just enough warmth so it doesn’t harden too quickly when you start spreading it onto those cooled cookie rings—this sticky delight needs some tender handling! Carefully spoon about one tablespoon of caramel onto each cookie ring, spreading it out evenly while allowing some drips down the sides—that’s where all that lusciousness lies!
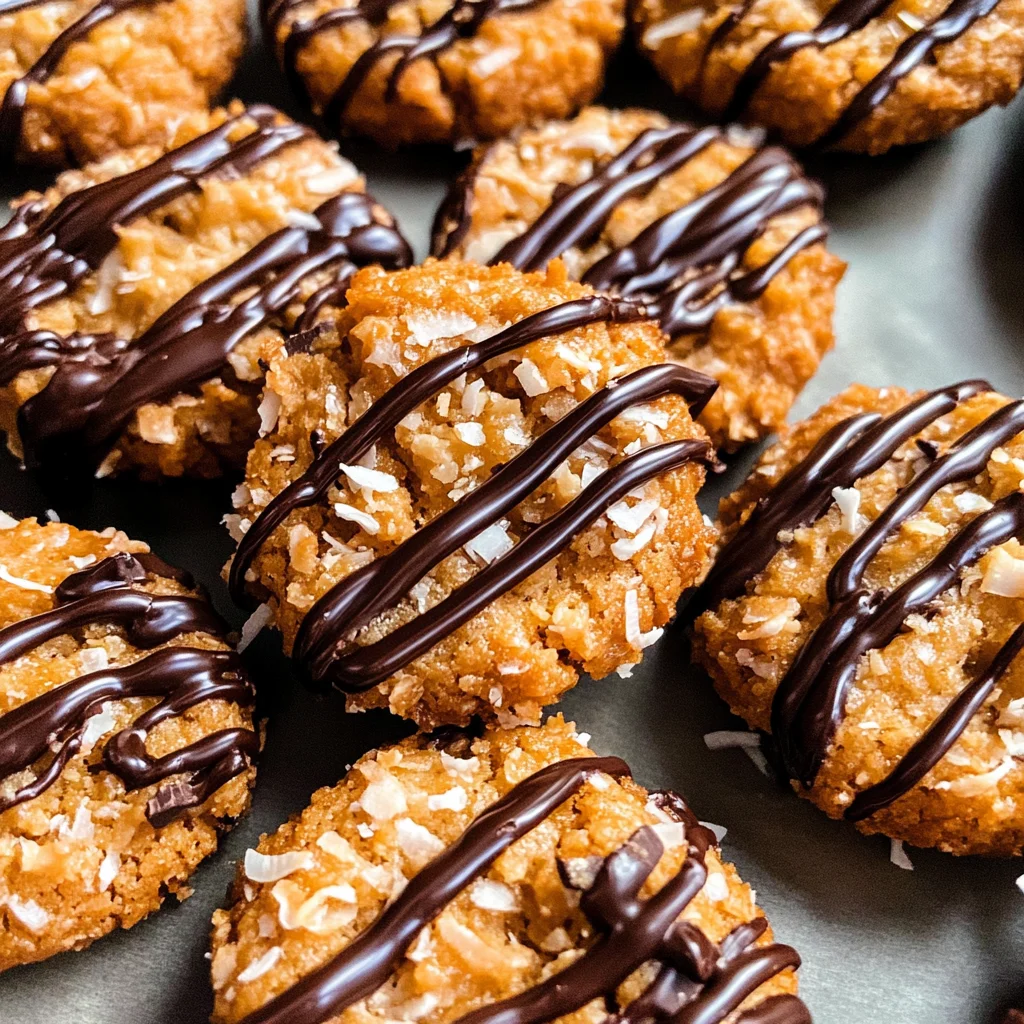
Step 10: Drizzling Dark Chocolate Heaven
As if those cookies couldn’t get any better! Now we’ll finish these Homemade Samoas Cookies off with an indulgent drizzle of dark chocolate—a match made in heaven! Melt eight ounces of dark chocolate using either a microwave-safe bowl or double boiler method over simmering water; if using a microwave, heat it in short bursts (15-20 seconds at a time) stirring until smooth and glossy.
Once melted and velvety smooth (feel free to taste test—pure bliss!), transfer it into a piping bag or simply use a fork for drizzling action. Lift each cookie carefully by its edges and dip or drizzle generously over each one until they’re beautifully coated with chocolate happiness! Allow excess chocolate to drip off before placing them back on parchment paper—this step is crucial because it’s what gives us those gorgeous chocolate stripes we adore so much!
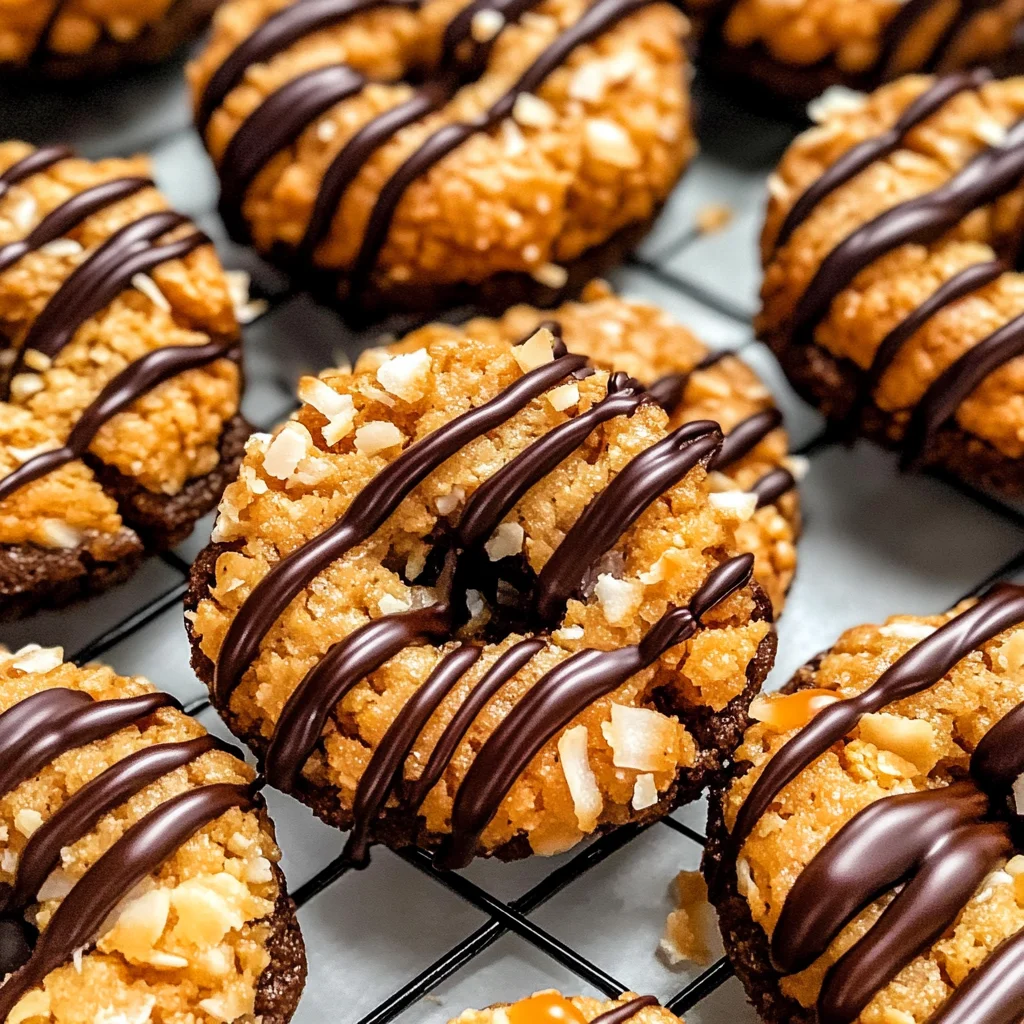
Step 11: Setting Up Your Sweet Treats
After all that love has been poured onto each cookie masterpiece, it’s time for one last bit of patience while they set up. Allow these drizzled gems to sit at room temperature for about 30 minutes until the chocolate hardens completely—you’ll want to resist diving in right away! The transformation happening before your eyes will be extraordinary as they solidify into decadent bites worth savoring.
If you’re feeling particularly eager (who could blame you?), pop them into the fridge for quicker setting—but trust me when I say waiting is part of enjoying this labor of love! Once they’re set, store these beauties in an airtight container at room temperature or if you’re feeling generous (or perhaps wanting some alone time), consider freezing some for later indulgences—you might find yourself hiding them away like precious treasures!
And there you have it—the ultimate recipe for Homemade Samoas Cookies that rivals any store-bought version you could imagine! I promise you will fall head over heels after just one bite—so gather your loved ones around because sharing these treats is all part of their magic! Enjoy every delicious moment!
Storage and Enjoyment Tips for Your Homemade Samoas Cookies
Now that you’ve crafted these delightful Homemade Samoas Cookies, it’s time to revel in the sweet satisfaction of your baking prowess! Trust me, every bite of these cookies is a journey through layers of toasted coconut, rich caramel, and decadent chocolate—an utterly intoxicating experience that I can’t wait for you to enjoy. But what if you find yourself with a few leftovers? Fear not! With the right storage techniques, you can keep the magic alive long after they’ve cooled on the counter.
Storing Leftover Homemade Samoas Cookies
To ensure your Homemade Samoas Cookies remain as delicious as the day they were baked, storing them properly is absolutely paramount. I recommend using an airtight container to seal in all that scrumptious flavor; tin or glass containers work beautifully here. Keep them at room temperature, away from direct sunlight, and they’ll stay fresh for about a week—though I doubt they’ll last that long! If you’re worried about maintaining moisture, try placing a slice of bread in the container. This little trick works wonders by keeping the cookies soft and chewy. After a few days, you might notice that the flavors have melded together beautifully—the caramel becomes even more pronounced, while the coconut takes on an almost nutty quality. For a delightful serving suggestion, simply pop one in the microwave for 10-15 seconds to bring back that gooey decadence before indulging.
Freezing Homemade Samoas Cookies for Later
If you’re anything like me and want to savor these treats at your leisure, freezing is a fantastic option! To freeze your Homemade Samoas Cookies properly, first allow them to cool completely. Then layer them between sheets of parchment paper in an airtight freezer-safe container—this keeps them from sticking together like best friends who never want to part! They can be stored in the freezer for up to three months without losing their signature taste and texture. When you’re ready for a taste of paradise again, simply remove the desired number of cookies and let them thaw at room temperature for about 30 minutes. The convenience factor here is immense; imagine having this delightful treat on hand whenever those cookie cravings strike. It’s like having your very own stash of happiness waiting just for you!
Homemade Samoas Cookies

Enjoy delicious Homemade Samoas Cookies made with toasted coconut and rich chocolate! Try this easy recipe today for cookie bliss.
- Prep Time: 20 minutes
- Cook Time: 15 minutes
- Total Time: 35 minutes
- Yield: Approximately 24 cookies 1x
- Category: Dessert
- Method: Baking
- Cuisine: American
Ingredients
- 1 cup unsalted butter, softened
- 1/2 cup sugar
- 2 cups all-purpose flour
- 1/4 teaspoon baking powder
- 1/2 teaspoon salt
- 2 tablespoons milk
- 1/2 teaspoon vanilla extract
- 3 cups shredded sweetened coconut
- 15 ounces soft caramels
- 3 tablespoons milk (for caramel)
- 1/4 teaspoon salt (for caramel)
- 8 ounces dark chocolate
Instructions
- Preheat your oven to 350°F (175°C) and line baking sheets with parchment paper.
- In a large mixing bowl, cream together the softened butter and sugar until light and fluffy.
- Gradually mix in flour, baking powder, and salt until just combined.
- Fold in milk, vanilla extract, and shredded coconut until evenly distributed.
- Shape dough into balls (about 1 tablespoon each), then create an indentation in the center of each ball to form rings.
- Bake for 12-15 minutes or until golden around the edges. Cool on wire racks.
- Meanwhile, melt caramels with milk and salt over low heat until smooth; drizzle over cooled cookies.
- Melt dark chocolate and drizzle over caramel-coated cookies; allow to set before serving.
Nutrition
- Serving Size: 1 serving
- Calories: 150
- Sugar: 10g
- Sodium: 60mg
- Fat: 8g
- Saturated Fat: 5g
- Unsaturated Fat: 3g
- Trans Fat: 0g
- Carbohydrates: 19g
- Fiber: <1g
- Protein: <1g
- Cholesterol: 30mg