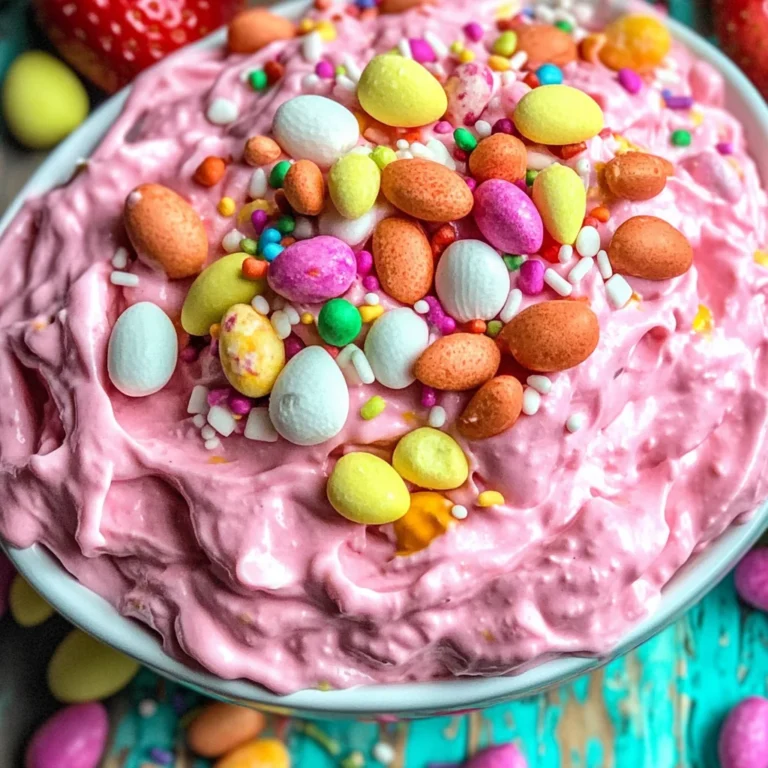
High Protein Frozen Peanut Butter Greek Yogurt Bites
There’s something undeniably magical about the act of creating food that not only nourishes the body but also feeds the soul. When I think about my favorite recipes, they evoke memories of shared laughter, family gatherings, and those cozy evenings when the aroma of something delightful fills the kitchen. Today, I want to share with you a recipe that does just that: High Protein Frozen Peanut Butter Greek Yogurt Bites. This isn’t merely a snack; it’s an experience waiting to unfold. Imagine biting into a creamy, rich bite that blends the nutty warmth of peanut butter with the tangy freshness of Greek yogurt, all sweetened by golden honey and punctuated with melty chocolate chips. These frozen delights are not only delicious but also packed with protein—a perfect treat for any time of day, whether you’re fueling up after a workout or just craving something sweet yet wholesome.
I promise you, once you make these High Protein Frozen Peanut Butter Greek Yogurt Bites, they will quickly become a staple in your freezer. The beauty of this recipe lies not just in its taste but in its simplicity and versatility. It’s one of those rare gems where you can feel good about indulging your sweet tooth while nourishing your body at the same time. Not to mention, they require minimal prep time—just ten minutes! So whether you’re preparing for a busy week ahead or throwing together a last-minute treat for unexpected guests, these bites have got you covered. Let’s embark on this culinary adventure together!
High Protein Frozen Peanut Butter Greek Yogurt Bites: A Wholesome Delight
These little morsels are like tiny treasure chests filled with flavor and nutrition. Each bite encapsulates everything we love about snacks—richness from peanut butter, creaminess from Greek yogurt, and just the right amount of sweetness from honey—all harmonized to create something truly extraordinary. You’ll find them perfect for meal prepping or simply enjoying whenever that sweet craving strikes! Now, let’s gather our ingredients and get started on these delightful treats.
Ingredients:
As we embark on this culinary journey together, let’s take a moment to appreciate each ingredient that plays a vital role in crafting our High Protein Frozen Peanut Butter Greek Yogurt Bites.
- 2 cups Greek yogurt (plain, low-fat or non-fat). This ingredient is absolutely paramount as it forms the creamy base of our bites. Greek yogurt is renowned for its thick texture and high protein content, making it not only satisfying but also an excellent choice for keeping us full longer. When selecting your yogurt, opt for plain varieties to avoid unnecessary sugars; if possible, look for brands that use simple ingredients without additives. The tanginess of Greek yogurt beautifully balances the richness of peanut butter while adding a refreshing note that makes each bite feel indulgent yet light.
- 1/2 cup peanut butter (natural, creamy or crunchy). Ahh, peanut butter—the star of this delightful show! Its creamy (or crunchy) texture gives our bites a smooth richness that is simply irresistible. I recommend using natural peanut butter made from just peanuts and salt; this way, you’ll enjoy all its wholesome goodness without artificial additives. Remember to stir it well before measuring because natural peanut butter tends to separate in the jar! The nutty flavor pairs wonderfully with the yogurt and adds healthy fats that keep these bites satisfying.
- 1/4 cup honey or maple syrup. This liquid gold is what ties everything together with its beautiful sweetness. Honey brings an earthy note that enhances the flavors without overpowering them; however, if you prefer a vegan alternative or are watching sugar intake closely, opt for pure maple syrup instead—it works like magic here! There’s something special about sweetening with nature’s gifts; they add depth and warmth to our bites while ensuring they’re naturally delicious.
- 1 teaspoon vanilla extract. Vanilla is one of those ingredients that elevates any dish it graces! It imparts an aromatic sweetness reminiscent of homemade desserts and adds complexity to our simple mixture. Choose pure vanilla extract whenever possible over imitation; trust me—it makes all the difference in flavor! Just a teaspoon goes a long way in rounding out our bites’ taste profile.
- 1/2 cup chocolate chips (optional). Oh yes—these are optional but highly recommended if you’re anything like me and have a soft spot for chocolate! Adding chocolate chips transforms our frozen treats into something decadent while still keeping them nutritious. Whether you choose dark chocolate chips for their rich flavor or semi-sweet ones for classic appeal is entirely up to you; either way, they bring joy to every bite!
- 1/4 cup chopped nuts or seeds (optional). For added crunch and texture, consider folding some chopped nuts or seeds into your mixture! Almonds, walnuts, chia seeds—whatever suits your fancy—will not only enhance the flavor profile but also contribute even more protein and healthy fats into these delightful bites.
Equipment You’ll Need:
Having the right tools at hand can turn cooking into an enjoyable experience rather than a chore; it streamlines every step and makes things so much smoother! While these may not be ingredients, trust me when I say they are essential partners in crafting your High Protein Frozen Peanut Butter Greek Yogurt Bites.
- Mixing bowl – A sturdy mixing bowl is vital for combining all ingredients efficiently without fear of spills or messes! Opt for one that’s large enough to accommodate all your mixtures comfortably; glass bowls work wonderfully as they allow you to see how everything comes together visually.
- Whisk or spatula – You’ll need either a whisk for blending your mixture smoothly or a spatula if you prefer folding in those delicious chocolate chips delicately! A whisk ensures everything is combined evenly while breaking up any lumps in your yogurt—this step is crucial!
- Mini muffin tin or silicone mold – The choice between these two can greatly influence how easily you’ll remove your frozen bites later on! Silicone molds provide effortless release due to their flexibility—which can be especially handy when dealing with cold treats—but mini muffin tins work wonderfully too if lined properly.
- Cooking spray or paper liners – If you’re using a muffin tin instead of silicone molds (which don’t require liners), having some cooking spray on hand will help prevent sticking—trust me; nothing is more frustrating than losing half of your creation because it won’t come out cleanly!
Now that we have our ingredients prepped and tools ready at hand let’s dive into making these delectable High Protein Frozen Peanut Butter Greek Yogurt Bites!
Step 1: Creating Your Creamy Base
Begin by grabbing your large mixing bowl—you’ll want something spacious enough to allow plenty of room as we combine our ingredients effortlessly! Measure out 2 cups of plain Greek yogurt first; this luscious ingredient serves as both base and hero here—it’s creamy yet tangy flavor will shine through each bite we craft today! Once measured into the bowl, it’s time to introduce ½ cup of natural peanut butter into this dreamy concoction as well—don’t hesitate here; embrace every bit as it melds beautifully with yogurt creating an irresistibly rich blend right off the bat!
Step 2: Sweeten It Up
Next up comes the sweetening stage—add ¼ cup honey (or maple syrup depending on preference). This step transforms what would otherwise be two simple ingredients into something utterly intoxicating! As you pour in liquid gold over yogurt-peanut buttery goodness swirling together gently creates harmony amongst flavors already developing within your bowl—an enticing aroma will begin wafting through your kitchen inviting everyone nearby to join this delicious endeavor!
Step 3: A Touch of Vanilla
Once you’ve combined those main elements seamlessly together it’s time for vanilla extract—don’t skimp on quality here either! Measure out 1 teaspoon carefully then pour over mixture allowing its aromatic notes envelop everything around filling hearts (and noses!) alike with warmth before getting whisked back into play—it adds depth while enhancing sweetness already present turning ordinary flavors extraordinary!
Step 4: Optional Add-ins
Now here comes perhaps one my favorite moments where creativity takes flight: folding in optional goodies like chocolate chips OR chopped nuts/seeds according preference toward texture diversity within each bite itself—it keeps things fun exciting knowing every individual piece could differ slightly based on additions chosen throughout process! If opting for both feel free mix away until well distributed evenly across creamy mixture ensuring no single area gets left behind missing out on all deliciousness awaiting ahead…
With those initial steps behind us let’s continue layering flavors further through methodical preparation leading towards final stage where everything solidifies beautifully opening doors wide toward snacking bliss awaiting afterward…
Crafting Your High Protein Frozen Peanut Butter Greek Yogurt Bites
Step 5: Filling the Muffin Tin with Love
Now that you have your creamy, dreamy mixture ready, it’s time to fill those little muffin cups with this luscious concoction. I recommend using a mini muffin tin or a silicone mold for this step—both work beautifully but offer different experiences when it comes to releasing your bites later. If you choose to use paper liners, they will help with easy removal, ensuring you don’t lose any precious bites in the process. Grab a spoon or a small ice cream scoop and begin to fill each cup to the top. This is important because you want each bite to be uniform in size, giving you that perfect balance of flavors and textures—trust me, it makes all the difference when you’re enjoying them later!
As you fill, take a moment to appreciate how beautiful this mixture looks—the rich tan of the peanut butter swirled through the bright white yogurt creates an inviting contrast that already has my taste buds tingling! Don’t rush this step; take your time to ensure each little cup is filled generously. The act of filling these molds isn’t just about getting the job done; it’s about crafting something special. Once filled, tap the muffin tin gently on the kitchen counter; this helps settle the mixture and release any air bubbles trapped inside, which can make your bites less smooth. A few gentle taps should do it—your patience here is rewarded later when you savor each creamy bite.
Step 6: The Freezing Transformation
With your tin filled and perfectly settled, it’s time for the most transformative step: freezing! Place your muffin tin or silicone mold into the freezer, ensuring it sits level so that your bites freeze evenly without any accidental spills or slants. This chilling phase is absolutely paramount because it solidifies your creamy mixture into those delightful frozen bites we are all excited about. Ideally, you’ll want to let them freeze for at least 2-3 hours.
Why so long? Well, freezing isn’t instant magic—it requires patience for the ingredients to fully set and meld together in their chilly embrace. During this time, as they freeze, those flavors will deepen and unify into a symphony of deliciousness that will make every bite truly extraordinary. You’ll know they’re ready when they feel firm to the touch; gently press on one of the center bites after about two hours to check for firmness—you’re looking for that solid texture that signals they’re ready for action!
Step 7: The Big Reveal
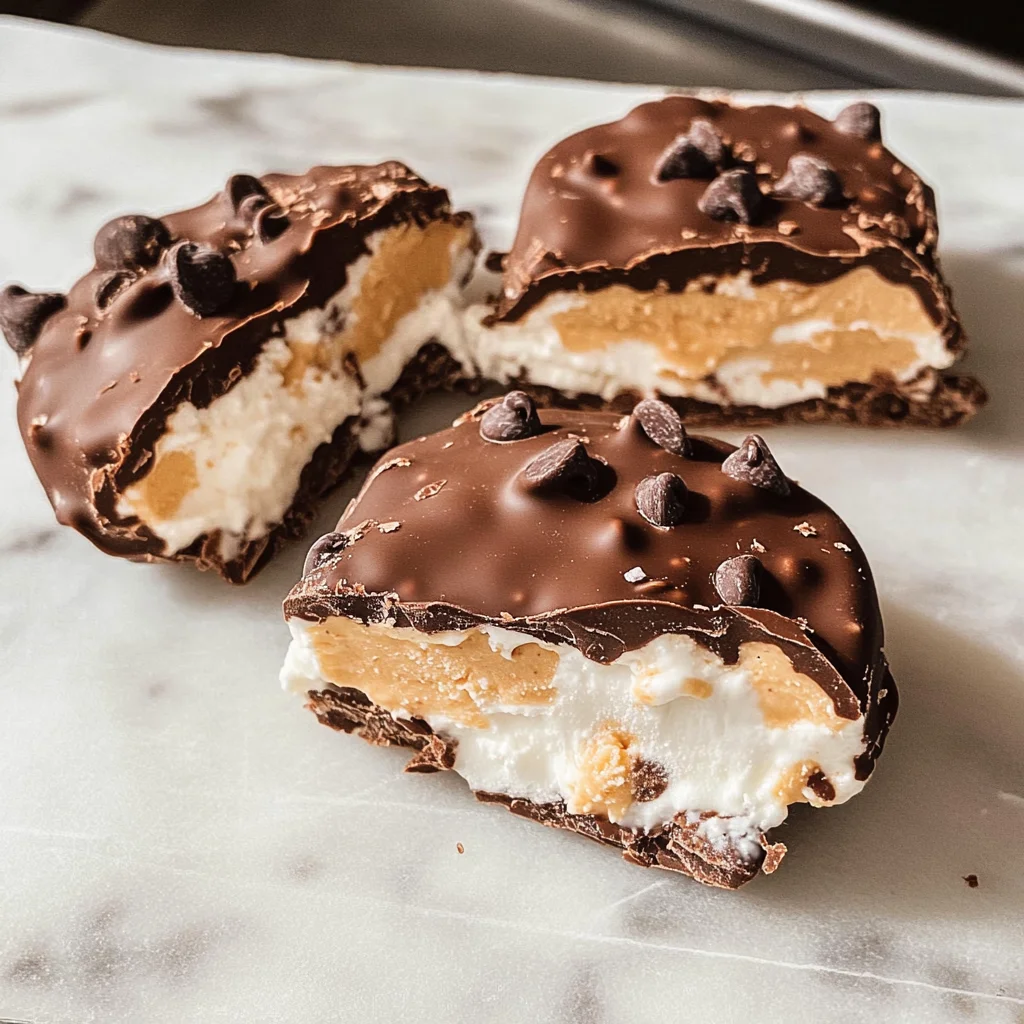
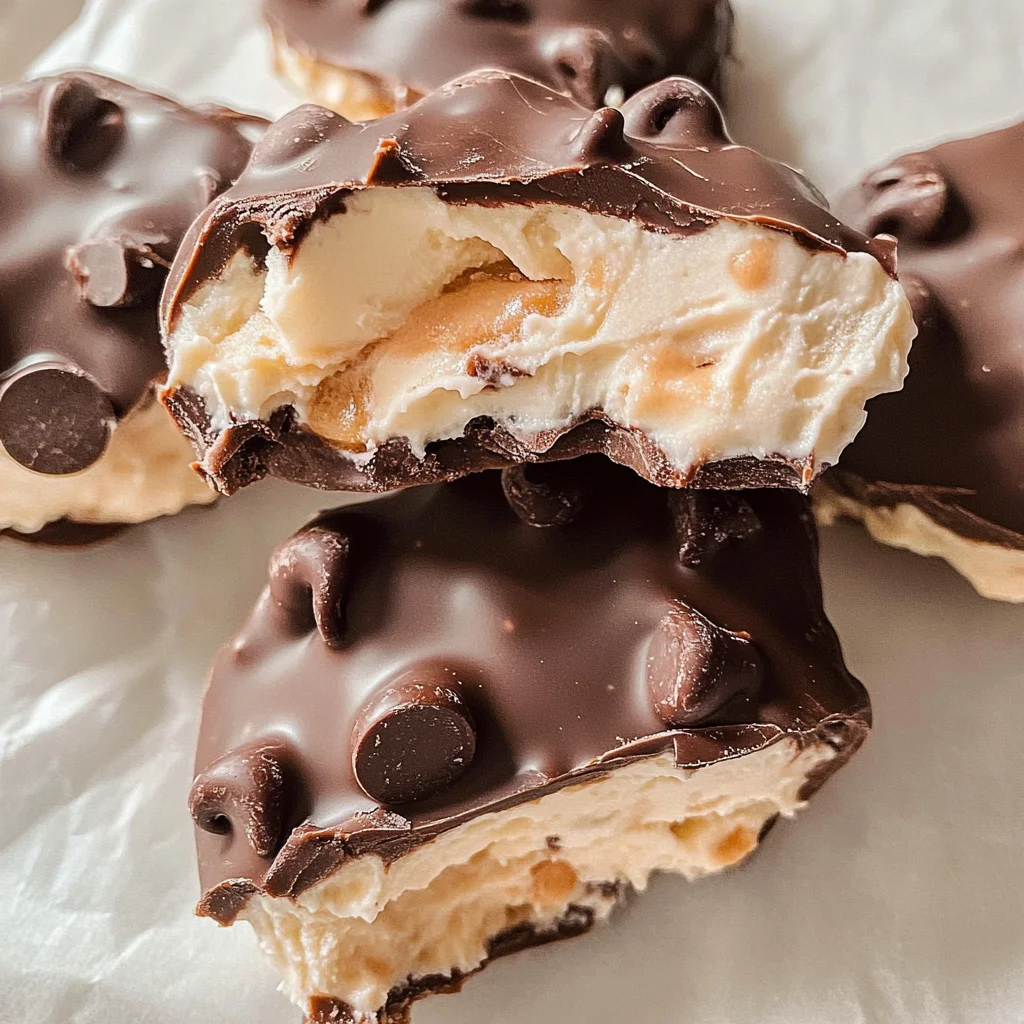
After what feels like an eternity (but really only a few hours), it’s finally time for the big reveal! Carefully remove your muffin tin from the freezer; I always feel a rush of excitement at this moment because I know I’m about to taste something fantastic! If you’ve opted for silicone molds, gently push from underneath each bite—they should pop out effortlessly if they’ve been frozen solid enough. For standard muffin tins lined with paper liners, simply peel them away with care.
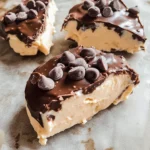
This part can be thrilling yet requires a gentle touch! If they’re not coming out easily, don’t force them; instead, give them another minute at room temperature—this allows just enough thawing so they release without breaking apart. When all bites are out and beautifully formed, take a moment to admire them. Each little round piece is like a piece of art—smooth surfaces glistening in their frozen glory, waiting to be devoured!
Step 8: Storing Your Masterpieces
Now that you’ve successfully removed these beautiful High Protein Frozen Peanut Butter Greek Yogurt Bites from their molds, it’s essential to store them properly so they remain fresh and delicious until you’re ready to indulge again. Transfer them into an airtight container—this step is crucial because exposure to air can lead to freezer burn, which diminishes flavor and texture over time. Layering parchment paper between each layer of bites can also help prevent sticking if you’re feeling extra cautious.
I promise you; if stored correctly in the freezer, these delightful snacks will keep well for up to one month! But let’s be honest—I doubt they’ll last that long once you’ve tasted their creamy goodness! Whenever you need a quick snack or something sweet without feeling guilty, simply grab a bite straight from the freezer. There’s something utterly intoxicating about enjoying these frozen treats right away—the coldness against your tongue paired with rich peanut butter and tart yogurt creates an experience that’s profoundly satisfying.
Final Touches on Your Journey
With all steps complete and your High Protein Frozen Peanut Butter Greek Yogurt Bites beautifully stored away, there’s just one thing left: enjoy them! Whether you reach for one while running out the door or treat yourself during a cozy movie night at home, each bite is packed with nutrition and flavor that fills both body and soul.
And remember—this recipe doesn’t have strict rules! Feel free to experiment with different mix-ins or toppings; perhaps some dried fruit or seeds could elevate these even further? Cooking is about joy and creativity—never hesitate to make this recipe your own! Trust me on this: once you’ve made these high-protein delights once, you’ll find yourself returning again and again.
So grab your favorite container from the freezer whenever you’re in need of a snack that satisfies both cravings and nutritional needs—because who said healthy can’t be delicious? Enjoy every moment of making (and devouring) these amazing High Protein Frozen Peanut Butter Greek Yogurt Bites!
Storage and Enjoyment Tips for Your High Protein Frozen Peanut Butter Greek Yogurt Bites
Now that you’ve crafted these delightful High Protein Frozen Peanut Butter Greek Yogurt Bites, it’s time to dive into all the ways you can enjoy them and keep them at their best! Trust me when I say that these little frozen gems are not only a delicious treat but also a nutritious snack that you’ll want on hand at all times. Imagine reaching into the freezer for a quick pick-me-up and finding these creamy, dreamy bites waiting for you, ready to deliver a burst of flavor and energy! I can hardly contain my excitement as I share how to store these beauties so they stay fresh and delicious.
Storing Leftover High Protein Frozen Peanut Butter Greek Yogurt Bites
To ensure your High Protein Frozen Peanut Butter Greek Yogurt Bites remain as scrumptious as the moment they came out of the freezer, it’s vital to use an airtight container. Glass or plastic containers with tight-fitting lids work wonderfully to keep air out and maintain their creamy texture. If you have any extra space in your freezer, consider placing a piece of parchment paper between layers of bites to prevent them from sticking together—a simple trick that goes a long way! These bites will keep beautifully for up to one month in the freezer, allowing you plenty of time to savor each one. Just remember, the longer they sit, the more their flavor may mellow, but I promise they will still be delicious long after they’re made. When you’re ready to enjoy them again, there’s no need for reheating; just grab a couple straight from the freezer and let them slowly melt in your mouth—they’re utterly heavenly!
Freezing Components for Later
If you’re looking to batch-prepare these treats or want to save some ingredients for future fun, here’s how to freeze components like Greek yogurt or peanut butter properly. Portion out what you won’t use right away into smaller containers or freezer bags—this makes it easy to grab just what you need later on. Both peanut butter and Greek yogurt freeze beautifully, retaining their flavors and textures for about three months when stored correctly. Whenever you’re ready to whip up another batch of those fabulous bites, simply thaw your ingredients in the refrigerator overnight or on the countertop for a few hours. The convenience of having pre-portioned components ready at hand means you can whip up these delightful snacks whenever cravings strike! Just imagine having those creamy bites prepped and waiting in your kitchen—what could be better?
High Protein Frozen Peanut Butter Greek Yogurt Bites
Indulge in the delightful experience of making High Protein Frozen Peanut Butter Greek Yogurt Bites, a wholesome treat perfect for snacking at any time of day. These creamy bites blend the rich flavors of natural peanut butter and tangy Greek yogurt, sweetened with honey and complemented by optional chocolate chips or nuts for added texture. In just ten minutes of prep, you can whip up a batch that not only satisfies your sweet cravings but also provides a nutritious boost, making them ideal for meal prepping or a quick snack after a workout. With their easy-to-follow recipe and customizable ingredients, these bites are sure to become a staple in your freezer!
- Prep Time: 10 minutes
- Cook Time: Freezing time varies (2–3 hours)
- Total Time: 0 hours
- Yield: Approximately 20 bites 1x
- Category: Dessert
- Method: Freezing
- Cuisine: American
Ingredients
- 2 cups plain Greek yogurt (low-fat or non-fat)
- 1/2 cup natural peanut butter
- 1/4 cup honey or maple syrup
- 1 teaspoon vanilla extract
- 1/2 cup chocolate chips (optional)
- 1/4 cup chopped nuts or seeds (optional)
Instructions
- In a large mixing bowl, combine Greek yogurt and peanut butter until smooth.
- Add honey (or maple syrup) and vanilla extract; mix well.
- Fold in chocolate chips and/or chopped nuts/seeds if using.
- Spoon mixture into a mini muffin tin or silicone mold, filling each cup evenly.
- Tap the tin gently to settle the mixture and place it in the freezer for 2-3 hours until firm.
- Once frozen solid, remove bites from molds and store them in an airtight container in the freezer.
Nutrition
- Serving Size: 1 serving
- Calories: 90
- Sugar: 5g
- Sodium: 30mg
- Fat: 5g
- Saturated Fat: 1g
- Unsaturated Fat: 4g
- Trans Fat: 0g
- Carbohydrates: 8g
- Fiber: 1g
- Protein: 4g
- Cholesterol: 0mg