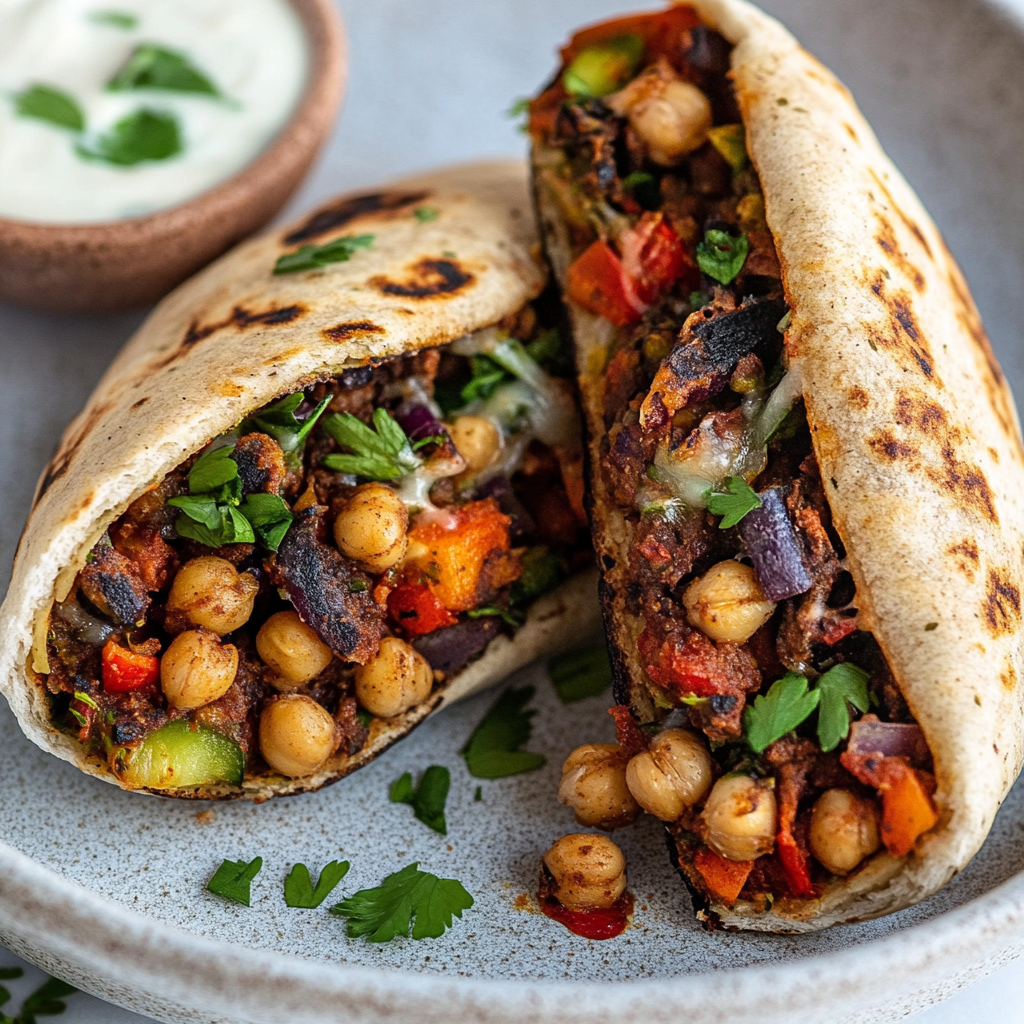
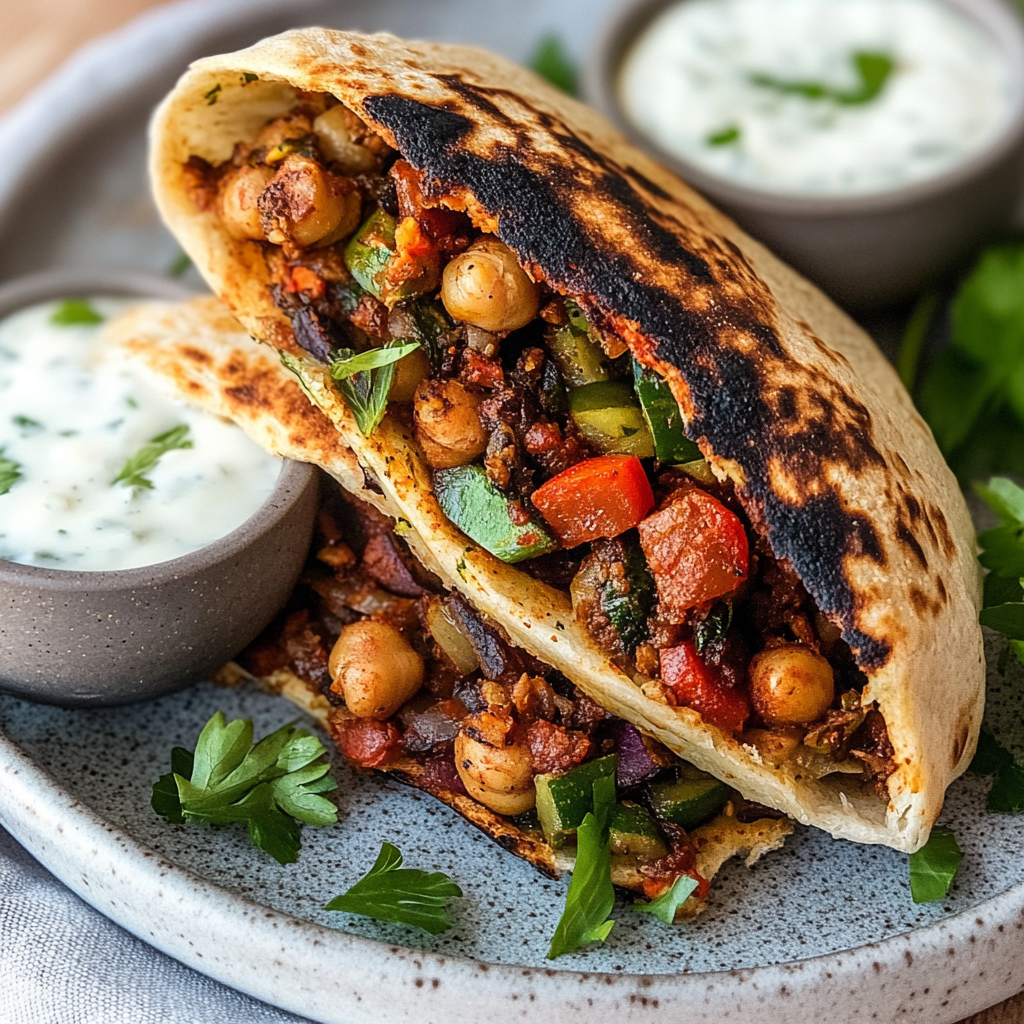
Grilled Chickpea Veggie Pita
If you’re looking for a quick and satisfying meal that’s packed with flavor, you’ve come to the right place! My Grilled Chickpea Veggie Pita recipe is not just delicious; it’s also incredibly nutritious. The za’atar spiced chickpea filling brings a delightful twist, and when stuffed into whole grain pitas and grilled to perfection, it becomes an irresistible treat. Whether it’s a busy weeknight or a casual family gathering, these pitas are sure to please everyone at the table.
What I love most about this recipe is how adaptable it is. You can whip it up in no time and feel great knowing you’re serving something wholesome and fulfilling. Plus, they make for fantastic leftovers if you have any!
Why You’ll Love This Recipe
- Easy to prepare: With just a handful of simple steps, you’ll have a hearty meal on the table in about 40 minutes!
- Family-friendly: Kids and adults alike will enjoy the flavorful fillings tucked inside warm pitas.
- High in protein and fiber: This dish is nutritious, keeping you full and satisfied without weighing you down.
- Perfect for meal prep: Make a big batch ahead of time for quick lunches throughout the week.
- Customizable flavors: Feel free to swap ingredients based on what you have on hand or your personal taste!
Ingredients You’ll Need
Let’s gather our simple and wholesome ingredients! This list features everything you need to create those delightful Grilled Chickpea Veggie Pitas. You might already have many of these items in your pantry!
For the Filling
- 2 tbsp avocado oil, divided
- 1, 15 oz can chickpeas, rinsed and drained
- 1/2 yellow onion, finely diced
- 1 red bell pepper, finely diced
- 4 oz of mushrooms, finely diced
- 5 cloves garlic, minced or crushed
- 1 tbsp tomato paste
- 1/2 tbsp soy sauce or coconut aminos
- 2 tsp za’atar
- 1/2 tsp ground cumin
- 1/2 tsp ground coriander
- 1/4 tsp fennel seeds
- 1/4 cup parsley, minced
- Salt and pepper to taste
For Assembly
- 3 whole grain pitas
For the Yogurt Sauce
- 1/2 cup plain, unsweetened vegan Greek-style yogurt or your favorite thick vegan yogurt
- Juice of half a lemon
- Salt and pepper to taste
- 1 clove garlic, crushed or finely grated
- 1/4 cup cilantro, finely minced
- 2 tsp extra virgin olive oil, optional
Variations
One of the best things about this Grilled Chickpea Veggie Pita recipe is its flexibility! Here are some fun ideas to mix things up:
- Swap the protein: Try using lentils instead of chickpeas for a different texture and flavor.
- Add veggies: Toss in spinach or zucchini for extra nutrition and color.
- Change the spices: Experiment with different seasoning blends like curry powder or smoked paprika for a unique twist.
- Try different sauces: Instead of yogurt sauce, use hummus or tahini for spreading!
How to Make Grilled Chickpea Veggie Pita
Step 1: Mash the Chickpeas
Place your chickpeas in a bowl and roughly mash them with a fork until they’re crumbled but not completely smooth. This gives your filling texture while allowing all those delicious flavors to meld together.
Step 2: Sauté the Veggies
In a sauté pan over medium heat, heat up one tablespoon of avocado oil. Add in the onion, bell pepper, and mushrooms. Give everything a quick toss and let it sit for 2-3 minutes. This allows the veggies to release moisture and soften beautifully. Sprinkle with salt as they cook down.
Step 3: Add Flavorful Ingredients
Once the vegetables are tender, add in your minced garlic and sauté until fragrant—this should take about 30 seconds. Then stir in the tomato paste along with your mashed chickpeas. Don’t forget the soy sauce (or coconut aminos), za’atar, cumin, coriander, and fennel seeds! Sauté everything together for another 2-3 minutes so that those spices can infuse their flavors into every bite.
Step 4: Finish with Parsley
Stir in your minced parsley at this point! Taste your mixture and adjust seasoning as needed. This will ensure that every bite is seasoned just right before we start stuffing our pitas.
Step 5: Prepare Your Pitas
Preheat your griddle while you cut each pita in half carefully to create pockets. Gently stuff each half with that flavorful chickpea mixture until it’s filled generously. Brush or spray each pita outside with remaining avocado oil to help achieve that lovely crispy exterior.
Step 6: Grill Until Perfectly Crisp
Place each stuffed pita filling side down on your preheated griddle for about 3-4 minutes until grill marks appear—this adds so much character! Flip them over gently and grill for another 3 minutes on the other side.
Step 7: Whip Up Your Yogurt Sauce
While those pitas are grilling away happily, prepare your yogurt sauce by combining all its ingredients in a bowl—yogurt, lemon juice, salt & pepper, garlic, cilantro—and whisking them together until smooth. It’s going to be refreshing alongside those warm pitas!
Now you’re ready to serve your grilled chickpea veggie pitas! Pair them with that zesty yogurt sauce and any fresh veggies you desire for an unforgettable meal experience. Enjoy every bite—you deserve it!
Pro Tips for Making Grilled Chickpea Veggie Pita
Making the perfect Grilled Chickpea Veggie Pita is easier than you think! Here are some tips to ensure your meal turns out delicious every time.
- Use fresh ingredients – Fresh vegetables and herbs enhance the flavor of your filling, making each bite more vibrant and enjoyable.
- Don’t overstuff the pitas – While it’s tempting to pack them full, overstuffing can make them difficult to grill and eat. Aim for a generous but manageable amount.
- Preheat your grill properly – A hot grill helps achieve those beautiful grill marks and crispy texture on your pitas. Make sure it’s heated before placing the stuffed pitas on it.
- Experiment with spices – Feel free to adjust the za’atar or add other spices like smoked paprika or chili flakes for an extra kick. This personal touch can transform the dish to suit your preferences.
- Make extra filling – The chickpea filling keeps well in the fridge and can be used in salads, wraps, or even as a topping for rice dishes. Having leftovers means quick meals throughout the week!
How to Serve Grilled Chickpea Veggie Pita
Serving your Grilled Chickpea Veggie Pita can be just as fun as making it! With a few simple touches, you can elevate this meal into something truly special.
Garnishes
- Fresh herbs – Sprinkle chopped mint or cilantro on top for a burst of freshness that complements the flavors beautifully.
- Sliced radishes – Their crunchy texture and peppery flavor add a delightful contrast to the creamy yogurt sauce.
- Lemon wedges – A squeeze of lemon right before eating brightens up all the flavors and adds a zesty kick.
Side Dishes
- Tabbouleh salad – This refreshing salad made with parsley, tomatoes, bulgur, and lemon juice is a perfect light accompaniment that complements Middle Eastern flavors beautifully.
- Roasted vegetables – A mix of seasonal veggies roasted with olive oil and herbs makes for a hearty side that pairs nicely with the warm pitas.
- Hummus and pita chips – Creamy hummus served with crunchy pita chips offers a classic dip option that everyone loves.
- Cucumber salad – A simple salad with diced cucumbers, tomatoes, onion, and a splash of vinegar provides a cool contrast to the warm grilled pitas.
Enjoy serving up this delightful dish! Your Grilled Chickpea Veggie Pita will not only satisfy hunger but also please your taste buds with its rich flavors. Happy cooking!
Make Ahead and Storage
This Grilled Chickpea Veggie Pita is perfect for meal prep! You can easily whip up a batch ahead of time, making it a convenient option for busy weeknights or quick lunches. Here’s how to store, freeze, and reheat your delicious pitas.
Storing Leftovers
- Store any leftover grilled pitas in an airtight container in the refrigerator.
- They will stay fresh for up to 3-4 days.
- Keep the yogurt sauce in a separate container to maintain its freshness.
Freezing
- If you want to make a larger batch, you can freeze the stuffed pitas.
- Wrap each filled pita tightly in plastic wrap or foil before placing them in a freezer-safe bag.
- They can be frozen for up to 2 months.
Reheating
- To reheat from frozen, let the pitas thaw overnight in the refrigerator.
- Warm them on the grill or griddle for about 3-4 minutes per side until heated through and crispy.
- You can also microwave them for about 1-2 minutes, though they won’t be as crispy.
FAQs
If you have questions about this recipe, you’re not alone! Here are some common inquiries.
Can I make the Grilled Chickpea Veggie Pita gluten-free?
Absolutely! Just use gluten-free pitas or wraps instead of whole grain ones, and you’ll enjoy a delicious gluten-free version of this recipe!
What can I serve with Grilled Chickpea Veggie Pita?
These pitas pair wonderfully with a side salad, roasted veggies, or even some crunchy carrot sticks for a refreshing contrast.
How do I add more flavor to my Grilled Chickpea Veggie Pita?
Feel free to experiment with additional spices or herbs! Adding some chili flakes or smoked paprika can give your filling an extra kick!
Can I use other vegetables in my Grilled Chickpea Veggie Pita?
Certainly! This recipe is versatile; you can substitute with zucchini, spinach, or any seasonal veggies you have on hand.
Is there a vegan alternative to yogurt sauce for the Grilled Chickpea Veggie Pita?
Yes! You can use cashew cream or tahini mixed with lemon juice and garlic as an alternative to the yogurt sauce for added creaminess without dairy.
Final Thoughts
I hope you find joy in making these Grilled Chickpea Veggie Pitas as much as I do! They’re not only nutritious but also packed with flavor and perfect for sharing. Whether it’s a cozy family dinner or a casual lunch, these pitas bring warmth and satisfaction to any table. Enjoy every bite, and don’t hesitate to get creative with your fillings. Happy cooking!
Grilled Chickpea Veggie Pita

Enjoy these flavorful Grilled Chickpea Veggie Pitas filled with za’atar chickpeas. Perfect for meal prep—get grilling today!
- Prep Time: 15 minutes
- Cook Time: 25 minutes
- Total Time: 40 minutes
- Yield: Serves approximately 3 (3 stuffed pitas) 1x
- Category: Dinner
- Method: Grilling
- Cuisine: Mediterranean
Ingredients
- 2 tbsp avocado oil, divided
- 1, 15 oz can chickpeas, rinsed and drained
- 1/2 yellow onion, finely diced
- 1 red bell pepper, finely diced
- 4 oz of mushrooms, finely diced
- 5 cloves garlic, minced or crushed
- 1 tbsp tomato paste
- 1/2 tbsp soy sauce or coconut aminos
- 2 tsp za’atar
- 1/2 tsp ground cumin
- 1/2 tsp ground coriander
- 1/4 tsp fennel seeds
- 1/4 cup parsley, minced
- Salt and pepper to taste
- 3 whole grain pitas
- 1/2 cup plain, unsweetened vegan Greek-style yogurt or your favorite thick vegan yogurt
- Juice of half a lemon
- Salt and pepper to taste
- 1 clove garlic, crushed or finely grated
- 1/4 cup cilantro, finely minced
- 2 tsp extra virgin olive oil, optional
Instructions
- Place your chickpeas in a bowl and roughly mash them with a fork until they’re crumbled but not completely smooth.
- In a sauté pan over medium heat, heat up one tablespoon of avocado oil. Add in the onion, bell pepper, and mushrooms. Sauté for 2-3 minutes until softened.
- Add in the minced garlic and sauté until fragrant, about 30 seconds. Stir in the tomato paste along with the mashed chickpeas, soy sauce (or coconut aminos), za’atar, cumin, coriander, and fennel seeds. Sauté for another 2-3 minutes.
- Stir in the minced parsley and adjust seasoning as needed.
- Preheat your griddle while you cut each pita in half to create pockets. Stuff each half with the chickpea mixture and brush or spray the outside with remaining avocado oil.
- Grill the stuffed pitas filling side down on your preheated griddle for about 3-4 minutes until grill marks appear, then flip and grill for another 3 minutes.
- Prepare the yogurt sauce by combining all its ingredients in a bowl and whisking together until smooth.
Nutrition
- Serving Size: 1 stuffed pita (approx. 150g)
- Calories: 320
- Sugar: 4g
- Sodium: 380mg
- Fat: 12g
- Saturated Fat: 2g
- Unsaturated Fat: 10g
- Trans Fat: 0g
- Carbohydrates: 43g
- Fiber: 10g
- Protein: 12g
- Cholesterol: 0mg