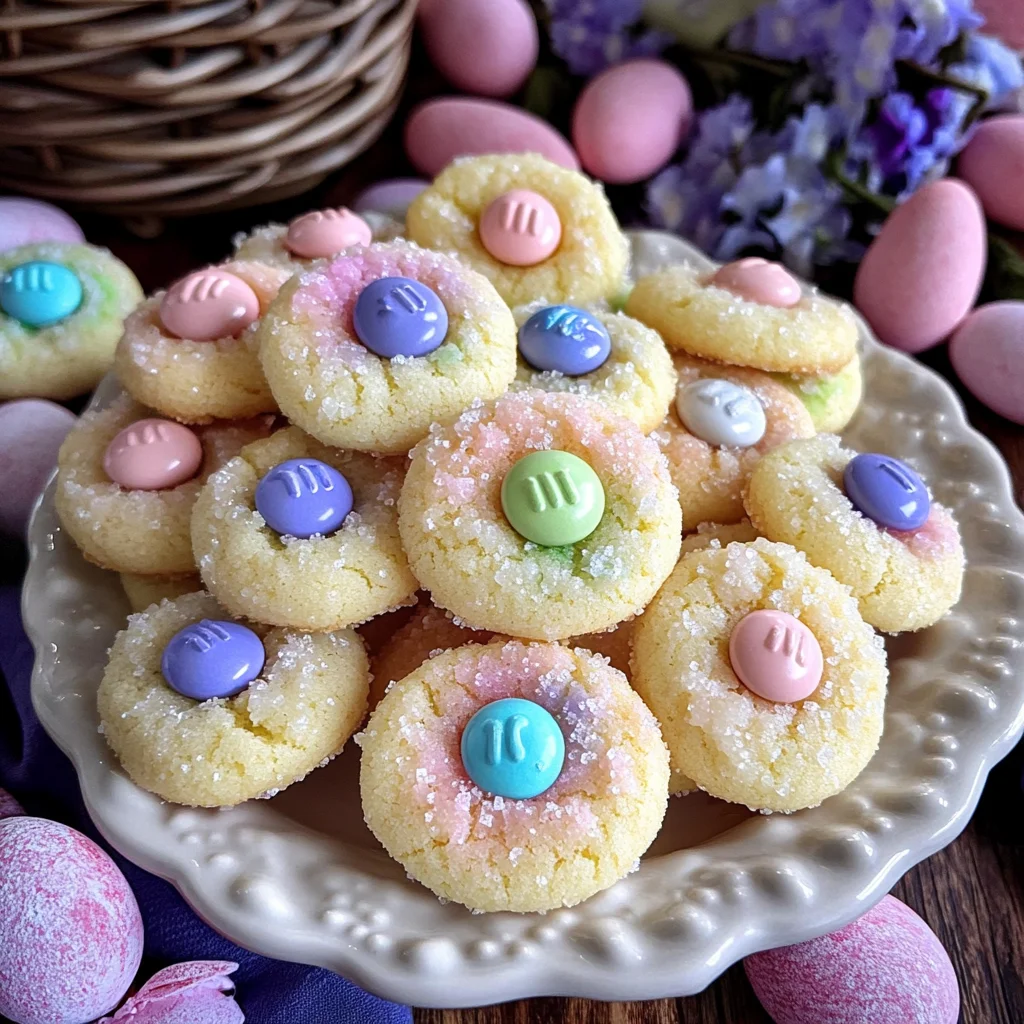
Easter Bunny Button Cookies
There’s something truly magical about the arrival of spring, don’t you think? The sun shines a little brighter, the flowers bloom with vibrant colors, and the air is filled with a sense of renewal. Among all these delightful changes, Easter stands out as a celebration of life and joy, inviting us to gather with family and friends. It’s during this beautiful time that I find myself drawn to baking, particularly to something that captures the whimsy of the season: Easter Bunny Button Cookies. These charming little treats are not just cookies; they’re tiny bites of happiness that bring smiles to faces young and old alike. Imagine sinking your teeth into these buttery delights, where a pastel candy center peeks through like a joyful surprise—a perfect combination of sweetness and nostalgia.
Baking has always been one of my greatest passions; it feels like an art form where love and creativity blend seamlessly. My heart swells with affection when I think about sharing these Easter Bunny Button Cookies with you. They embody everything we cherish about this holiday: the joy of giving, the excitement in every bite, and that warm feeling you get when you indulge in something homemade. Each cookie is like a little hug for your taste buds—soft, tender, and utterly irresistible. Trust me on this one; if you’re looking for a way to spread some cheer this Easter (or simply want to treat yourself!), then look no further than these delightful cookies!
Easter Bunny Button Cookies: A Whimsical Delight for Every Occasion
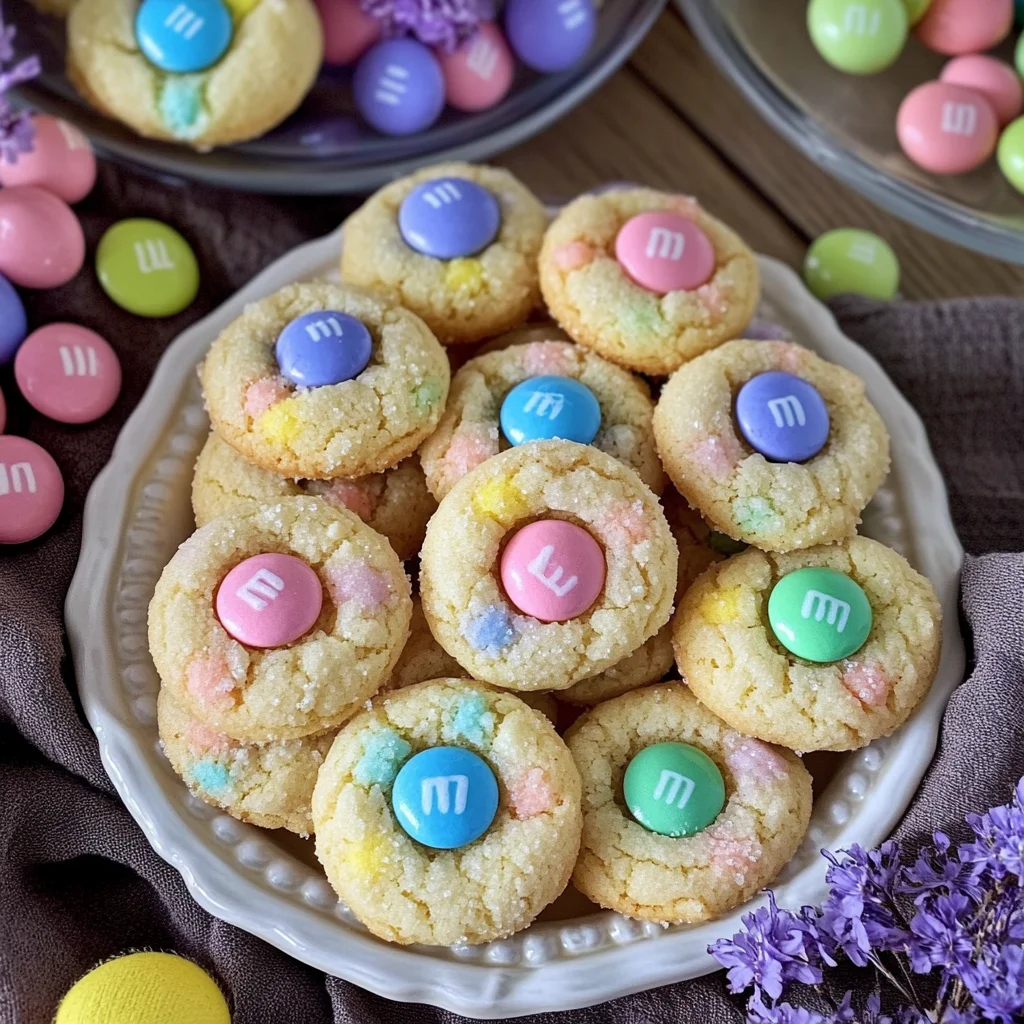
These Easter Bunny Button Cookies are not only adorable but also incredibly easy to make! Whether you’re preparing for an Easter gathering or simply want to brighten your day with some sweet bites, this recipe will surely become a cherished addition to your baking repertoire. With delightful pastel candy centers nestled in soft, buttery cookies, they evoke warm memories of childhood Easters spent hunting for eggs and enjoying treats with loved ones. So roll up your sleeves and let’s embark on this delicious journey together!
Ingredients:
As we dive into creating these delightful cookies, let’s take a moment to appreciate each ingredient’s role in making our Easter Bunny Button Cookies not just good but absolutely extraordinary!
- 1 cup (2 sticks or 226g) unsalted butter, softened to room temperature. This is crucial for creaming properly and creating that light and airy texture we’re aiming for in our cookies. If your butter is too cold, it won’t cream effectively; if it’s melted, your cookies will spread too much during baking. I always recommend using high-quality butter here—European-style butter with a higher fat content will impart an even richer flavor that makes these cookies irresistible.
- 2/3 cup granulated sugar. Sugar does more than just sweeten; it plays a vital role in achieving that perfect texture. When creamed with butter, sugar helps aerate the mixture, which contributes to the lightness of our cookies. Look for fine granulated sugar so it blends smoothly without any gritty texture remaining.
- 2 large egg yolks. Egg yolks add richness and moisture to our dough while also helping bind the ingredients together—making them essential for structure without making the cookies too cake-like. Using fresh eggs will elevate the flavor significantly; trust me when I say they make all the difference!
- 1 teaspoon vanilla extract. Vanilla is like the secret handshake in baking—it elevates flavors in ways we can barely describe! It adds depth and warmth that perfectly complements the sweetness of our cookies. Always opt for pure vanilla extract for its wonderful aroma and authentic taste.
- 2 1/3 cups all-purpose flour. Flour is what gives our cookies structure and body; however, measuring accurately is essential here! Too much flour can lead to dry cookies while too little may result in spreading too much during baking. To measure correctly, spoon flour into your measuring cup without packing it down—you want it light and fluffy!
- 1/2 cup sanding sugar (for rolling). Sanding sugar adds that beautiful crunch when baked and gives our cookies an eye-catching sparkle! It doesn’t dissolve as easily as regular sugar during baking so you’ll get those lovely crunchy bits on top—the perfect contrast against the soft cookie underneath.
- 1/2 cup chocolate M&M candy (or similar). These are your cute little surprises hidden within each cookie! The bright colors not only add festive flair but also create an explosion of chocolatey goodness when bitten into—what could be better than that? Feel free to use pastel-colored varieties to keep with the theme!
Equipment You’ll Need:
Now that we’ve gathered our ingredients full of promise and potential, it’s time to talk about equipping ourselves for success! Having the right tools makes all the difference in ensuring our experience is smooth and enjoyable.
- Mixing bowl: A sturdy mixing bowl is essential as it holds all your ingredients together while allowing enough space for mixing without overflowing. Glass or stainless steel works beautifully here since they’re durable and easy to clean.
- Hand-held mixer or stand mixer: This tool takes away much of the hard work involved in creaming butter and sugar together until light and fluffy—a step that’s absolutely paramount for achieving that melt-in-your-mouth texture we desire!
- Measuring cups & spoons: Precision is key in baking! Make sure you have accurate measuring tools at hand; dry measuring cups for flour/sugar and liquid measuring cups for ingredients like vanilla extract help ensure everything turns out just right.
- Baking sheets: Use sturdy baking sheets lined with parchment paper or silicone mats—they prevent sticking while also ensuring even cooking across each batch of cookies.
- Wire cooling rack: Allowing our baked goodies to cool on a wire rack prevents steam from building up underneath them (which can lead to sogginess!). This simple tool ensures we’re left with perfectly textured cookies ready for enjoyment.
Preparing the Easter Bunny Button Cookies
Step 1: Preheat Your Oven & Prepare Your Baking Sheet
Before diving into mixing up our cookie dough—a step brimming with anticipation—let’s preheat our oven to 350 degrees Fahrenheit (175 degrees Celsius). This temperature ensures even cooking throughout each cookie batch once they hit those hot oven walls; plus, you’ll notice how quickly things come together once it’s ready! While waiting on those warming-up vibes from your oven, line two baking sheets with parchment paper or silicone baking mats—this simple act prevents unnecessary sticking while also facilitating cleanup later on.
Step 2: Cream Together Butter & Sugar
Now comes one of my favorite parts—the creaming process! In a mixing bowl (preferably large enough), combine one cup of softened unsalted butter with 2/3 cup granulated sugar using either a hand-held mixer or stand mixer fitted with paddle attachment at medium speed until light and fluffy—about 3 minutes should do it! This process known as creaming introduces air pockets into our mixture which translates directly into tender textures once baked; don’t rush this step because it sets us up beautifully for success later on!
Step 3: Add Egg Yolks & Vanilla
Once you’ve achieved that desirable fluffiness—almost like cloud-like perfection—it’s time to add two large egg yolks along with one teaspoon pure vanilla extract into your creamy concoction! Beat these ingredients together until well combined—this helps emulsify everything nicely while imparting lovely flavors throughout every bite we create ahead! Remember though: freshness matters immensely here so go ahead… crack open those eggs right before use!
Step 4: Incorporate Flour Mixture
Now comes another exciting step—folding in flour which provides structure yet again but requires gentle handling! Gradually sprinkle 2 1/3 cups all-purpose flour over top whilst gently folding using spatula until just combined—that means no over-mixing allowed friends! Overworking gluten leads us down a road where cookies turn tough instead of soft; aim instead for hints of visible flour still peeking through—trust me when I say patience pays off big time here!
Stay tuned as we continue crafting these enchanting holiday bites together—the fun has only just begun!
Step 5: Forming the Cookie Balls
Now we embark on a delightful step that truly brings these Easter Bunny Button Cookies to life. With the dough ready, it’s time to portion it into bite-sized delights. Using a teaspoon, scoop out just the right amount of dough—about a teaspoonful per cookie. This is crucial because precise measurements ensure uniform baking and consistency in size, which means they will all bake evenly and look fantastic on your plate or in that special Easter basket.
Once you’ve scooped the dough, roll each piece gently between your palms until it forms a smooth ball. This gentle rolling not only helps shape the cookies but also encourages a lovely texture that will yield soft, tender bites once baked. As you roll, think about how satisfying it will be to pop these little treats into your mouth and how they’ll be adored by everyone at your gathering. After shaping each ball, it’s time to give them a sweet coat. Roll each one in sanding sugar until they’re fully coated—this step adds that charming sparkle and sweetness that makes these cookies visually appealing and utterly irresistible.
Step 6: The Sweet Surprise
Now comes the fun part—the sweet surprise at the center! Take those vibrant chocolate M&M candies and gently press one into the center of each cookie ball before they head into the oven. Trust me on this: this little touch transforms your regular cookie into something extraordinary! As these cookies bake, the M&Ms will melt slightly and create an ooey-gooey center that contrasts beautifully with the tender cookie surrounding it. You’ll want to make sure not to push them too far down; you want just enough of the candy visible so it can shine like a jewel atop your cookie creation.
This step is not just for aesthetics; it’s essential for flavor balance too! The chocolate from the M&Ms melds with the buttery goodness of the cookies during baking, creating a harmonious bite bursting with flavor. Remember, patience is key here—take your time pressing in those candies because this little moment ensures every cookie has that delightful burst of chocolatey goodness waiting within.
Step 7: Baking Your Cookies to Perfection
With your cookies formed and adorned with their colorful candy jewels, it’s time for the magic of baking! Place your prepared baking sheet in an oven preheated to 350 degrees Fahrenheit—a temperature that’s just right for achieving that perfect golden-brown exterior while keeping the insides delightfully soft. Bake these beauties for about 10 minutes; however, keep an eye on them as ovens can vary quite a bit. You’re looking for a light golden hue around the edges while ensuring they still have a slight puffiness in the center—this visual cue means you’re on track!
I promise you, as they bake, your kitchen will fill with an utterly intoxicating aroma of sweetness—a scent that speaks of warmth and nostalgia, pulling you back to childhood days filled with holiday treats. Once those ten minutes are up (and trust me, you’ll be counting down), carefully remove them from the oven. Allowing them to cool on the baking sheet for about 3-5 minutes is absolutely paramount; this resting period lets them set up perfectly so they don’t crumble when you transfer them later.
Step 8: The Cooling Transition
After those few moments of anticipation pass (which might feel like an eternity when you can smell such deliciousness!), it’s time to transfer your Easter Bunny Button Cookies onto a wire cooling rack. This step is vital because it allows air circulation around all sides of each cookie, preventing any sogginess from developing on their bottoms as they cool down completely—a fate we definitely want to avoid!
As you gently slide them onto the rack using a spatula, take a moment to admire their beautiful shapes and sparkling surfaces. Let them cool completely before digging in; I know it’s tempting to sneak just one while they’re still warm (trust me, I’ve been there!), but giving them this cooling time enhances their texture even more. The warmth will continue to soften those M&Ms just enough without making them lose their shape or color—ensuring every bite remains vibrant and deliciously chocolaty.
Easter Bunny Button Cookies
Delight in these charming Easter Bunny Button Cookies—a festive treat perfect for sharing or keeping all for yourself! Try this recipe today!
- Prep Time: 15 minutes
- Cook Time: 10 minutes
- Total Time: 25 minutes
- Yield: Approximately 24 cookies 1x
- Category: Dessert
- Method: Baking
- Cuisine: American
Ingredients
- 1 cup unsalted butter, softened
- 2/3 cup granulated sugar
- 2 large egg yolks
- 1 teaspoon vanilla extract
- 2 1/3 cups all-purpose flour
- 1/2 cup sanding sugar (for rolling)
- 1/2 cup chocolate M&M candies (or similar)
Instructions
- Preheat your oven to 350°F (175°C) and line baking sheets with parchment paper.
- In a mixing bowl, cream together the softened butter and granulated sugar until light and fluffy.
- Add egg yolks and vanilla extract; beat until well combined.
- Gradually fold in flour until incorporated without over-mixing.
- Scoop out tablespoon-sized portions of dough, roll into balls, and coat with sanding sugar.
- Press a chocolate candy into each cookie ball before placing on the baking sheet.
- Bake for 10 minutes or until lightly golden around the edges; let cool before transferring to a wire rack.
Nutrition
- Serving Size: 1 serving
- Calories: 120
- Sugar: 8g
- Sodium: 50mg
- Fat: 7g
- Saturated Fat: 4g
- Unsaturated Fat: 2g
- Trans Fat: 0g
- Carbohydrates: 13g
- Fiber: 0g
- Protein: 1g
- Cholesterol: 20mg