Dutch Oven No Knead Crusty Bread
There’s something utterly enchanting about the aroma of freshly baked bread wafting through the kitchen, isn’t there? It’s one of those simple pleasures that can instantly elevate your mood and make a house feel like a home. With my Dutch Oven No Knead Crusty Bread recipe, you’re not just making bread; you’re embarking on a heartfelt journey that connects us all through the age-old tradition of baking. Imagine pulling a golden, crunchy loaf from the oven, its crust crackling as it cools, and knowing that in just a few hours, you’ll have something truly special to share with your loved ones. This bread is more than just food; it’s an experience filled with warmth, love, and the promise of delightful moments around the dinner table.
What I adore about this recipe is how approachable it is for everyone, whether you’re a seasoned baker or someone who’s just stepping into the world of homemade bread. You may be surprised to learn that this no-knead method requires only five minutes of active effort! Yes, you read that right—just five minutes! The real magic happens while it rises, developing flavors and textures that will make your taste buds dance with joy. Each bite reveals an airy, soft interior hugged by a crust so gorgeous and crunchy that you might find yourself reaching for another slice before you even realize it. Trust me when I say your friends and family will rave about this bread long after the last crumb has been devoured!
Dutch Oven No Knead Crusty Bread: A Love Letter to Home Baking
Welcome to a delightful adventure in baking! This Dutch Oven No Knead Crusty Bread is perfect for those cozy evenings at home or to impress guests at dinner parties. It’s not just any bread; it’s an artisanal loaf that invites everyone to gather ’round and enjoy. With its golden crust and soft inside, this bread is versatile enough for slathering with butter or serving alongside your favorite soups and salads. Let’s dive into this experience together!
Ingredients:
As we embark on this culinary journey of creating our Dutch Oven No Knead Crusty Bread, let’s take a moment to appreciate each ingredient we’ll be using. Each one plays a vital role in crafting a loaf that’s not only delicious but also deeply satisfying.
- 1 1/2 cups warm water (about 100°F). This warm water is crucial because it activates the yeast, allowing it to bloom and work its magic in helping the dough rise beautifully. You want it warm but not scalding hot; think of how you’d test bathwater for comfort—this temperature encourages the yeast to wake up without shocking it into dormancy. If you’re unsure, use a thermometer or dip your finger in—it should feel pleasantly warm against your skin.
- 1 packet active dry yeast (2.25 teaspoons). Yeast is our little miracle worker here! It ferments sugars in the flour and produces carbon dioxide, which creates those lovely air bubbles that give our bread its lightness. When purchasing yeast, look for packets with an expiration date well into the future; fresh yeast means better results. If you’re feeling adventurous later on, you can explore different types of yeast or even try using sourdough starter as an alternative!
- 1 ½ teaspoons fine grain salt. Salt isn’t just there for seasoning; it’s absolutely paramount in enhancing flavor and controlling yeast activity during fermentation. It balances the sweetness of the dough while also strengthening gluten structure—essential for achieving that perfect chewy texture we crave in homemade bread. Opt for fine grain salt rather than coarse as it dissolves more easily into our dough mixture.
- 3 1/4 cups all-purpose flour. This is where we build our foundation! All-purpose flour provides just the right balance of protein content necessary for gluten formation without making our loaf too dense or heavy. When measuring flour, I recommend spooning it into your measuring cup and leveling off with a knife rather than scooping directly from the bag—this ensures accuracy! If you’re feeling creative down the line, consider experimenting with whole wheat or spelt flour for different textures and flavors.
Equipment You’ll Need:
Before we dive into mixing our ingredients together, let’s talk about some essential tools that will be your best friends throughout this process. Having the right equipment makes everything smoother and more enjoyable.
- Large mixing bowl – A sturdy bowl gives you plenty of space to mix your dough without worrying about spills or messes. Choose one that’s easy to handle and can accommodate rising dough—something made from glass or ceramic works beautifully since they retain warmth well during rising.
- Dutch oven – This is where some real magic happens! The Dutch oven creates an ideal environment for baking bread by trapping steam released from the dough as it bakes. This steam helps form that gorgeous crust we all love while keeping the interior moist and airy—it’s absolutely non-negotiable if you want restaurant-quality results at home.
- Parchment paper – A roll of parchment paper is essential for transferring your shaped dough into the hot Dutch oven without burning yourself (trust me on this!). Plus, it prevents sticking so you can lift out your beautiful loaf easily post-bake.
Now that we’ve gathered everything we need let’s move on to preparing our delightful Dutch Oven No Knead Crusty Bread!
Step 1: The Yeast Awakening
In a large mixing bowl, combine your warm water with active dry yeast and fine salt until dissolved—a gentle stir will suffice here! This process invites those dormant yeast cells back to life as they plump up in anticipation of their important role in transforming simple ingredients into something spectacular. Let this mixture rest for about five minutes until frothy bubbles appear on top; this indicates that our yeast is alive and ready to go! If you don’t see any bubbles forming after five minutes, sadly it’s time to start over with fresh yeast because nothing will rise without happy yeast.
Step 2: Flour Power
Once you’ve ensured your yeast has awoken beautifully, it’s time to add in all-purpose flour all at once—the entire quantity! Using a wooden spoon or stiff spatula, mix vigorously until a sticky dough forms; don’t worry if it’s messy—that’s part of its charm! The goal here isn’t perfection but rather creating something rustic yet utterly delectable. As you mix things together vigorously (think back-and-forth motion), you’ll notice how quickly everything comes together—a few lumps are perfectly fine!
Step 3: Rise Up
Cover your bowl tightly with a kitchen towel or plastic wrap—this keeps all those glorious gases inside—and place it somewhere warm for about 2-3 hours until doubled in size (a sunny spot near a window works wonders). Don’t rush this step; let nature do its thing! Patience rewards us with beautifully developed flavors as well as lighter texture once baked—it’s truly magical watching it transform before your eyes!
Step 4: Preheat Your Oven
When you’re nearing the end of rising time (the moment when you can hardly contain your excitement), preheat your oven to 450°F (230°C) with your Dutch oven inside for at least 30 minutes prior to baking—that’s crucial! This encourages even heat distribution throughout while also ensuring our loaf gets nice and steamy when placed inside later on—resulting in that perfect crust we’re aiming for!
This adventure into baking delicious homemade bread continues thrillingly from here onward—so stay tuned as we shape our lovely dough next…
Step 5: The Art of Shaping Your Dough
Now, let’s dive into the magical moment of shaping our dough. After that glorious rise, where the dough doubles in size and fills your kitchen with an intoxicating yeasty aroma, it’s time to turn that sticky mass into something truly beautiful. Gently flour your work surface and your hands; this is crucial because we want to prevent any sticking. Carefully scrape the dough out of the bowl onto your floured surface. You’ll notice it’s incredibly soft and a little bubbly—this is a sign that the yeast has done its job beautifully!
With floured hands, gently stretch and fold the dough over itself a few times to form a loose round shape. You don’t want to knead it or deflate it too much; we’re trying to keep those lovely air pockets that will create a light, airy crumb inside our bread. Think of this step as giving your dough a little hug instead of wrestling with it. If you see any stubborn bits sticking, sprinkle just a touch more flour as needed, but don’t go overboard—too much flour can weigh down our masterpiece. Once shaped, place the dough on a piece of parchment paper—this will make transferring it later so much easier.
Cover it lightly with a kitchen towel and let it rest for about 30 minutes while your oven preheats. This resting period is essential; not only does it allow gluten to relax, which helps maintain its shape during baking, but it also gives us a head start on developing flavor profiles through fermentation. Trust me on this: taking your time here will reward you with an even better texture and depth of flavor in your final loaf.
Step 6: Preheating Your Dutch Oven—A Critical Step
Now we arrive at a pivotal moment: preheating the Dutch oven. This step is absolutely paramount for achieving that crusty exterior that we all crave in artisan bread! Start by placing the empty Dutch oven (with its lid) in the oven and set the temperature to 450°F (about 232°C). Allowing the Dutch oven to heat up for at least 30 minutes is non-negotiable; this intense heat creates steam when you add the dough, which helps develop that beautiful golden crust while keeping the inside moist and tender.
While you’re waiting, take a moment to breathe in the delightful aromas wafting from your rising dough—it’s one of life’s simple pleasures! You might be wondering why we need such high temperatures. The science behind this is pretty fascinating: when bread bakes at such high heat, it undergoes what’s known as “oven spring,” where the yeast continues to produce gas until it’s killed off by the heat. This creates those lovely air bubbles inside your loaf that make it so irresistible.
As you approach the end of your preheat time, carefully remove both parts of the Dutch oven using oven mitts (it’ll be scorching hot!). I know it’s tempting to rush this step when you’re excited about bread, but please give yourself grace here; taking time ensures every piece works together beautifully in harmony!
Step 7: The Grand Transfer—From Paper to Pot
This next step is where all your hard work pays off! With your parchment paper ready and your dough rested beautifully, it’s time for what I like to call “the grand transfer.” Grab those corners of parchment paper gently and lift your shaped dough right into that hot Dutch oven. It might feel like magic when you see how effortlessly it sits inside! Do remember not to drop it from too high; we want to preserve those precious air bubbles we’ve worked so hard for.
Once your dough is nestled comfortably within its new home, cover with the lid immediately—you want to trap all that steam inside! This steam is crucial because it keeps moisture close to our loaf during those first critical moments of baking, allowing for expansion without forming a crust prematurely. If you’re feeling adventurous or want an extra crispy crust (and who doesn’t?), consider adding ice cubes around the base of your pot just before covering; these will create additional steam.
Now set your timer for 35-40 minutes. As you wait (perhaps sipping on some tea or coffee), take note of how difficult patience can be when you know something delicious is bubbling away just out of sight! Try not to peek too often during this time; every glance lets precious heat escape!
Step 8: The Final Bake—Uncovering Brilliance
As you approach those last few minutes with anticipation bubbling inside you like a fresh batch of soda pop, it’s time for one last transformation: uncovering our loaf for its final bake! Carefully remove the lid from your Dutch oven after 35-40 minutes; prepare yourself for an utterly intoxicating sight—the smell alone will have everyone flocking towards the kitchen!
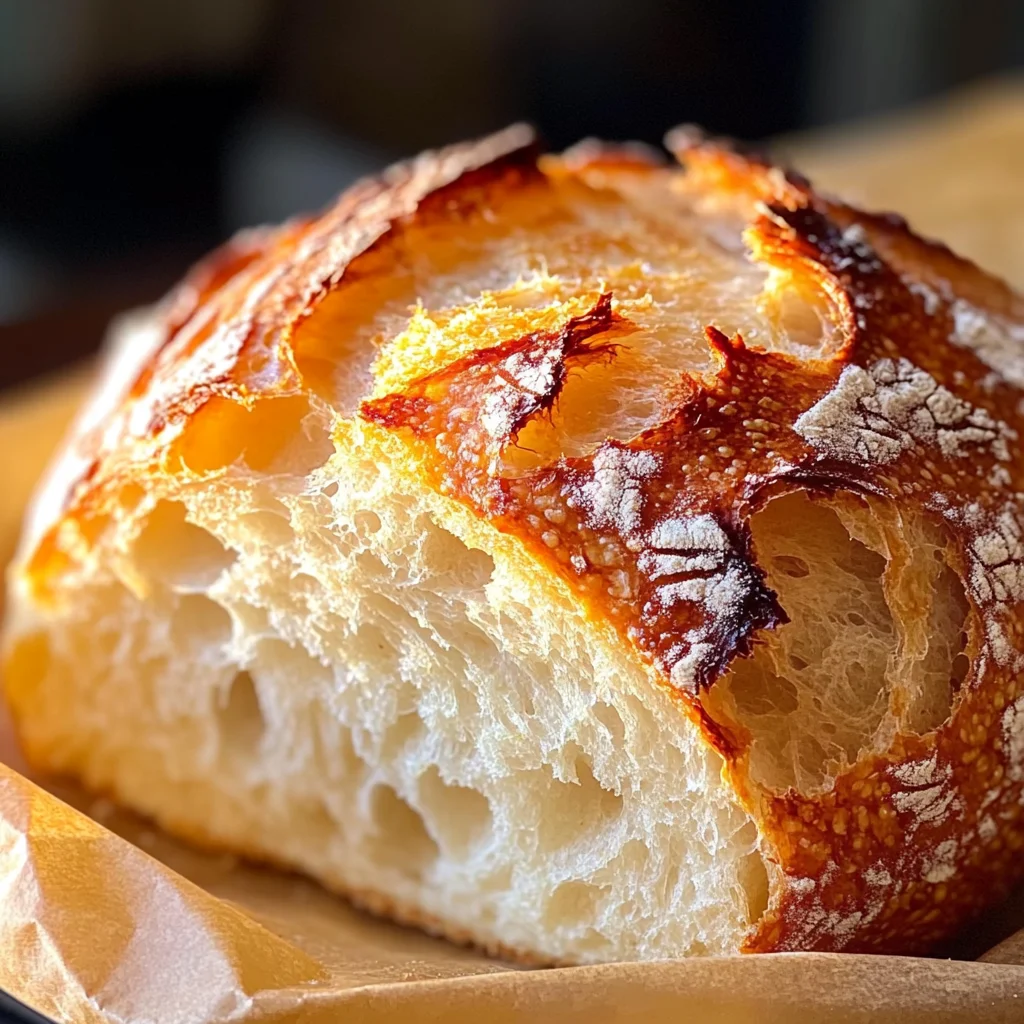
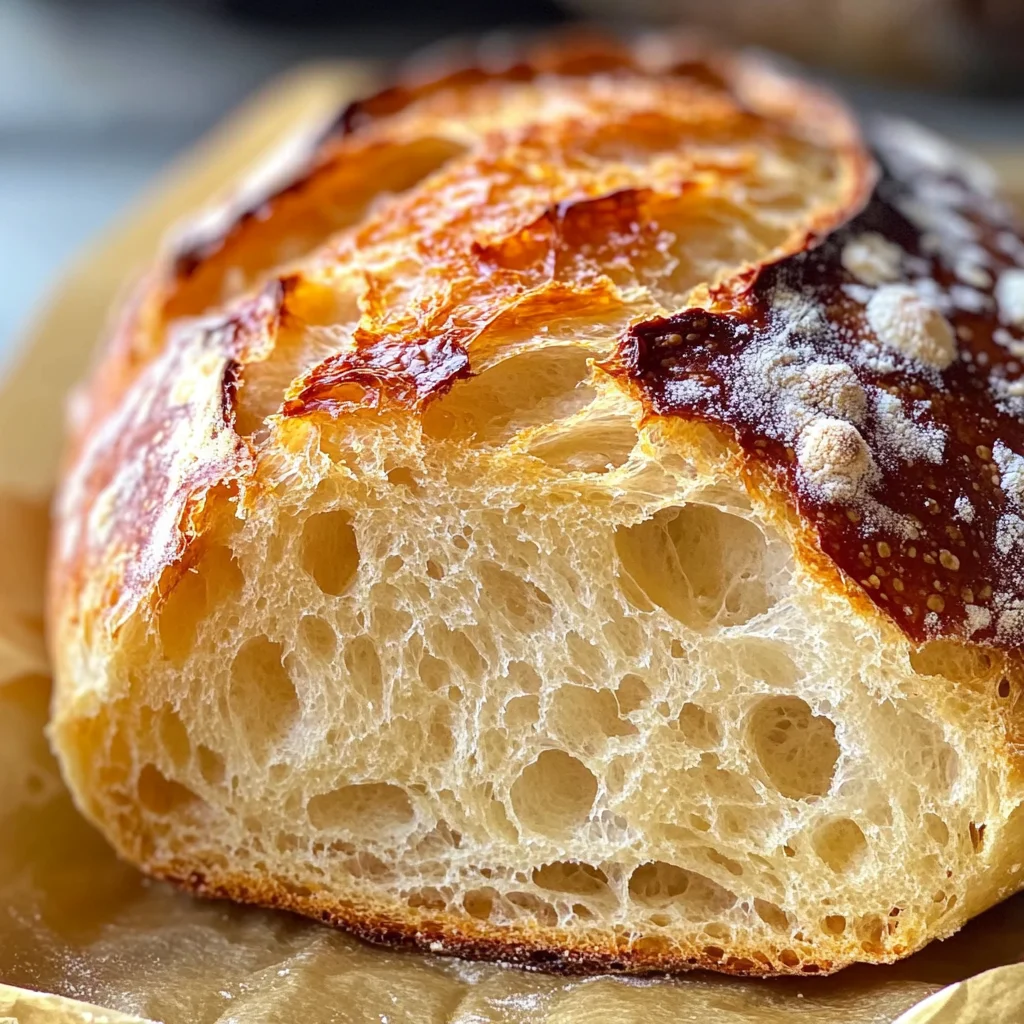
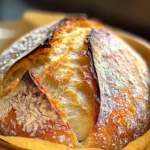
At this stage, you’ll witness your loaf’s crust begin to turn an alluring shade of golden brown—a sign that all is going according to plan! Let it bake uncovered for an additional 5-10 minutes until it’s reached that perfect hue and sounds hollow when tapped on top—a sound frankly music to any baker’s ears! Keep an eye on it during these last moments because ovens can vary widely; if yours runs hot or cold, adjust accordingly.
When you finally pull out that dutch oven masterpiece, let out a sigh of relief mixed with sheer delight—you’ve done something extraordinary here! Remember though—it’s crucial now to resist slicing into it immediately despite how tantalizingly delicious it looks and smells right out of the oven. Cooling on a rack for at least ten minutes allows steam trapped inside to escape safely while setting up its crumb structure perfectly.
Conclusion:
As we wrap up this delightful journey through the recipe of Dutch Oven No Knead Crusty Bread, I hope you’re feeling inspired and excited to embark on this culinary adventure! There’s something profoundly satisfying about creating such a simple yet extraordinary loaf with just a handful of ingredients. The contrast between the robust crust and the tender crumb creates an irresistible experience that transcends mere sustenance; it’s pure comfort food that warms both heart and soul.
Why is this recipe a must-try? Because it’s not just about taste; it’s about the sheer joy of making something so rewarding with minimal effort. Picture pulling your Dutch oven from the oven—steam wafts up carrying the scent of warm bread that fills your kitchen with an intoxicating aroma. Whether it’s served alongside a hearty soup during chilly evenings or as an accompaniment at family gatherings, this bread fits seamlessly into any occasion. It’s versatile enough to shine at breakfast too, perhaps toasted with a slathering of butter or topped with creamy avocado.
Imagine savoring one slice with homemade hummus while sipping herbal tea on a lazy afternoon or piling slices high with roasted vegetables and creamy spreads for an unforgettable sandwich experience. For an indulgent treat, try enjoying it as French toast drizzled with maple syrup—a wholly unexpected yet utterly divine twist!
Feeling adventurous? This recipe is wonderfully adaptable—you can incorporate herbs like rosemary or thyme into the dough for an aromatic kick or even fold in cheese before baking for an indulgent cheesy surprise. You could also experiment by adding seeds like sesame or poppy for added texture and flavor! I encourage you to make this recipe your own—play with flavors and textures until it sings uniquely to you. I can’t wait for you to try it out; share your experience with friends and family because nothing brings people together quite like homemade bread!
Dutch Oven No Knead Crusty Bread
Baking homemade bread has never been easier or more rewarding than with this Dutch Oven No Knead Crusty Bread recipe. This simple, no-knead technique transforms basic ingredients into a golden, crusty loaf that is both visually stunning and deliciously inviting. The process requires just five minutes of active preparation, allowing time for the dough to rise and develop rich flavors. Imagine the satisfaction of pulling a perfectly baked loaf from the oven, its crackling crust hinting at the soft, airy interior within. Whether served alongside soups or enjoyed on its own with butter, this artisan bread will impress family and friends alike. Dive into this delightful baking adventure and enjoy the wonderful aromas and warm memories created with each slice.
- Prep Time: 5 minutes
- Cook Time: 45 minutes
- Total Time: 50 minutes
- Yield: Approximately 12 servings 1x
- Category: Bread
- Method: Baking
- Cuisine: Homemade
Ingredients
- 1 1/2 cups warm water (about 100°F)
- 1 packet active dry yeast (2.25 teaspoons)
- 1 ½ teaspoons fine grain salt
- 3 1/4 cups all-purpose flour
Instructions
- In a large mixing bowl, combine warm water, active dry yeast, and salt until dissolved. Let it rest for about five minutes until frothy.
- Add all-purpose flour to the mixture at once and stir vigorously until a sticky dough forms.
- Cover the bowl with a kitchen towel and place it in a warm area for about 2-3 hours until doubled in size.
- Preheat your oven to 450°F (232°C) with your Dutch oven inside for at least 30 minutes.
- Gently scrape the risen dough onto a floured surface and shape it into a round without deflating it too much.
- Transfer the dough on parchment paper into the hot Dutch oven and cover with the lid.
- Bake covered for 35-40 minutes, then uncover and bake for an additional 5-10 minutes until golden brown.
- Allow to cool on a rack for at least ten minutes before slicing.
Nutrition
- Serving Size: 1 slice (50g)
- Calories: 130
- Sugar: 0g
- Sodium: 150mg
- Fat: 0g
- Saturated Fat: 0g
- Unsaturated Fat: 0g
- Trans Fat: 0g
- Carbohydrates: 27g
- Fiber: 1g
- Protein: 4g
- Cholesterol: 0mg