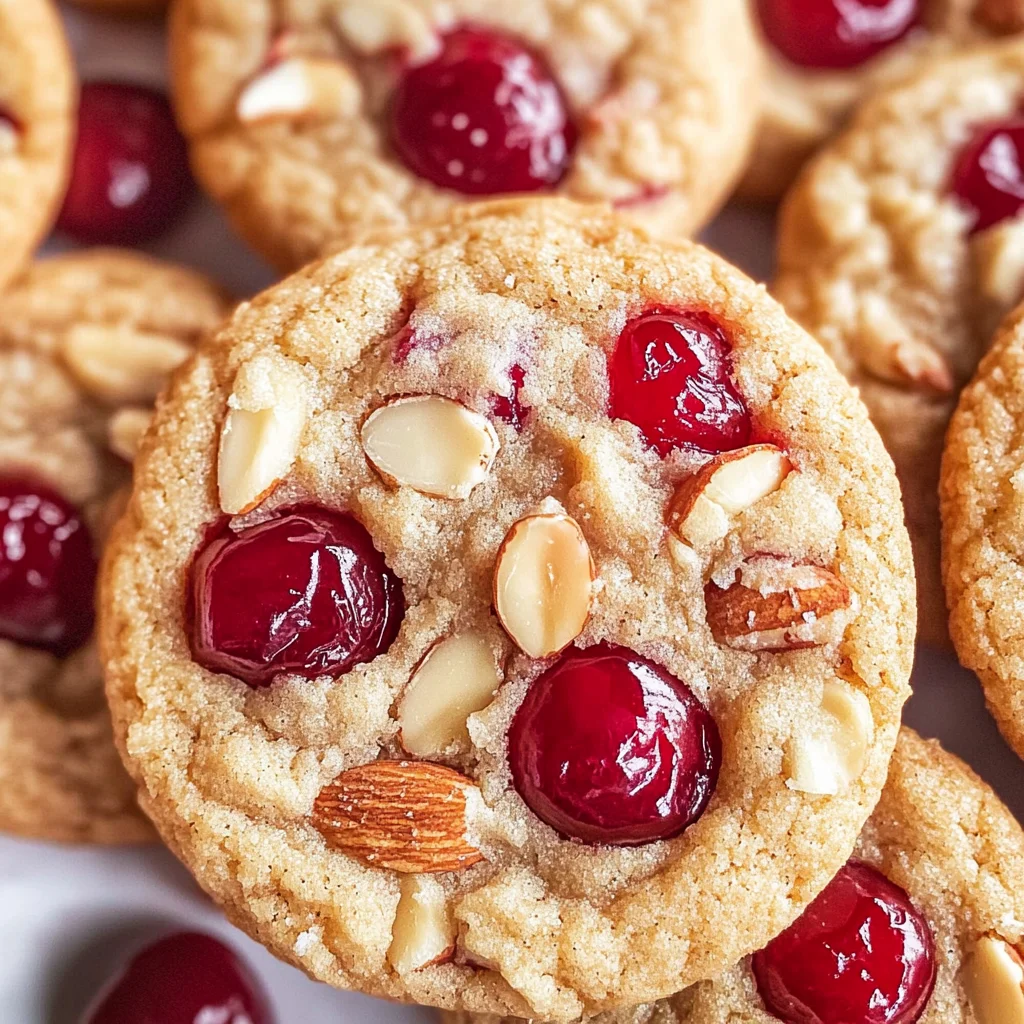
Cherry Almond Cookies
There’s something undeniably magical about the aroma of freshly baked cookies wafting through the air. It has a way of wrapping around you like a warm hug, stirring up memories of childhood kitchens and family gatherings. Today, I want to share with you an utterly delightful recipe that embodies this spirit: Cherry Almond Cookies. These soft, chewy treats are bursting with vibrant maraschino cherries and complemented by the fragrant essence of almond. Imagine biting into a cookie that is not just a sweet indulgence but a joyful experience—a symphony of flavors that dances on your palate and brings smiles to everyone around you. Trust me when I say these will be a hit at any gathering, or even just as a comforting treat for yourself after a long day.
The beauty of these Cherry Almond Cookies lies not only in their taste but also in their simplicity. This is a NO CHILL bakery-style cookie recipe, meaning there’s no waiting around for your dough to rest in the fridge—who has time for that when cravings strike? You’ll find that the quick and easy dough comes together seamlessly, thanks to melted butter and those lovely maraschino cherries that add both sweetness and a pop of color. Each bite feels like a celebration, bringing together timeless ingredients in a way that feels both nostalgic and fresh. So grab your apron and let’s embark on this delicious adventure together!
Ingredients:
As we prepare to dive into this culinary journey, let’s gather our star ingredients. Each one plays a vital role in creating the perfect Cherry Almond Cookies, combining flavors and textures that make every bite special.
- 1 – 12 ounce jar maraschino cherries*, diced small and patted dry (340g). These charming little cherries are the heart of our cookies—they infuse each bite with sweetness and a hint of tartness. When selecting your maraschino cherries, look for ones that are vibrant in color without any unpleasant aftertaste; you want them to enhance your cookies rather than overwhelm them. Be sure to pat them dry after dicing; this crucial step prevents excess moisture from making your cookie dough too wet, ensuring they bake up perfectly chewy.
- ½ cup unsalted butter, melted (113g). Melted butter is indispensable here because it creates that soft texture we crave in cookies while also allowing the sugars to dissolve beautifully into the mixture. The richness of unsalted butter gives us control over the salt content; it’s paramount for balancing flavors effectively. If you’re feeling adventurous, using European-style butter can elevate the flavor profile with its higher fat content—this means richer cookies! Remember, letting your melted butter cool slightly before adding it helps prevent scrambling your egg later on.
- ¾ cup granulated sugar (150g). This classic sugar is essential for sweetness but also contributes to our desired texture—the granules help create little pockets of air during mixing, leading to softer cookies. Granulated sugar caramelizes during baking, giving our cookies those irresistible golden edges. While we could substitute with other sweeteners, nothing quite mimics the results achieved with good old granulated sugar.
- ¼ cup brown sugar (50g). Brown sugar brings depth and moisture to our cookies thanks to its molasses content. This ingredient is non-negotiable if you’re aiming for rich flavor notes and chewiness! It not only enhances the sweetness but also contributes slightly to chewiness—trust me when I say this dual-sugar approach makes all the difference.
- 1 large egg. Eggs are so much more than just an ingredient—they act as binders that hold everything together while providing structure as they cook. A large egg will give us enough moisture without weighing down our delicate cookie dough; it’s absolutely essential for achieving that perfect texture.
- 1 teaspoon pure almond extract. This is where things get exciting—the almond extract adds a heavenly fragrance and flavor profile that complements our cherry marvelously! Be sure to use pure extract rather than imitation; you’ll appreciate how much more vibrant and authentic it tastes in these cookies.
- 2 teaspoons maraschino cherry juice. Don’t toss out the cherry juice! Instead, let’s harness its sweet brightness by adding it right into our dough—it ties everything together beautifully while amplifying those cherry flavors we love so much.
- 1 teaspoon vinegar. You might wonder why vinegar makes an appearance here—it’s actually an acid that helps activate our baking soda later on! This step ensures our cookies rise perfectly without becoming overly dense or heavy; it’s crucial for lightness.
- ½ teaspoon baking soda. Baking soda is our trusty leavening agent; it reacts with acids (like vinegar) to create carbon dioxide bubbles during baking, which helps our cookies rise beautifully while developing that lovely crispy edge we adore.
- ½ teaspoon kosher salt. Salt is often overlooked but plays an important role in balancing sweetness; it enhances flavors across the board! Using kosher salt gives us larger crystals which dissolve well without making things overly salty—it’s just right for these treats.
- 1 ¾ cups all-purpose flour (220g). Flour is what gives structure to our cookie creation; however, too much can lead to dry cookies while too little won’t allow them to hold their shape at all! When measuring flour, be sure not to pack it down in your measuring cup; instead spoon it lightly into your cup then level it off for precision—this simple technique can mean the difference between success and failure!
Equipment You’ll Need:
Before we dive into mixing up this delightful cookie dough, let’s make sure we have all the right tools on hand! Having the proper equipment not only speeds up the process but also makes everything smoother—and who doesn’t appreciate an easier baking experience?
- Mixing bowls – You’ll need at least two: one large bowl for mixing your wet ingredients and another medium bowl for sifting together dry ingredients if you prefer! A sturdy glass or ceramic bowl works best as they retain heat well while mixing.
- Whisk – Opting for a whisk helps break up lumps easily when incorporating sugars into melted butter or eggs while creating an airy mixture—this is key for achieving fluffy texture!
- Spatula or wooden spoon – Perfect for folding in those gorgeous cherry bits gently without crushing them; this step ensures you maintain their integrity throughout baking!
- Baking sheets – A good quality non-stick or parchment-lined sheet pan allows even cooking of each batch without sticking issues—a must-have tool when you’re making multiple trays of these sensational cookies!
- Silicone baking mat (optional) – If you want effortlessly easy cleanup along with perfectly baked bottoms every time, investing in silicone mats will do wonders!
Having these tools ready will set you up perfectly as we move forward into creating these scrumptious Cherry Almond Cookies!
Preparing the Cherry Almond Cookies
Step 1: Prepare Your Cherries
Let’s start by prepping those beautiful maraschino cherries because they are truly the star here! Carefully remove them from their jar and place them on a layer or two of paper towels—this may seem tedious but trust me on this one! We’re going to slice each cherry first in half then further into tiny pieces so they’ll disperse evenly throughout your cookie dough; think about getting around 12 small pieces per cherry nestled within each delightful bite! Once chopped finely enough (and don’t forget about those pesky stems if any), transfer them onto another paper towel layer—you’ll want every bit of excess moisture blotted away before proceeding because soggy cherries will lead us down a path toward watery cookie dough instead of soft chews filled with fruit goodness!
Step 2: Preheat Your Oven
Now it’s time for some action—preheat your oven to 350°F (175°C) so we’re ready when our dough comes together! As soon as you start mixing ingredients together next door while aromas fill up your kitchen space from melted butter mingling with sugars—you’ll notice how quickly things escalate once warm air circulates through those oven vents too! Meanwhile set aside two sheet pans lined either with parchment paper or silicone mats—it’s essential not only for preventing sticking but also enables even browning as they bake away happily inside.
Step 3: Combine Wet Ingredients
In a medium-to-large bowl that’s been patiently waiting near by grab hold of melted butter now cooled slightly since last check-in—it should feel pleasantly warm yet not hot enough to scramble anything else added soon after! Whisk both granulated (¾ cup/150g) & brown sugars (¼ cup/50g) together until fully incorporated—this process forms tiny pockets within mixture allowing air bubbles develop which ultimately leads towards lighter textures upon baking… Isn’t science incredible? Once smooth consistency achieved go ahead add one egg along with almond extract plus cherry juice & vinegar too! Continue whisking until combined smoothly; you’ll see how everything blends seamlessly creating an inviting base before moving onto next stage…
Step 4: Incorporate Dry Ingredients
Sprinkle baking soda along with kosher salt evenly across mixture stirring carefully until fully combined—and here’s where patience pays off folks: slowly fold-in flour (1 ¾ cups/220g) till just barely mixed leaving small bits remaining untouched—that’s okay don’t rush please… It’s crucial not overmix here where gluten develops ruining tenderness sought after outcome instead—we want gentle hands guiding dough rather than forceful ones… Finally fold those prepped maraschino cherries into dough incorporating subtly throughout ensuring bright pops await inside each morsel once baked golden brown perfection arrives shortly thereafter!
And there you have it—each step lovingly crafted towards bringing forth Cherry Almond Cookies full circle—from prepping juicy delights straight through mixing mechanics leading us closer towards divine indulgence awaiting patiently ahead beckoning every taste bud alive!
Step 5: Incorporating the Dry Ingredients to Create a Perfect Dough
Now, let’s talk about the next step in our cookie-making journey, which is absolutely paramount for achieving that soft and chewy texture we all crave. Once you’ve whisked in your baking soda (½ teaspoon) and kosher salt (½ teaspoon) into the buttery sugar mixture, it’s time to introduce the flour (1 ¾ cups/220g). This is where we create the structure of our cookies, so pay close attention! When adding the flour, gently sprinkle it over the wet mixture rather than dumping it in all at once. This helps ensure that everything blends together smoothly and evenly, avoiding any clumps that might form if you rush this step.
Using a spatula or wooden spoon, stir just until you notice that there are still a few streaks of flour remaining—this is crucial because overmixing can lead to tough cookies rather than the tender bites we desire. Remember that gluten develops when flour is mixed with liquid; we want just enough mixing to combine everything without activating too much gluten. After you’ve combined most of the ingredients, it’s time for one of my favorite parts: gently folding in those chopped maraschino cherries! These bright red jewels add not only a burst of flavor but also a delightful chewiness that enhances every bite. As you fold them in with care, take a moment to appreciate how vibrant and inviting your dough looks; trust me, it’s going to be utterly intoxicating once baked.
Step 6: Scooping Out Your Cookie Dough
With your dough now perfectly blended and speckled with cherry goodness, it’s time to get down to business—scooping! Using about 2 tablespoons of dough per cookie is ideal; I find that using a size 30 scoop makes this process effortlessly delightful. If you don’t have a scoop handy, simply use two spoons to measure out equal amounts of dough. The key here is consistency; uniform cookies will bake evenly and prevent some from being overdone while others remain underbaked. As you place each scoop onto your prepared baking sheets—spaced about 2 inches apart—don’t be alarmed if they look a bit mounded at this stage; they will flatten beautifully as they bake.
Ensure that your oven is preheated to 350°F (175°C) before placing these beauties inside; this initial heat shock helps set the edges while keeping the centers delightfully chewy. And remember, when arranging your cookies on the sheet pan, give them room to spread! This step not only allows for beautiful cookie formation but also ensures even airflow during baking, which contributes significantly to achieving that bakery-style finish we all adore.
Step 7: Baking Your Cherry Almond Cookies
Now comes the exhilarating moment we’ve been waiting for: baking! Slide those trays filled with your lovingly crafted cookie dough into your preheated oven and let them work their magic. Set a timer for 10-12 minutes—watching them closely as they rise and spread into glorious little rounds of joy. You’ll know they’re ready when the edges are set but the centers still look slightly soft; this contrast is what gives us that lovely chewy texture we’re after.
If you’re wondering why we aim for this specific doneness, well, it’s all about carryover cooking! Even after you pull them from the oven, they’ll continue to cook slightly on the sheet pan due to residual heat. So don’t be tempted to leave them in too long; trust me on this one—overbaking will result in cookies that are more crunchy than chewy and that’s simply not what we’re after here! Once they’re out of the oven, allow them to rest on the pan for about two minutes before transferring them to a wire rack. This resting period allows them to firm up slightly while still retaining their tender interiors.
Step 8: The Perfect Cooling Process
After letting those gorgeous cookies rest on the baking sheet for a couple of minutes, it’s time for another essential step—the cooling process! Gently transfer each cookie onto a wire rack using a spatula or tongs; this cooling method is vital as it allows air circulation around each cookie, preventing sogginess while ensuring they maintain their delightful chewiness throughout. The aroma wafting through your kitchen during this phase? It’s nothing short of heavenly!
While I know it’s tempting to dive right into these warm delights, giving them time to cool completely will enhance their flavor profile exponentially. As they cool down, you’ll notice how flavors meld together beautifully—from the sweet cherries bursting forth with every bite to the comforting warmth of almond notes enveloping your palate—it becomes an experience rather than just eating a cookie! Plus, cooled cookies are easier to handle if you’re planning on storing them or sharing with friends and family.
Next Major Phase – Adding Finishing Touches
As we round out our Cherry Almond Cookies adventure, let’s talk about those final touches that truly elevate these treats from delightful snacks into extraordinary desserts worthy of any occasion—be it simple gatherings or festive celebrations.
Step 9: The Finishing Touches
Once completely cooled on your wire rack (which takes about 10-15 minutes), it’s time for an optional yet incredibly rewarding finishing touch: decorating with a light dusting of powdered sugar or perhaps drizzling some melted dark chocolate over top if you want an extra layer of flavor complexity. A light sprinkle of powdered sugar adds an elegant touch reminiscent of fresh snowfall on winter mornings—an utterly charming element!
When drizzling chocolate, melt some dairy-free chocolate chips in a microwave-safe bowl at half power in short intervals (15-20 seconds), stirring frequently until smooth and glossy; then grab a fork or piping bag and drizzle away! This final touch not only enhances visual appeal but also introduces another layer of richness that complements those sweet cherries beautifully.
And there you have it—your Cherry Almond Cookies are now ready for sharing (or indulging solo!). Each bite carries an explosion of flavor and warmth—a true testament to what can happen when simple ingredients come together through love and care in our kitchens. Enjoy every crumb knowing you’ve created something truly magical!
Storage and Enjoyment Tips for Your Cherry Almond Cookies
Now that your Cherry Almond Cookies are baked to perfection, it’s time to savor every bite! But let’s be honest—if you’re like me, you’ll want to enjoy these delightful treats over a few days. Luckily, I’ve got some fantastic tips to help you store them so they maintain that soft, chewy goodness we all adore. Trust me, preserving these little gems is just as important as baking them!
Storing Leftover Cherry Almond Cookies
To keep your Cherry Almond Cookies in their prime, store them in an airtight container at room temperature. This simple step is crucial because exposure to air can lead to dryness, which we certainly want to avoid! When stored properly, these cookies can last for about five days—though they’ll likely be devoured much earlier! For an extra touch of magic, consider placing a slice of bread in the container; the moisture from the bread helps keep the cookies fresh and soft. After storage, you’ll find that the flavors meld beautifully, creating an even more profound taste experience with each bite. If you ever feel like treating yourself again, simply pop them in the microwave for 5-10 seconds; you’ll be back in cookie heaven in no time!
Freezing Cherry Almond Cookies for Later
Want to save some of these delightful cookies for a later date? Freezing is an excellent option! To do this, allow your cookies to cool completely first—this step prevents ice crystals from forming. Then, layer them between sheets of parchment paper in a freezer-safe container or zip-top bag. They’ll stay fresh frozen for about three months! The best part? When you’re ready for a treat, simply pull out as many cookies as you want and let them thaw at room temperature or warm them up briefly in the oven. This not only gives you the convenience of having a sweet snack on hand but also ensures that any sudden craving can be satisfied almost instantly. How wonderful is that?
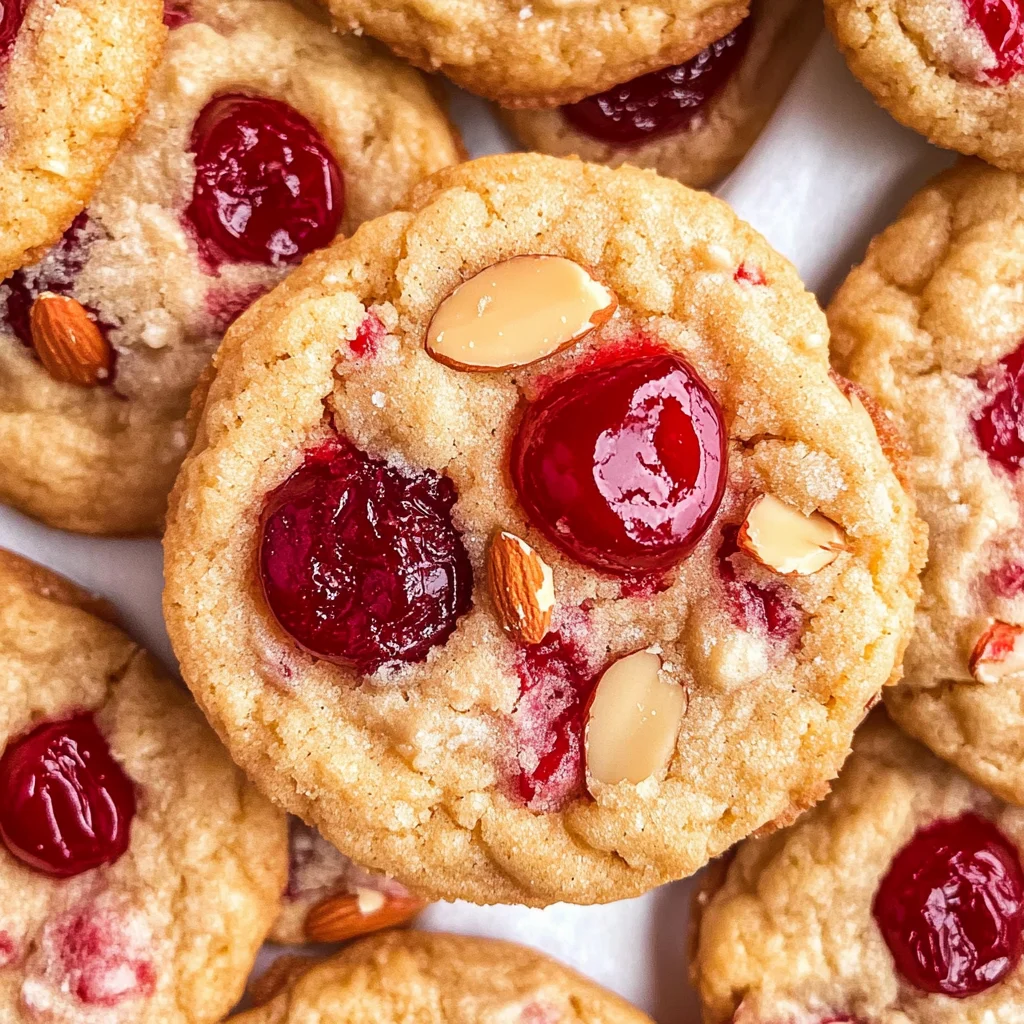
Cherry Almond Cookies
Indulge in the delightful world of Cherry Almond Cookies, where every bite takes you on a flavorful journey. These soft and chewy treats are not only a feast for the taste buds but also a nostalgic reminder of childhood baking adventures. With vibrant maraschino cherries folded into a rich cookie dough infused with almond essence, these cookies are perfect for any occasion—whether you’re hosting a gathering or treating yourself after a long day. Best of all, this recipe is incredibly simple and requires no chilling time, so you can satisfy your cravings in no time. Get ready to enjoy warm, fresh-baked cookies that will bring smiles to everyone around!
- Prep Time: 15 minutes
- Cook Time: 12 minutes
- Total Time: 27 minutes
- Yield: Approximately 24 cookies 1x
- Category: Dessert
- Method: Baking
- Cuisine: American
Ingredients
- 12 oz jar maraschino cherries, diced small and patted dry
- ½ cup unsalted butter, melted
- ¾ cup granulated sugar
- ¼ cup brown sugar
- 1 large egg
- 1 teaspoon pure almond extract
- 2 teaspoons maraschino cherry juice
- 1 teaspoon vinegar
- ½ teaspoon baking soda
- ½ teaspoon kosher salt
- 1¾ cups all-purpose flour
Instructions
- Preheat your oven to 350°F (175°C) and prepare two baking sheets with parchment paper.
- In a large mixing bowl, whisk together melted butter, granulated sugar, brown sugar, egg, almond extract, cherry juice, and vinegar until smooth.
- In another bowl, combine baking soda and kosher salt with the flour. Gradually mix the dry ingredients into the wet mixture until just combined.
- Gently fold in the diced maraschino cherries.
- Scoop about 2 tablespoons of dough onto the prepared baking sheets, spacing them about 2 inches apart.
- Bake for 10-12 minutes or until edges are set but centers are slightly soft. Allow to cool on the pan for two minutes before transferring to a wire rack.
Nutrition
- Serving Size: 1 serving
- Calories: 130
- Sugar: 8g
- Sodium: 90mg
- Fat: 6g
- Saturated Fat: 3g
- Unsaturated Fat: 2g
- Trans Fat: 0g
- Carbohydrates: 18g
- Fiber: <1g
- Protein: <1g
- Cholesterol: 20mg