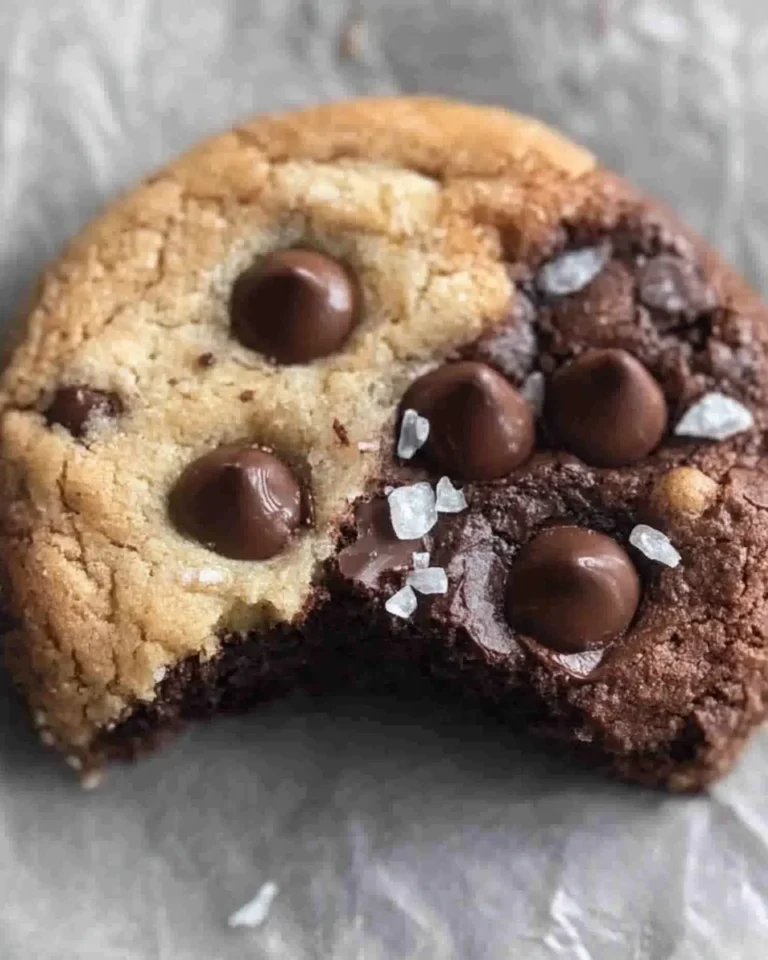
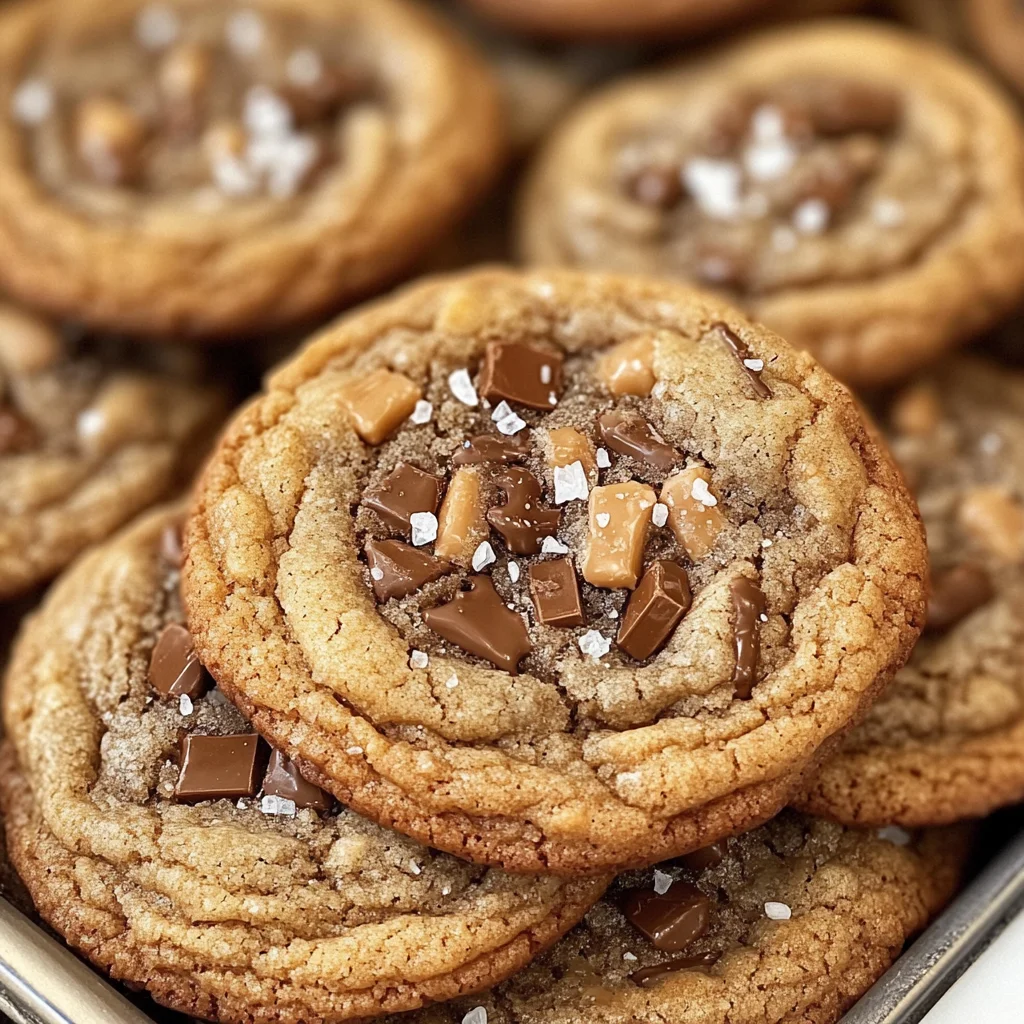
Brown Butter Coffee Toffee Cookies
Indulge in the delightful world of baking with these Brown Butter Coffee Toffee Cookies. There’s something truly magical about transforming simple ingredients into a warm, inviting treat that fills your home with comforting aromas and creates moments of pure joy. Imagine the rich, nutty scent of brown butter wafting through your kitchen as you prepare to bake. It’s not just a recipe; it’s an experience that bridges cherished memories and modern flavors. With every bite, you’ll savor the harmonious dance between sweet toffee bits and a rich coffee kick, all beautifully finished with a sprinkle of flaky sea salt. These cookies are perfect for any occasion – whether you’re hosting friends or simply indulging yourself in a well-deserved treat, they promise to elevate your dessert game.
As a self-proclaimed coffee lover, I’ve always been captivated by how this beloved beverage can enhance our culinary creations. The addition of espresso powder doesn’t merely bring a caffeine boost; it deepens the flavor profile, complementing the sweetness of the toffee in an utterly intoxicating way. It’s that perfect blend of sweet and salty goodness that keeps you coming back for more. I promise you, once you try these Brown Butter Coffee Toffee Cookies, you’ll understand why they hold such a special place in my heart – they’re like little bites of happiness wrapped in chewy perfection!
Brown Butter Coffee Toffee Cookies: A Chewy Delight for Coffee Lovers
Let’s embark on this delicious journey together! Baking is not just about following instructions; it’s about infusing love into every step and creating something beautiful from scratch. With just a handful of ingredients and some patience, you’ll whip up these decadent cookies that will have everyone asking for the recipe.
Ingredients:
Baking is much like alchemy; each ingredient plays its role in creating something extraordinary. As we gather our ingredients for these Brown Butter Coffee Toffee Cookies, let’s take a moment to appreciate what each one brings to the table.
-
½ cup (113.5 g) unsalted butter: This is where our magic begins! Unsalted butter allows us to control the sodium levels in our cookies. When we brown it over medium heat, we unlock a symphony of nutty flavors that add depth to our cookies. Watch as it transforms from liquid gold to a gorgeous amber hue, releasing an irresistible aroma that will make your heart sing. Using high-quality butter here can elevate your cookies significantly—look for European-style butters with slightly higher fat content for an even richer result.
-
1 tablespoon espresso powder: This is the secret weapon that takes our cookies from ordinary to extraordinary! Espresso powder intensifies the coffee flavor without adding any liquid—perfect for keeping our dough consistency just right. It seamlessly blends into our batter, enriching every single bite with its deep, robust essence. If you’re feeling adventurous, try adding more or using freshly ground coffee beans for an even bolder taste!
-
¾ cup (165 g) brown sugar: Ahh, brown sugar—the sweet sibling of granulated sugar! Its molasses content gives our cookies moisture and chewiness while imparting a lovely caramel undertone that pairs beautifully with our browned butter and espresso powder. When selecting brown sugar, ensure it’s packed nicely in your measuring cup; this helps achieve that perfect texture we’re after!
-
¼ cup (50 g) granulated sugar: While brown sugar does most of the heavy lifting when it comes to flavor and moisture, granulated sugar contributes to the structure and crispness on the edges of our cookies. The contrast between chewy centers and slightly crunchy edges is absolutely essential for cookie perfection!
-
1 large egg, room temperature: Eggs play a crucial role in binding our ingredients together while adding richness and moisture to our batter. Using them at room temperature ensures they incorporate smoothly into our dough—trust me on this one! You don’t want any lumps disrupting your cookie’s texture.
-
½ tablespoon vanilla extract: This humble ingredient often goes unnoticed but is absolutely paramount in elevating flavors! A good quality vanilla extract adds warmth and depth to our cookies, enhancing all those beautiful notes we’ve developed through browning butter and using espresso powder.
-
¼ teaspoon baking powder & ½ teaspoon baking soda: These two leavening agents work hand-in-hand to lift our cookies ever so slightly while contributing to their delightful texture. Baking soda is particularly important here because it reacts with acidity (in this case from the brown sugar), helping create those lovely chewy edges we crave!
-
½ teaspoon salt: Salt isn’t just an afterthought; it enhances sweetness by balancing flavors perfectly! A pinch brings out all those amazing notes present in both chocolate and coffee while preventing any overly sweet aftertaste.
-
¼ cup (175 g) all-purpose flour: Flour provides structure to our cookies—too much can lead to dry results while too little makes them fall apart! I recommend spooning flour into your measuring cup rather than scooping directly so you don’t accidentally pack it down too much.
-
½ cup (80 g) Heath toffee bits with chocolate: Ahh…the grand finale! These delightful morsels deliver bursts of buttery sweetness coupled with hints of chocolatey goodness throughout each cookie bite—a true match made in heaven if you’re a fan of sweet treats!
-
Flaked sea salt for topping: Just before baking, we’ll sprinkle these beauties with flaked sea salt which will give each cookie a little extra pizzazz! That contrast between sweet and salty enhances every flavor note beautifully—a non-negotiable step if you ask me!
Equipment You’ll Need:
Now that we’ve gathered all these wonderful ingredients, let’s talk about the tools that will help us bring them together into something truly special. Having the right equipment makes all the difference when creating delicious treats like these Brown Butter Coffee Toffee Cookies.
-
Medium saucepan – This will be your best friend during the browning process! A medium saucepan allows even heat distribution which is crucial when melting butter without burning it—important because burnt butter would ruin everything we’ve worked towards so far!
-
Stand mixer or mixing bowl with whisk attachment – Whether you choose a stand mixer or opt for good old-fashioned elbow grease with a whisk depends on how fancy you’re feeling today! Either way works fine; just remember that mixing thoroughly until light and fluffy is key here—as air incorporation leads us closer toward cookie perfection!
-
Parchment paper or silicone baking mat – No one enjoys sticky situations around here—so lining your baking sheets prevents any potential sticking disasters later on during cleanup time! Both options promote even cooking while ensuring easy removal post-baking.
-
Wire rack – Once baked golden perfection emerges from your oven’s warmth, using cooling racks allows air circulation underneath which prevents sogginess—a detail worth considering if you want those chewy textures intact!
With each step taken towards crafting these delectable Brown Butter Coffee Toffee Cookies comes excitement as aromatic scents fill your kitchen—let’s dive right into preparing this delightful treat!
Step 1: Brown Your Butter
To begin this delicious adventure, we first need to transform our unsalted butter into golden-brown perfection through browning—a technique where milk solids caramelize under gentle heat producing an utterly intoxicating aroma! In your medium saucepan over medium heat (no need for rushing here), melt ½ cup of unsalted butter while stirring constantly until golden brown flecks appear at bottom along with nutty fragrance wafting through kitchen air—it might feel like forever but trust me—it’ll be worth every second spent watching this transformation unfold before eyes! Once you’ve achieved that lovely amber color (approximately 5–7 minutes), remove from heat immediately because burnt butter tastes bitter—not what we’re aiming for here at all! Transfer carefully into another bowl where we’ll mix in espresso powder allowing flavors meld beautifully as they cool together—this mixture should rest in refrigerator until solidified again—give it about 1–2 hours (patience pays off).
Step 2: Prepare Your Dough
After allowing enough time for browned buttery goodness paired beautifully alongside espresso infusion cool down nicely—we can finally get started on preparing dough itself using either stand mixer or mixing bowl method depending on preference! Beat solidified mixture along with both sugars together at medium-high speed until light fluffy texture forms—this process known as creaming incorporates air bubbles ensuring soft chewy centers later on once baked correctly; don’t rush this step because skipping could result in dense final product instead fluffy delights everyone craves when indulging sugary treats like ours here today!
Step 3: Add Egg & Vanilla
Next up comes adding one large room-temperature egg alongside half tablespoon vanilla extract—all vital components bringing further moisture richness enhancing overall flavor profile throughout entire batch whilst providing additional structure through binding elements present therein too! Mix gently yet thoroughly until everything combines harmoniously; keep an eye out since sometimes wet ingredients may separate momentarily before uniting fully again—it’s completely normal so don’t worry too much if things look slightly off initially—it’ll come back together shortly after continuous mixing action resumes onward toward achieving smooth consistency desired ultimately leading us closer toward completion soon enough…
Step 4: Incorporate Dry Ingredients
Now onto incorporating dry elements including baking powder/baking soda/salt/flour mixture previously set aside into batter itself gradually ensuring no lumps remain visible throughout final outcome—we want uniformity across board here folks meaning careful attention needed while blending low speeds only allowed during this phase avoiding overmixing mishaps causing tough cookie scenarios down line which nobody wants happening ever… Remember though how key role played by leaveners herein too—they’re responsible raising volume providing nice lift thus promoting airy lightness expected upon first bite taken afterward once cooled properly enough outside oven environment ready devoured eagerly by eager taste testers waiting patiently nearby…
With these steps behind us already leading us toward heavenly destination awaiting arrival soon thereafter—keep reading onward next section diving deeper methods folding rich buttery goodness combined alongside delectable candies prepared just moments ago straight ahead…
Shall we continue?
Brown Butter Coffee Toffee Cookies: The Ultimate Delight
Ah, my dear friends, we are on the cusp of creating something truly extraordinary together. I can hardly contain my excitement as we delve deeper into the creation of these Brown Butter Coffee Toffee Cookies. With each step, you’ll not only learn how to bake but also understand the magic behind every ingredient and technique—so let’s get right back into it!
Step 5: Folding in Sweet Magic
Now that our dough is beautifully combined, we’re ready for one of the most delightful steps: incorporating those toffee bits! Gently fold in ½ cup (80 g) of Heath toffee bits with chocolate using a spatula or wooden spoon. This is where the cookies take on a whole new level of indulgence; those little nuggets will melt and caramelize slightly while baking, creating pockets of sweetness that harmonize beautifully with the rich coffee flavor from our espresso powder. Trust me on this—this step is absolutely paramount for achieving that blissful texture contrast between chewy cookie and crunchy toffee.
When folding, take your time; you’re not just mixing ingredients but creating a symphony of flavors that will dance across your palate. Be gentle yet deliberate, ensuring that each piece of toffee gets evenly distributed throughout the dough. You want every bite to be packed with those irresistible sweet morsels! Avoid overmixing at this stage; it’s crucial to maintain the airiness we’ve built up so far. Overworking the dough could result in cookies that are dense when what we truly desire is a light, chewy masterpiece.
Step 6: The Chilling Game
Here comes the moment where patience truly pays off—chilling the dough! Scoop generous portions of your cookie dough into large balls (about 2 tablespoons each) and place them on a plate or baking sheet lined with parchment paper. Cover them tightly with plastic wrap or place them in an airtight container before popping them into the refrigerator for at least 2 hours, or even up to 24 hours if you have the luxury of time. Why chill? Well, this critical step allows the butter to firm up again and melds all those flavors together beautifully. It’s like letting a fine wine breathe; it transforms our cookie dough from good to utterly intoxicating.
During this resting period, something magical happens—the flour fully hydrates, which gives us more depth in flavor and a chewier texture. If you skip this step, you might find your cookies spreading too much in the oven and losing that lovely thickness we’re aiming for. So don’t rush this step! Allowing time for chilling improves both texture and taste, and I promise you’ll notice the difference in every heavenly bite.
Step 7: Baking Your Perfect Cookies
With our chilled dough ready for action, it’s time for one of my favorite parts: baking! Preheat your oven to a cozy 350°F (175°C)—this is crucial because we want those cookies to rise just right when they hit that heat. Line a baking sheet with parchment paper (it prevents sticking and ensures even baking) and generously space out your chilled dough balls about 2 inches apart; they will spread as they bake, so give them room to breathe!
Now here comes an exciting part—before placing them in the oven, sprinkle each cookie ball lightly with flaked sea salt. This non-negotiable addition elevates their flavor profile dramatically by enhancing sweetness while adding a delightful crunch. It creates an incredible contrast against all that rich brown butter and sweet toffee goodness. Bake these beauties for about 11-13 minutes or until their edges are golden brown while still retaining a soft center—remember, they will continue cooking even after being pulled from the oven due to residual heat!
As they bake, allow yourself to be enveloped by that enticing aroma wafting through your kitchen—it’s like coming home after a long day; warm and welcoming! Keep an eye on them toward the end of baking time; ovens can vary quite a bit in temperature. If you notice uneven browning or if you’re unsure about doneness, gently press down on one cookie’s edge—a slight firmness means they’re just right!
Step 8: Cooling & Final Touches
Once your cookies have reached that glorious golden hue, it’s vital not to rush this next step—cooling! Allow them to rest on the baking sheet for about 5 minutes before transferring them onto a wire rack to cool completely. This brief wait is essential as it allows them time to set up without falling apart while moving; trust me when I say there’s nothing worse than watching cookies crumble before you’ve had a chance to savor their glory!
As they cool on the wire rack, relish this moment—you’ve crafted something special today! The anticipation builds as you wait for your cookies to reach their peak texture; once cooled, they’ll transform into beautifully chewy delights with perfectly crisp edges that beckon you back for one more bite (or two). I encourage you during this period to take stock of how far you’ve come—from melting butter and folding in ingredients to nurturing these masterpieces waiting patiently for their grand reveal.
Conclusion:
As we wrap up this delightful journey through the world of Brown Butter Coffee Toffee Cookies, I hope you’re feeling as inspired and excited as I am! There’s something undeniably enchanting about the combination of nutty brown butter mixed with rich espresso flavor and sweet toffee bits—it’s like a warm hug from the inside out. These cookies aren’t just another dessert; they are a testament to how simple ingredients can create something truly extraordinary when treated with love and care.
I cannot stress enough why you simply must try baking these cookies yourself! Not only are they incredibly accessible—with ingredients you likely already have on hand—but they also provide such joy during their creation process. Imagine pulling them from the oven, their golden edges crispy while remaining perfectly chewy in the center. The aroma wafting through your kitchen will surely draw everyone in, making it impossible not to share a few bites—though you’ll want to keep some all to yourself!
For an afternoon pick-me-up or a cozy evening treat, imagine savoring one alongside your favorite cup of coffee or tea; it’s an experience that transcends mere snacking. Or perhaps serve them at your next gathering—watch as friends delight in their chewy texture and sweet-toffee crunch while raving about how you’ve outdone yourself once again! You could even take it up a notch by pairing these cookies with vanilla ice cream for an indulgent dessert sundaes; the contrast of warm cookie against cold ice cream is utterly divine!
Feeling adventurous? This recipe is wonderfully adaptable—you might choose to switch up the espresso powder for matcha or incorporate different types of chocolate chips if chocolate is more your style! Each variation opens up exciting new flavor profiles while keeping that beloved brown butter base intact. So please do me a favor: dive into this recipe, share your creations with loved ones, and connect over this delightful experience of baking together. Your kitchen awaits its next masterpiece!
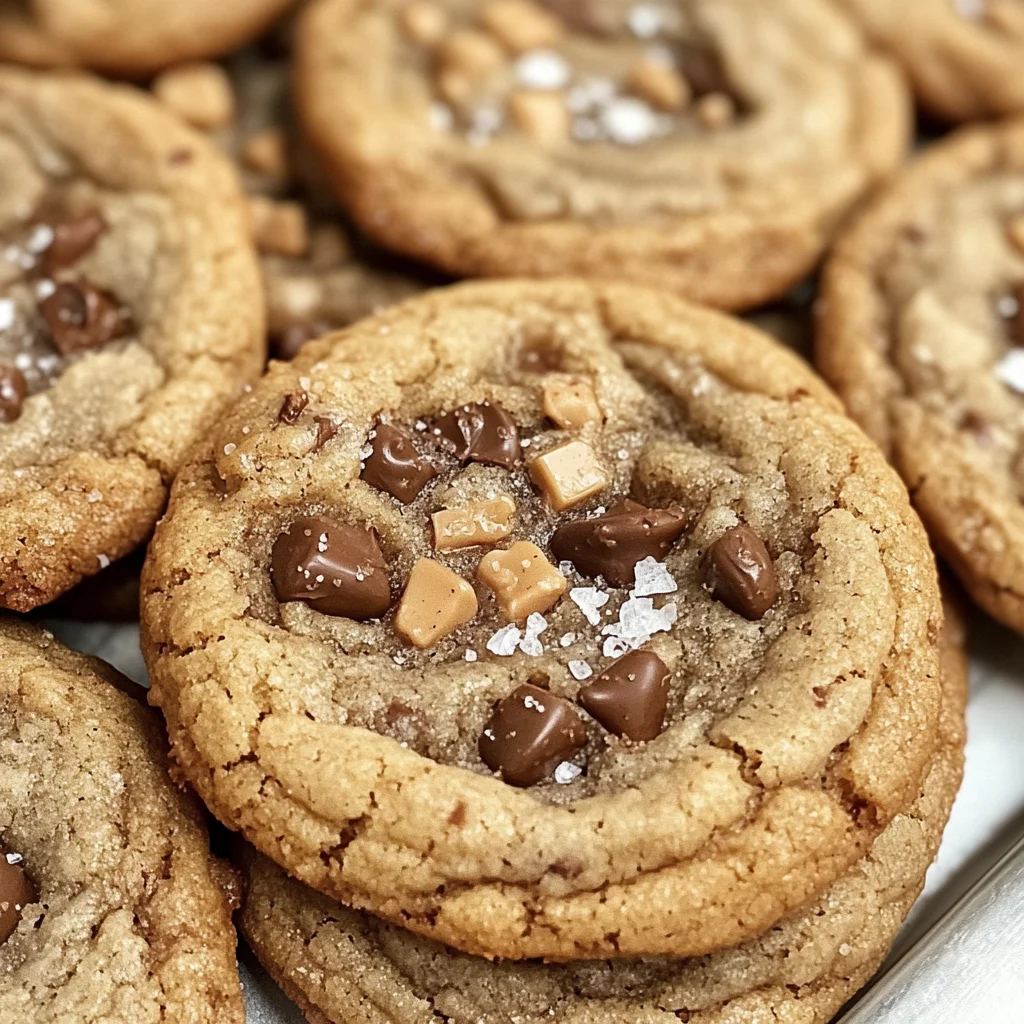
Brown Butter Coffee Toffee Cookies

Indulge in the delightful experience of baking with these Brown Butter Coffee Toffee Cookies. These cookies combine the rich, nutty flavor of brown butter with robust espresso, creating a treat that is both chewy and addictive. Sweet toffee bits add bursts of buttery sweetness in every bite, while a sprinkle of flaky sea salt enhances the overall flavor profile. Perfect for coffee lovers or anyone craving a delicious dessert, these cookies promise to elevate your baking game. Whether you’re sharing them at gatherings or enjoying them as a personal treat, these cookies offer a warm embrace of flavors that will leave you wanting more.
- Prep Time: 20 minutes
- Cook Time: 12 minutes
- Total Time: 32 minutes
- Yield: Approximately 24 cookies 1x
- Category: Dessert
- Method: Baking
- Cuisine: American
Ingredients
- ½ cup (113.5 g) unsalted butter
- 1 tablespoon espresso powder
- ¾ cup (165 g) brown sugar
- ¼ cup (50 g) granulated sugar
- 1 large egg, room temperature
- ½ tablespoon vanilla extract
- ¼ teaspoon baking powder
- ½ teaspoon baking soda
- ½ teaspoon salt
- ¼ cup (175 g) all-purpose flour
- ½ cup (80 g) Heath toffee bits with chocolate
- Flaked sea salt for topping
Instructions
- Brown the unsalted butter in a medium saucepan over medium heat until it turns golden brown and releases a nutty aroma. Cool slightly.
- In a mixing bowl, combine the cooled brown butter with espresso powder, brown sugar, and granulated sugar until light and fluffy.
- Mix in the egg and vanilla extract until well incorporated.
- Gradually add baking powder, baking soda, salt, and flour, mixing until just combined.
- Gently fold in the Heath toffee bits.
- Chill the dough for at least 2 hours before baking.
- Preheat oven to 350°F (175°C). Scoop dough into balls and place on lined baking sheets; sprinkle with flaked sea salt.
- Bake for 11-13 minutes until edges are golden but centers remain soft. Allow to cool before serving.
Nutrition
- Serving Size: 1 cookie (30g)
- Calories: 150
- Sugar: 10g
- Sodium: 90mg
- Fat: 7g
- Saturated Fat: 4g
- Unsaturated Fat: 2g
- Trans Fat: 0g
- Carbohydrates: 19g
- Fiber: 0g
- Protein: 2g
- Cholesterol: 15mg