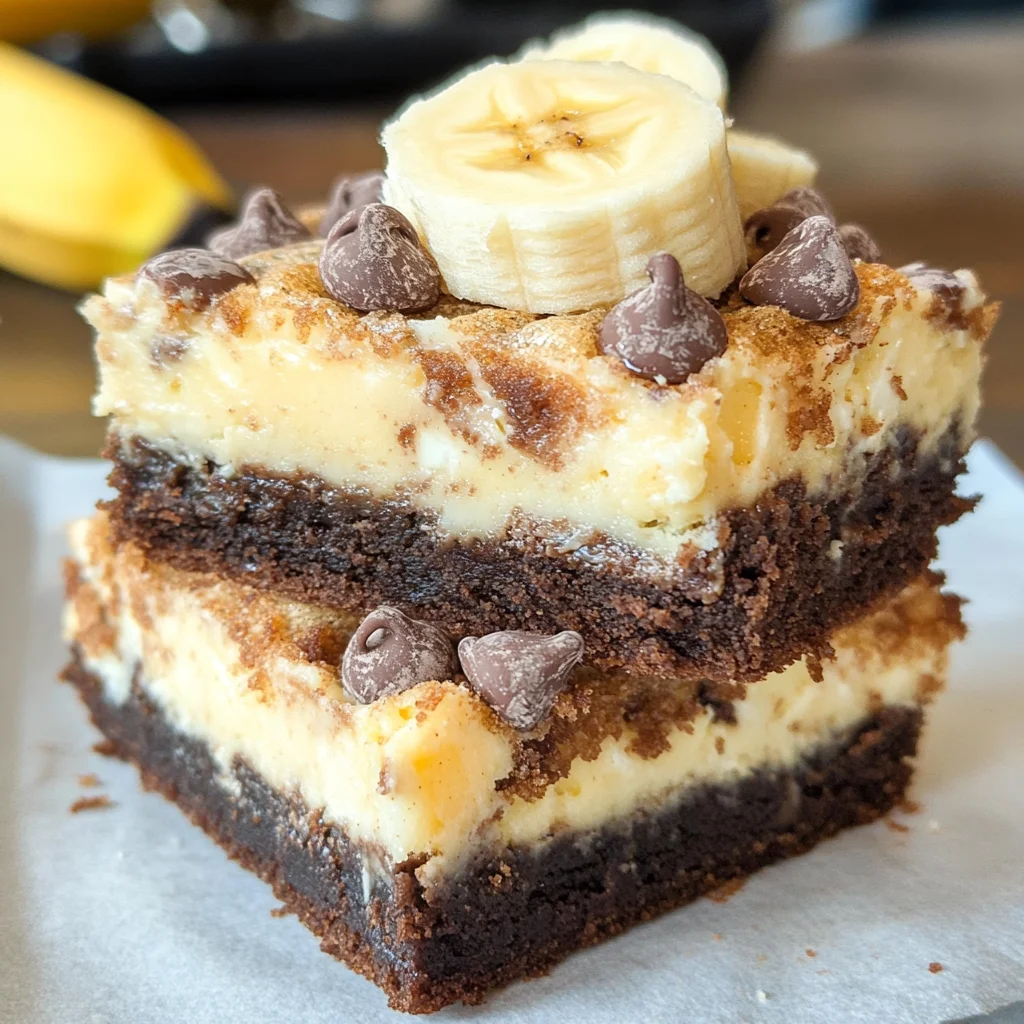
Banana Pudding Brownies
There’s something truly magical about the combination of banana pudding and brownies that just speaks to the soul. It’s as if each layer is a chapter in a story, woven together with love, nostalgia, and a sprinkle of creativity. The Banana Pudding Brownies we’re about to create are not just a dessert; they are an experience that invites you to share moments with friends and family over sweet bites of chocolatey goodness and creamy banana bliss. Imagine biting into a fudgy brownie that’s dense yet soft, only to be met by the luscious, velvety texture of cream cheese banana pudding melting in your mouth. It’s like a hug from your favorite person—warm, comforting, and utterly satisfying.
As you prepare to embark on this culinary adventure, know that these brownies carry with them not just flavors but stories. I remember the first time I made them for a gathering; my friends were practically swooning! Their expressions were priceless as they took their first bites, eyes lighting up with delight. This recipe bridges tradition with innovation—a classic dessert transformed into something new yet familiar. It’s perfect for any occasion—from birthdays to casual weeknight treats—and trust me when I say it can become your go-to dish for impressing guests or simply indulging yourself.
Banana Pudding Brownies: A Heavenly Fusion of Two Classics
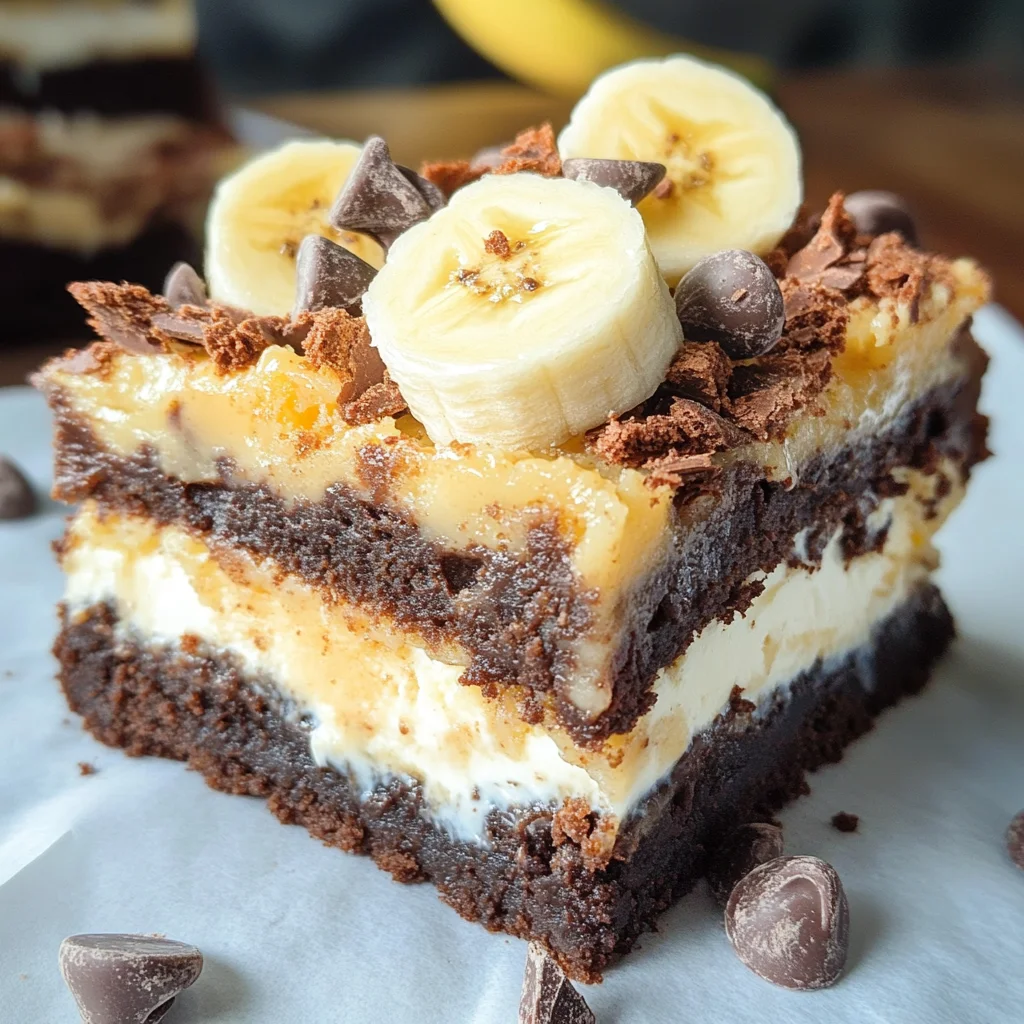
Let’s dive into this delightful recipe together! The beauty of Banana Pudding Brownies lies in their layers: a rich brownie base topped with creamy banana pudding and adorned with crispy vanilla wafers. I promise you will fall in love at first bite!
Ingredients:
As we gather our ingredients for this enchanting treat, let’s take a moment to appreciate each component’s role in crafting our Banana Pudding Brownies. Each ingredient adds its own unique charm to the final creation.
- 1 cup light brown sugar, packed. This sugar is essential for achieving that deep caramel flavor that gives our brownies their signature richness. The molasses content in brown sugar not only adds sweetness but also contributes moisture, making every bite luscious and fudgy. When measuring brown sugar, don’t be shy—pack it firmly into the measuring cup for accuracy!
- 1/4 cup white granulated sugar. While the brown sugar provides depth, the granulated sugar brings balance with its pure sweetness and helps create a lovely texture in our brownies. It plays nicely alongside the other sugars to ensure we achieve that perfect melt-in-your-mouth consistency everyone loves.
- 1/2 cup (1 stick) unsalted butter, melted. Butter is the heart of this recipe; it adds flavor while creating that tender crumb we crave in baked goods. Melting the butter allows it to blend seamlessly into the batter, ensuring every bite is rich and buttery without any chunks of solid fat disrupting that dreamy texture.
- 2 tsp pure vanilla extract. This ingredient is nothing short of magical—it elevates all other flavors while adding an aromatic warmth that makes desserts irresistible. Always opt for pure vanilla extract rather than imitation for an authentic taste; trust me, it makes all the difference!
- 2 large eggs. Eggs are pivotal in baking—they provide structure and stability while contributing moisture and richness. Be sure they are at room temperature before using them; this ensures they incorporate smoothly into your batter without cooling down your melted butter or other ingredients.
- 3/4 cup all-purpose flour. Flour acts as the backbone of our brownies, giving them structure without making them too dry or dense. For best results, measure your flour correctly by spooning it into your measuring cup and leveling it off—this prevents packing it down and causing excess density.
- 1/4 cup unsweetened cocoa powder. Cocoa powder is what transforms these brownies from basic chocolate bars into rich fudge-like creations! Look for high-quality cocoa powder to enhance both flavor and color—Dutch-process cocoa can provide an extra depth if you’re feeling adventurous.
- 1/2 tsp salt. A touch of salt is non-negotiable when baking desserts; it amplifies sweetness while balancing flavors beautifully—think of it as nature’s secret ingredient! Don’t underestimate its power; even a small amount can transform ordinary recipes into something extraordinary.
- 1 cup semi-sweet chocolate chips. These little morsels are like treasure hidden within our brownies! They melt slightly during baking but retain enough shape to provide delightful pockets of gooey chocolate throughout each bar—a little surprise with every bite!
- 1 8oz block cream cheese, room temperature. Cream cheese creates the creamy layer atop our brownies; its tanginess complements the sweetness beautifully while adding an indulgent texture that makes this dessert unforgettable.
- 1 3.4oz box instant banana pudding. This is where we capture that beloved banana flavor without needing real bananas throughout all layers! Instant pudding mix also thickens our cream cheese mixture quickly and easily—it’s a game-changer when aiming for efficiency without sacrificing taste.
- 1/3 cup dairy milk of any kind. Milk provides just enough liquid to smooth out our cream cheese mixture while enhancing flavor richness—feel free to use whole milk or your preferred alternative here!
- 1 small banana, peeled and chopped small. Fresh bananas bring natural sweetness and texture contrast against our silky pudding layer—choosing one that’s perfectly ripe will ensure maximum flavor impact!
- 1 to 1 1/2 cups vanilla wafers, broken into pieces. These delightful cookies add crunchiness and nostalgic charm atop our dessert! Feel free to adjust based on how much crunch you desire—it’s all about personal preference here!
Equipment You’ll Need:
Before we start creating these luscious Banana Pudding Brownies, let’s gather some essential tools that will make this process smooth sailing! While they may not be ingredients themselves, having the right equipment can elevate your baking experience immensely.
- 9×13 inch baking pan – This size is perfect for achieving those ideal brownie dimensions while allowing enough space for our decadent layers above! If you don’t have one on hand or prefer smaller portions, consider halving the recipe into a smaller pan—just keep an eye on bake times!
- Parchment paper – Lining your pan with parchment paper not only prevents sticking but also allows for easy removal once baked—trust me when I say struggling with stuck-on desserts isn’t fun! You’ll want enough overhang on two sides so you can lift out your creation effortlessly after cooling.
- Mixing bowls (various sizes) – Having multiple bowls at your disposal means you won’t have to wash between mixing steps! Use larger bowls for wet ingredients and smaller ones for dry ingredients—it keeps everything organized as we work through layers.
- Hand or stand mixer – While whisking by hand is certainly possible (and great exercise!), using an electric mixer saves time and energy when creaming together those sugars with butter—it’ll help achieve lightness effortlessly!
- Rubber spatula – A versatile tool essential for scraping every last bit from mixing bowls ensures nothing goes wasted while folding ingredients together gently yet effectively without deflating air bubbles we’ve worked hard to incorporate.
Preparing the Banana Pudding Brownies
Now that we’ve gathered everything we need, it’s time to get started on creating these mouthwatering Banana Pudding Brownies! The process might seem extensive at first glance but trust me—it’s worth every moment spent crafting such delightful layers of happiness!
Step 1: Preheat & Prepare Your Pan
First things first: preheat your oven to 350°F (175°C). This step is crucial because starting off with a hot oven ensures even cooking throughout our brownies—no one wants undercooked centers! As it’s heating up, line your 9×13 inch baking pan with parchment paper letting some edges hang over; this will make removing those decadent bars super simple once baked!
Step 2: Cream Together Sugars & Butter
In a large mixing bowl (preferably equipped with either hand or stand mixer), combine both packed light brown sugar along with white granulated sugar followed by melted unsalted butter until everything becomes light and fluffy—a process known as creaming! This step introduces air into our mixture resulting in those sought-after airy textures later on—aiming for about 3 minutes should do it perfectly here before adding in pure vanilla extract along with room temperature eggs one at a time until well combined.
Step 3: Mix Dry Ingredients Separately
While waiting patiently for those sugary delights above to come together beautifully—we’ll whip up another bowl meant solely containing dry ingredients consisting of all-purpose flour sifted together alongside unsweetened cocoa powder sprinkled generously plus half-a-teaspoonful salt added too! Stirring these components carefully ensures no lumps remain before gradually introducing them into wet mixtures three additions at once; be cautious not overmix though since excess stirring could lead us toward dense results instead of lovely fudginess desired here!
Step 4: Fold in Chocolate Chips
Once you’ve folded dry ingredients gently until just combined (remember—I’m talking about barely mixing!), it’s time now fold those heavenly semi-sweet chocolate chips throughout batter evenly distributing them around like confetti at celebration parties—we want surprises hidden inside each square after all! Carefully spread brownie batter across prepared pan leveling surface gently using rubber spatula ensuring corners receive equal attention too so everything bakes uniformly once placed inside heated oven awaiting magic transformation ahead…
As you continue through these initial steps filled with excitement about what’s unfolding ahead—I hope you feel inspired knowing soon enough tastes reminiscent childhood memories will come alive again within delicious bites shared alongside loved ones around tables filled laughter joy warmth created together…
Stay tuned as we progress further through assembling final components layering pudding goodness atop brownie base next!
Step 5: Crafting the Creamy Banana Pudding Layer
Now we’re diving into the heart of this dish—the cream cheese banana pudding layer. This step is not just about mixing ingredients; it’s where we create that luscious, silky texture that will beautifully contrast with our fudgy brownie base. Start by taking out a clean mixing bowl and your room-temperature cream cheese, which is absolutely paramount for achieving that smooth consistency we all crave. If your cream cheese is too cold, you’ll end up with lumps in your pudding, and trust me, nobody wants that! Using either a hand mixer or stand mixer, beat the cream cheese until it’s velvety smooth—this usually takes about 1-2 minutes on medium speed. The goal here is to break down any stubborn lumps so that when we add other ingredients, everything melds together seamlessly.
Once your cream cheese is nice and creamy, it’s time to introduce the star of this layer: the instant banana pudding mix. Pour it in along with 1/3 cup of your choice of dairy milk—whether it be lactose-free, almond milk, or good old cow’s milk. Mix these together until fully incorporated; you’ll notice how the mixture starts to thicken just a bit—it’s like magic! This thickening is due to the pudding mix activating with the liquid and cream cheese, creating that rich texture we all adore in traditional banana pudding. Don’t forget to fold in those delightful little chunks of chopped bananas at this point. Their natural sweetness and soft texture will elevate this layer beyond what you could imagine! I promise you that this combination will result in a truly extraordinary topping that sings harmoniously sweet notes alongside our brownies.
Step 6: Spreading the Pudding Layer Like a Pro
Now comes one of my favorite parts—spreading that gorgeous banana pudding layer over our decadent brownie base! Once your brownie layer has baked and cooled slightly (but still warm enough to provide a comforting hug), it’s crucial to ensure it’s level and even before adding this luscious topping. Using an offset spatula or even the back of a spoon, carefully spread the banana pudding mixture over the brownies. Take your time here; don’t rush this step! You want an even distribution so every bite has that creamy goodness enveloping it.
As you spread, let yourself enjoy the aroma wafting up from those rich brownies mingling with the sweet scent of bananas—it’s intoxicating! This layering process is vital because each component needs to shine through while also complementing one another. You might find yourself tempted to sneak a spoonful of that pudding while you work (and who could blame you?), but trust me on this: savoring it later will be worth every moment spent waiting! Once you’ve spread it evenly across the surface, take a moment to admire your handiwork—it looks beautiful already!
Step 7: Topping Off Your Creation with Vanilla Wafers
With our beautiful pudding layer now in place, it’s time for one last touch before we send everything off into the oven—the addition of vanilla wafer pieces! These iconic cookies are more than just a garnish; they bring delightful crunchiness and an extra layer of flavor, which makes each bite feel like a nostalgic trip down memory lane. Gently break your vanilla wafers into pieces; aim for sizes similar to small quarters or halves so they can distribute evenly across the top without overpowering any single bite.
Sprinkle those broken pieces generously over your creamy pudding layer, pressing them down lightly for better adhesion during baking. This step isn’t just about aesthetics; those wafers will soak up some moisture from the pudding as it bakes, adding their own unique texture while still retaining some crispness—a perfect balance between soft and crunchy! Keep an eye on how they’re placed; you’re crafting layers here—each crumbly piece adds character and charm to our Banana Pudding Brownies.
Step 8: Baking Until Golden Perfection
Now we arrive at perhaps one of the most exciting moments—baking our creation! Preheat your oven to 350°F if you haven’t done so already—you want it hot and ready when you’re prepared to slide in your masterpiece. Place your pan on the center rack where heat circulation is optimal for even cooking. Bake uncovered for about 30-40 minutes; however, keep an eye on those edges—they should turn golden brown while maintaining a slight jiggle at the center.
The key visual cue here is watching for that golden hue around the edges of both layers—the brownie should look set but not overly firm while the pudding layer becomes slightly puffy as it cooks through. Trust me on this: patience is essential here! Resist any urge to open that oven door frequently as it can cause temperature fluctuations which might affect baking times. Instead, use this time wisely—perhaps prepare some coffee or tea while imagining how delectable these treats will be straight from the oven! When you finally pull them out, let them cool completely in their pan before attempting to cut into squares; I know it’s hard to wait for such deliciousness!
Next Major Phase – Final Touches
As tempting as it may be to dive right into those decadent Banana Pudding Brownies after baking them (I completely understand!), allowing them ample time to cool ensures cleaner cuts and enhances flavors as they settle together beautifully. Once they’ve cooled completely—ideally letting them rest for at least an hour—you can slice into generous squares or rectangles depending on how indulgent you’re feeling!
When serving these beauties—oh boy—is there anything more magical than watching friends’ faces light up upon tasting? Each bite reveals layers upon layers of flavor: fudgy chocolate brownies topped with creamy banana goodness and delightful crunch from those vanilla wafers—it’s nothing short of dessert nirvana! And don’t underestimate leftovers; while they might soften after being stored (which honestly just makes them more indulgently moist), keeping them sealed in a container ensures they’ll stay fresh for days ahead.
In closing, I encourage you not just to make these Banana Pudding Brownies but also share them with loved ones—because nothing brings people together quite like comfort food made from love. So gather around some plates and enjoy every last crumb—you deserve every sweet moment!
Storage and Enjoyment Tips for Your Banana Pudding Brownies
Now that you’ve created this delightful dish, it’s time to savor every last bite! These Banana Pudding Brownies are not just a treat; they’re an experience, rich with fudgy layers and creamy banana goodness. I can already imagine you serving them at your next gathering or enjoying them after a long day, the sweet aroma still wafting through your kitchen. But what happens if you have leftovers? Fear not; I’ve got you covered with some essential storage tips to ensure your brownies remain as delectable as the moment they came out of the oven.
Storing Leftover Banana Pudding Brownies
To keep those luscious Banana Pudding Brownies at their best, I recommend transferring any leftovers into an airtight container. This is crucial because it helps lock in moisture and flavor while preventing them from absorbing any unwanted odors from the fridge. In terms of where to store them, a cool place is ideal—your refrigerator is perfect for this purpose! When properly stored, these brownies can stay fresh for about five days. If you’re looking to maintain that delightful texture, consider placing a slice of bread in the container alongside the brownies; this handy trick keeps things moist and prevents any unfortunate drying out. After a few days, you might notice that the vanilla wafers have softened slightly, but trust me when I say that they still deliver a wonderfully satisfying treat. When you’re ready to indulge again, simply pull them out of the fridge and let them come to room temperature for a few minutes—this will heighten their flavors and give that pudding layer a chance to shine!
Freezing Banana Pudding Brownies for Later
If you’ve made a big batch or want to save some for a rainy day (trust me, you’ll thank yourself later), freezing these beauties is an excellent option! To freeze your Banana Pudding Brownies properly, allow them to cool completely first—patience pays off here! Then, cut them into squares and layer them between sheets of parchment paper in a freezer-safe container or wrap each piece individually in plastic wrap. They’ll keep well frozen for up to three months! When you’re ready to enjoy one again, simply take it out of the freezer and let it thaw in the refrigerator overnight or on your countertop for about 30 minutes before serving. This convenience factor means you can whip up dessert with no fuss at all. Imagine pulling out a frozen brownie on a busy evening and savoring it without any extra effort—I promise it’s like having a little piece of joy waiting just for you!
Banana Pudding Brownies
Indulge in the delightful fusion of rich chocolate and creamy banana with these Banana Pudding Brownies. This layered dessert features a fudgy brownie base topped with a luscious cream cheese banana pudding, all adorned with crispy vanilla wafers. Perfect for any occasion, these brownies create sweet memories and are sure to impress family and friends alike. The combination of chocolatey goodness and fruity flavor is a match made in dessert heaven, making every bite a comforting experience that evokes nostalgia and joy.
- Prep Time: 20 minutes
- Cook Time: 35 minutes
- Total Time: 55 minutes
- Yield: Approximately 16 servings 1x
- Category: Dessert
- Method: Baking
- Cuisine: American
Ingredients
- 1 cup light brown sugar, packed
- 1/4 cup white granulated sugar
- 1/2 cup (1 stick) unsalted butter, melted
- 2 tsp pure vanilla extract
- 2 large eggs
- 3/4 cup all-purpose flour
- 1/4 cup unsweetened cocoa powder
- 1/2 tsp salt
- 1 cup semi-sweet chocolate chips
- 1 8oz block cream cheese, room temperature
- 1 3.4oz box instant banana pudding
- 1/3 cup dairy milk of any kind
- 1 small banana, peeled and chopped small
- 1 to 1 1/2 cups vanilla wafers, broken into pieces
Instructions
- Preheat the oven to 350°F (175°C) and line a 9×13 inch baking pan with parchment paper.
- In a large bowl, cream together brown sugar, granulated sugar, and melted butter until light and fluffy. Add vanilla extract and eggs one at a time, mixing well.
- In another bowl, whisk together flour, cocoa powder, and salt. Gradually add to the wet mixture until just combined. Fold in chocolate chips.
- Spread the brownie batter into the prepared pan evenly. Bake for 25 minutes or until set.
- While baking, prepare the banana pudding layer by beating room temperature cream cheese until smooth. Mix in instant banana pudding and milk until thickened. Fold in chopped bananas.
- Once brownies are baked and cooled slightly, spread the pudding layer evenly over the brownies. Top with broken vanilla wafers.
- Bake for an additional 10 minutes to set the pudding layer.
Nutrition
- Serving Size: 1 brownie square (68g)
- Calories: 320
- Sugar: 24g
- Sodium: 150mg
- Fat: 15g
- Saturated Fat: 8g
- Unsaturated Fat: 6g
- Trans Fat: 0g
- Carbohydrates: 43g
- Fiber: 2g
- Protein: 4g
- Cholesterol: 30mg