Banana Bread Cheesecake
There’s something profoundly magical about the smell of baked goods wafting through the kitchen, isn’t there? When you combine that with the comforting warmth of banana bread and the creamy decadence of cheesecake, you create an experience that transcends mere dessert; it’s a heartfelt hug in edible form. My favorite Banana Bread Cheesecake beautifully marries these two beloved treats into a single show-stopping dessert that is both familiar and innovative. Each slice reveals layers of velvety vanilla cheesecake nestled on top of moist, chocolate chip-studded banana bread, creating a symphony of flavors and textures that dance joyfully on your taste buds. I promise you, this dish is not just a recipe but a delightful journey, one that evokes memories of family gatherings, sunny afternoons, and shared laughter around the table.
As you dive into this recipe, imagine yourself standing in a cozy kitchen filled with love and warmth. The sweet scent of ripe bananas mingles with the rich aroma of cream cheese, enveloping you like a cherished memory from childhood. This Banana Bread Cheesecake isn’t just for special occasions; it’s perfect for any day when you need a touch of sweetness or when friends drop by unexpectedly. It’s for those moments when life feels too hectic—taking time to bake this cheesecake becomes an act of self-care. So let’s get started on this culinary adventure together; I can’t wait to share every little secret that makes this dessert so special!
Banana Bread Cheesecake: A Delightful Fusion of Two Classics
There’s something incredibly enchanting about combining two classic desserts into one extraordinary creation. This Banana Bread Cheesecake does just that—bringing together the soft, spiced richness of banana bread with the luxurious creaminess of cheesecake in every forkful. It’s an indulgent treat that can elevate any gathering or simply satisfy your sweet cravings after dinner. Trust me; once you try it, you’ll find it hard to believe how perfectly these flavors complement each other.
Ingredients:
Before we embark on our baking journey together, let me assure you that each ingredient in this Banana Bread Cheesecake plays a vital role in crafting its irresistible flavor and texture. As we gather our components, let’s take a moment to appreciate what each one brings to our masterpiece.
- 16 oz. full-fat cream cheese-softened to room temperature: This ingredient is absolutely paramount for achieving that rich and creamy texture we crave in cheesecake. Full-fat cream cheese provides the lusciousness that makes each bite feel indulgent yet light at the same time. Be sure to let it soften fully at room temperature; if it’s too cold when mixed, you’ll end up with lumps instead of a smooth filling.
- 1/4 cup sour cream: Adding sour cream gives our cheesecake a delightful tanginess while enhancing its overall creaminess. It also helps keep the cheesecake moist during baking, which is crucial since we’ll be using water bath techniques later on. If you’re out of sour cream, plain Greek yogurt can be an excellent substitute without compromising flavor or texture.
- 3/4 cup sugar: Sugar not only sweetens our cheesecake but also contributes to its overall structure and texture by helping to stabilize our filling as it bakes. Use granulated sugar for this recipe since it dissolves easily and provides the perfect sweetness balance against the tangy notes from the sour cream.
- 1 teaspoon vanilla extract: Vanilla extract is like liquid gold in baking—it elevates flavors in ways nothing else can! The warm notes from vanilla really round out our cheesecake’s flavor profile beautifully. Always opt for pure vanilla extract over imitation for deeper and more authentic flavor.
- 1 Tablespoon all-purpose flour: A small but mighty addition! Flour helps bind our cheesecake filling together while providing stability as it bakes, preventing cracks from forming on top—a common concern with cheesecakes.
- 2 eggs + 1 egg white: Eggs are essential for both structure and richness in our cheesecake batter. The yolks contribute fat which enriches flavor while helping set the filling as it bakes. The additional egg white adds extra fluffiness without making the cake dense.
- ½ cup vegetable oil: Here’s where we introduce moisture into our banana bread layer! Vegetable oil keeps our banana bread tender and moist—trust me on this one! It ensures that every bite is soft rather than dry or crumbly.
- ½ cup sugar: Just like before, sugar provides sweetness here too! You’ll notice how vital it is in balancing out flavors as we layer them throughout this recipe.
- 6 Tablespoons brown sugar: Brown sugar adds depth and a hint of caramel-like flavor thanks to its molasses content—it harmonizes perfectly with bananas! It also contributes moisture which keeps our banana bread soft.
- 1 egg + 1 egg yolk: Similar to earlier in our list, these eggs will provide richness while ensuring perfect cohesion within our banana bread batter.
- 1 teaspoon vanilla extract: Yes, another splash of vanilla! Each layer deserves its own note of aromatic bliss; don’t skimp on this step!
- 2 large or 3 small bananas-mashed (about 1 ¼ cups): The star ingredient! Ripe bananas bring natural sweetness along with moisture content essential for keeping our banana bread tender while infusing it with irresistible flavor.
- 1 ½ cups all-purpose flour: This forms the foundation—the backbone—of our banana bread layer. It’s what holds everything together while contributing structure during baking!
- 1 teaspoon baking powder: Baking powder acts as a leavening agent—this means it creates those lovely air pockets that make your banana bread rise beautifully as it bakes!
- ½ teaspoon baking soda: Another leavener! Baking soda reacts with acidic ingredients (like ripe bananas) creating even more lift—helping ensure your loaf rises properly without being heavy or dense.
- ¼ teaspoon salt: Salt enhances sweetness by balancing flavors—it brings out all those delicious notes we’ve been building upon throughout this recipe!
- 1 ½ – 2 teaspoons ground cinnamon (to taste): Cinnamon adds warmth and spiciness; it’s like wrapping your dessert up in cozy fall vibes no matter what season it actually is!
- ½ cup miniature chocolate chips: Because who could resist adding chocolate? Miniature chocolate chips melt slightly during baking but hold their shape enough to provide delightful bursts throughout each slice! Feel free to adjust according to personal preference; dark chocolate chips could add an even richer element if desired.
- 3 oz. full-fat cream cheese-softened to room temperature: Just like before—the rich taste here enhances both texture & flavor within frosting later on!
- 3 Tablespoons unsalted butter-softened to room temperature: Butter brings both richness & moisture—again establishing balance across different components we’re working towards achieving here today!
- 2 cups powdered sugar-sifted: To sweeten things up without compromising texture—powdered sugar dissolves quickly ensuring smooth results when whipping up frosting later down road!
- 1 teaspoon vanilla extract: We’re keeping tradition alive by incorporating yet another splash into frosting mixture—it lends familiarity amidst new experiences happening across layers below us!
- 1/8 teaspoon salt: Just like earlier! Salt works wonders even within frostings too bringing everything back into harmony again!
- 1 – 2 Tablespoons sour cream: Adding some tanginess back into sweetness here helps maintain balance ensuring no single element dominates completely over others involved here today either way!
- 1/3 cup chopped walnuts-for garnish: As if all these other elements weren’t enough—we’re topping off final product beautifully by adding crunch factor through garnishes at end serving process bringing textures alive visually appealing way too!
Equipment You’ll Need:
Now let’s talk about some essential tools you’ll want by your side as we create this beautiful Banana Bread Cheesecake together! Having reliable equipment not only streamlines your cooking process but also enhances your enjoyment as you immerse yourself into crafting such fabulous creations.
- 9-inch springform pan – This pan is key because its removable sides allow us easy access once baked without damaging delicate layers inside! Make sure it’s sturdy enough since we’ll be adding water bath technique later on ensuring even distribution throughout oven during bake time too!
- Mixing bowls (various sizes) – You’ll need several bowls ranging from large ones for batters down smaller ones reserved specifically for mixing toppings separately—that way multitasking becomes effortless while avoiding unnecessary clutter around workspace simultaneously!
- Electric mixer (handheld or stand) – An electric mixer saves time when whipping up batters ensuring proper consistency achieved quickly so no worries about elbow grease needed here anymore either way possible—just plug-in & go!
As we gather these ingredients and equipment together, remember each step taken brings us closer toward creating something truly extraordinary—a treat meant not just for satisfying cravings but also nourishing connections made through sharing joy found within cooking alongside loved ones alike too! Now let’s dive deeper into preparing this scrumptious Banana Bread Cheesecake so everyone can enjoy what we’ve crafted together soon enough…
Preparing the Banana Bread Cheesecake
Step 1: Prepping Your Pan
To kick off our adventure, preheat your oven to 350°F (175°C). While that’s warming up—which will fill your home with anticipation—grab your trusty 9-inch springform pan and line its bottom with parchment paper before greasing both bottom & sides generously using nonstick cooking spray; trust me when I say sticking later would ruin all efforts put forth thus far! After greasing adequately wrap springform pan tightly using two layers aluminum foil around outer walls preventing any leakage occurring during subsequent water-bath process set aside until ready for action ahead shortly thereafter too!
Step 2: Crafting That Luscious Cheesecake Filling
In another bowl combine softened full-fat cream cheese along with sour cream stirring until smooth consistency achieved through electric mixer used previously mentioned earlier—you’ll want velvety results which lead seamlessly transitioning flavors later down road once baked perfectly aligned together harmoniously balanced gratifying experience awaits ahead patiently crafted lovingly over time spent invested today specifically focusing solely upon creating something truly memorable worth cherishing long after consumed entirely—all right?! Gradually add granulated sugar mixing thoroughly until well incorporated followed next step where flour joins party lending structural support needed maintaining integrity throughout final product during bake cycle itself thereafter noticed carefully monitoring progress closely thereafter following cues given appropriately towards desired outcomes sought after initially decided upon beforehand getting underway now…
Step 3: Blending In Those Eggs
Next comes eggs—they’re essential players joining forces now along side previous components already combined together facilitating binding action needed leading us onward towards final stages unfolding ahead shortly indeed next steps taken accordingly onwards toward completion itself beckoning forth tantalizing aromas arising eventually embodying essence behind craftsmanship involved present day here amongst endeavors undertaken collectively sharing passions ignited alongside friendships forged blossoming stronger bonds enriched tremendously through culinary art form expressed freely enjoyed evermore amongst company gathered nearby surely cheering loudly whenever anyone indulges further savoring bites shared openly moving forward united proudly facing challenges head-on throughout entire journey undertaken today certainly bearing witness firsthand accomplishments achieved ultimately reaching fruition finally unveiling spectacular masterpiece awaits revealing true magic hidden deep beneath surface waiting patiently until unveiled finally ready served widely amongst crowd assembled eagerly anticipating tasting delights awaiting soon ahead…
Step 4: Creating That Moist Banana Bread Layer
Now let’s move onto creating deliciously moist layers filled generously boasting delightful aromas wafting gently through air surrounding everyone closely gathered around—you’ll take ripe bananas mashed thoroughly combining them seamlessly alongside vegetable oil introducing rich moisture enhancing finished product notably bringing everything alive vibrantly amidst harmonious union established between contrasting textures lovingly preserved intact joining forces united purposefully towards crafting excellence achieved unanimously shared among people whom cherish such moments cherished equally forevermore highlighting significance behind culinary adventures embarked upon intentionally nurturing bonds cultivated everlasting connections created forever changing lives positively impacting everyone involved deeply enriching souls transformed inspiring creativity blossoming forth unrestrained allowing artistic expressions flourish vibrantly fueled passion driving endeavors forward boldly fearless undeterred willing embrace challenges faced overcoming obstacles emerged victorious shining brightly illuminating paths paved purposely traversed willingly forging ahead confidently always striving perfection never settling merely accepted standards rather aiming higher reaching closer dreams imagined realized fully embracing potential limitless possibilities exist awaiting exploration ready unfold further adventures await travelers journey embarking upon exciting processes begun leading discovering uncharted territories enriched experiences discovered along paths chosen wisely traveled…
And there you have it—the first few steps toward creating your very own Banana Bread Cheesecake masterpiece! Stay tuned as we continue piecing together this delectable delight in upcoming sections where we’ll delve further into completing assembly transforming dream dessert envisioned reality finally unveiling treasure trove hidden within hearts longing fulfillment discovered through joyous expressions woven intricately fabric life lived passionately shared celebrating connections built lasting legacies left untouched echoing stories told fondly generations yet come…
Step 5: The Creamy Cheesecake Filling
Now that your crust is perfectly prepped, it’s time to whip together the luscious cheesecake filling that will truly elevate this Banana Bread Cheesecake to new heights of indulgence. In a large mixing bowl, combine the softened cream cheese (16 oz.) and sour cream (1/4 cup). It’s crucial that the cream cheese is at room temperature—this ensures it blends smoothly without lumps and creates that silky texture we all adore. Using an electric mixer on medium speed, beat these two ingredients until they’re light and fluffy, which should take about 2-3 minutes. Trust me when I say, this step is non-negotiable; you want a creamy consistency that will meld beautifully with the flavors of the banana bread.
Next, add in the sugar (3/4 cup), vanilla extract (1 teaspoon), and flour (1 tablespoon). Mix again until everything is well incorporated; you’re looking for a batter that’s not only smooth but also has a hint of sweetness that will perfectly complement the banana flavors to come. This mixture should be thick but pourable—think of it as a luxurious canvas for your other ingredients. Now, one by one, add the eggs (2 whole eggs + 1 egg white), blending well after each addition. This is where the magic happens! The eggs provide structure and stability to your cheesecake while also contributing to its creamy texture. Ensure there are no streaks left—fully incorporated means fully delicious!
Step 6: The Banana Bread Mixture
With your cheesecake filling ready, let’s turn our attention to the moist banana bread layer, which is where that comforting homey flavor comes from. In another large bowl, whisk together the vegetable oil (1/2 cup), sugar (1/2 cup), brown sugar (6 tablespoons), and eggs (1 egg + 1 egg yolk) until smooth and somewhat frothy. This step is important because the combination of sugars and fats creates a rich base for your bread that will ensure it stays moist throughout baking—a key factor in achieving that melt-in-your-mouth experience.
Now comes the star of our show: bananas! Mash those ripe bananas until they resemble a chunky puree—about 1¼ cups should do nicely. This step not only adds natural sweetness but also brings moisture to your banana bread layer, making it incredibly tender. Gently fold in these mashed bananas along with vanilla extract (1 teaspoon) into your wet mixture—you want to capture every bit of their essence! Afterward, sift together the all-purpose flour (1½ cups), baking powder (1 teaspoon), baking soda (½ teaspoon), salt (¼ teaspoon), and ground cinnamon (1½-2 teaspoons) in a separate bowl before gradually adding them to your wet ingredients. Mixing just until combined is key—overmixing can lead to a dense loaf instead of the fluffy treat we are aiming for.
Step 7: Marrying Two Worlds
Now comes one of my favorite parts—the moment we bring both worlds together! Take roughly half of your banana bread batter and pour it gently into the bottom of your prepared springform pan. It should cover just enough to act as a base for our cheesecake filling. Then carefully dollop on half of your cheesecake mixture over this layer; use a spatula or the back of a spoon to spread it evenly without disturbing the banana batter too much. The gentle layering technique here is essential as it allows both flavors to intermingle during baking without completely losing their individual identities.
Once you’ve layered half of each component into the pan, repeat this process: pour in the remaining banana bread batter followed by another dollop of cheesecake filling on top. As you do this, try swirling them ever so slightly with a butter knife or skewer—this creates beautiful marbling effects that are not only visually stunning but also enhance those flavors when baked! Don’t worry if it feels messy; trust me on this one—it’ll bake up beautifully!
Step 8: Baking Your Perfect Banana Bread Cheesecake
With everything layered beautifully inside your springform pan, it’s finally time for baking—the transformative phase where all those flavors meld together in utter harmony! Place your assembled cheesecake into a larger roasting pan filled with about an inch of hot water; this water bath technique helps regulate temperature around your cheesecake as it bakes, yielding an ultra-creamy texture while preventing cracks from forming on top—a baker’s worst nightmare! You’ll want to bake it in a preheated oven set at 350°F for about 60-70 minutes.
Keep an eye on your creation during this time; you’ll notice subtle changes as it begins to rise and puff up slightly around the edges while remaining soft in the center—it should jiggle just a touch when nudged gently. A toothpick inserted into the center should come out mostly clean with maybe some moist crumbs clinging onto it—not wet batter—that’s how you know it’s ready! Once baked to perfection, turn off your oven but allow the cheesecake to sit inside for another hour; this gradual cooling helps prevent any sudden temperature changes that could cause cracking.
Next Major Phase – Chilling Your Masterpiece
The waiting game begins now! While I know it’s tempting to dive right into tasting after such hard work, patience here is absolutely paramount. Carefully remove your springform pan from its water bath and let it cool at room temperature for about 30 minutes before transferring it to the refrigerator for chilling. I recommend letting it chill for at least four hours—or even overnight if you can hold out! Why chill? Chilling allows all those flavors to deepen further while providing an incredibly rich texture that’s truly extraordinary when served cold.
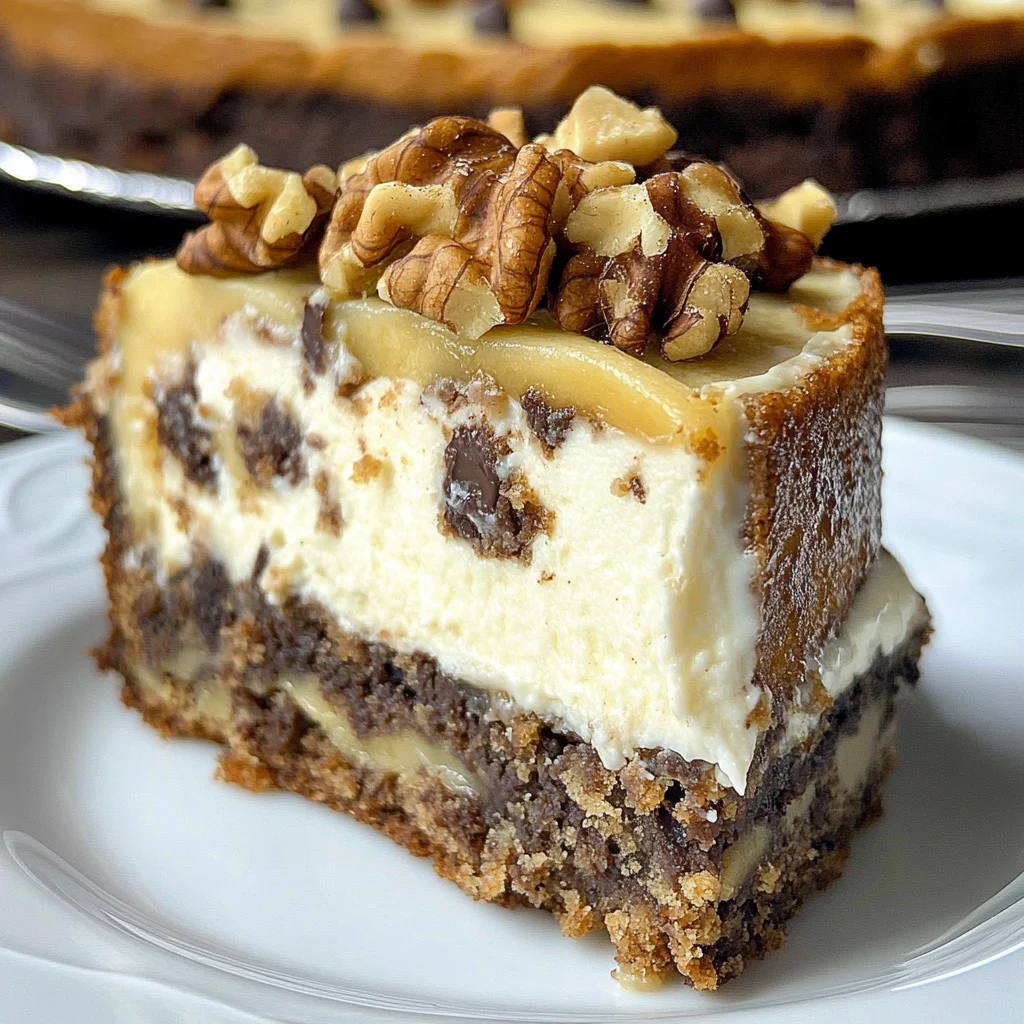
As you wait, imagine slicing through layers upon layers of velvety cheesecake mingling seamlessly with moist banana bread studded with chocolate chips—a symphony of flavors just waiting for you! And let me tell you: once chilled properly, each slice holds up beautifully under its own weight without crumbling apart; it’s simply magical!
So take this time for yourself—maybe brew some tea or coffee—and appreciate what you’ve created thus far because soon enough you’ll be ready for one last delightful touch before serving…
Storage and Enjoyment Tips for Your Banana Bread Cheesecake
Now that you’ve lovingly crafted this delightful Banana Bread Cheesecake, it’s time to dive into the experience of savoring every bite. This cake is not just a dessert; it’s a hug in cake form, perfect for sharing with friends and family or keeping all to yourself (I won’t judge!). If you find yourself with leftovers—though I promise it’ll be hard to resist—let’s talk about how to store this masterpiece while keeping its decadent flavors intact.
Storing Leftover Banana Bread Cheesecake
When storing your precious Banana Bread Cheesecake, choosing the right container is absolutely paramount. I recommend using an airtight container that fits snugly around the cheesecake to minimize air exposure, which can lead to drying out. If you don’t have one on hand, you can simply cover the cheesecake tightly with plastic wrap or aluminum foil—just make sure it’s sealed well! Store it in the refrigerator where it will stay fresh for up to five days. Now, here’s a little pro tip: if you want to keep your cheesecake from getting too soggy, place a slice of bread in the container. The bread will absorb moisture and keep your cheesecake perfectly moist! Just imagine pulling out a slice after a day in the fridge—the way it retains its creamy texture while still delivering that comforting banana flavor is truly extraordinary. When you’re ready to indulge again, simply enjoy it cold or let it sit at room temperature for about 30 minutes. Trust me; it’s utterly intoxicating!
Freezing Banana Bread Cheesecake for Later
If you find yourself with more cheesecake than you can handle (though I seriously doubt you’ll regret making extra!), freezing some is a fantastic option that brings convenience into your kitchen. To freeze your Banana Bread Cheesecake properly, first ensure it’s fully cooled down and then wrap individual slices in plastic wrap followed by aluminum foil, which will help keep out moisture and prevent freezer burn—this step is non-negotiable if you want to maintain that luscious texture. You can also freeze the entire cheesecake; just place it in a suitable freezer-safe container after wrapping! It will keep beautifully frozen for up to three months. When you’re ready for a slice of heaven from your freezer, simply transfer it to the refrigerator overnight or let it thaw on the counter for about an hour before serving. The beauty of this method lies in its convenience—you can pull out a slice any time cravings hit without any fuss!
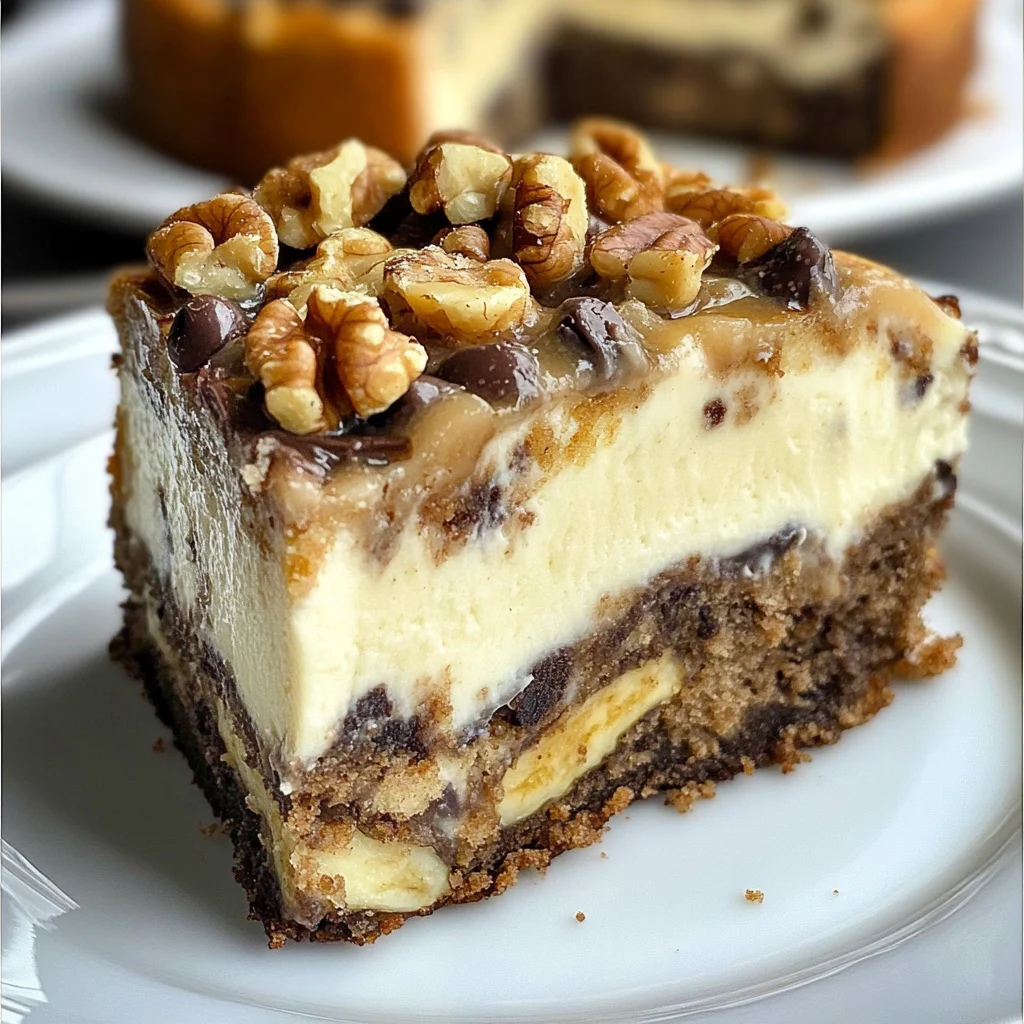
Banana Bread Cheesecake
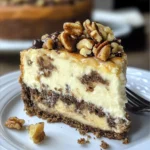
Indulge in the delightful fusion of flavors with this Banana Bread Cheesecake, where the comforting warmth of banana bread meets the creamy decadence of cheesecake. This extraordinary dessert features layers of velvety vanilla cheesecake on a moist, chocolate chip-studded banana bread base, creating a harmonious symphony of tastes and textures that will enchant your taste buds. Perfect for any occasion—be it a family gathering or a quiet evening at home—this recipe is not just about satisfying your sweet cravings; it’s about crafting memories and sharing joy through baking.
- Prep Time: 30 minutes
- Cook Time: 70 minutes
- Total Time: 1 hour 40 minutes
- Yield: Approximately 12 servings 1x
- Category: Dessert
- Method: Baking
- Cuisine: American
Ingredients
- 16 oz full-fat cream cheese, softened
- 1/4 cup sour cream
- 3/4 cup granulated sugar
- 1 teaspoon vanilla extract
- 2 eggs + 1 egg white
- 1/2 cup vegetable oil
- 2 large bananas, mashed
- 1 ½ cups all-purpose flour
- 1 teaspoon baking powder
- 1/2 cup chocolate chips
- 1/2 cup sugar
- 6 Tablespoons brown sugar
- 1 egg + 1 egg yolk
- 1 teaspoon vanilla extract
- 1 teaspoon baking soda
- 1/4 teaspoon salt
- 1 ½ – 2 teaspoons ground cinnamon (to taste)
- 1/3 cup chopped walnuts (for garnish)
Instructions
- Preheat oven to 350°F (175°C) and prepare a 9-inch springform pan by greasing and lining it with parchment paper.
- In a mixing bowl, combine softened cream cheese and sour cream until smooth. Add sugar, vanilla extract, and flour; mix well. Then incorporate eggs one at a time until fully combined.
- In another bowl, whisk together vegetable oil, sugars, eggs, and mashed bananas. Gradually mix in sifted flour, baking powder, cinnamon, and salt.
- Layer half of the banana bread mixture in the prepared pan followed by half of the cheesecake mixture. Repeat with remaining mixtures.
- Bake for 60-70 minutes in a water bath until set but slightly jiggly in the center. Cool before refrigerating for at least four hours.
Nutrition
- Serving Size: 1 slice (100g)
- Calories: 360
- Sugar: 22g
- Sodium: 210mg
- Fat: 21g
- Saturated Fat: 6g
- Unsaturated Fat: 14g
- Trans Fat: 0g
- Carbohydrates: 36g
- Fiber: 2g
- Protein: 6g
- Cholesterol: 75mg