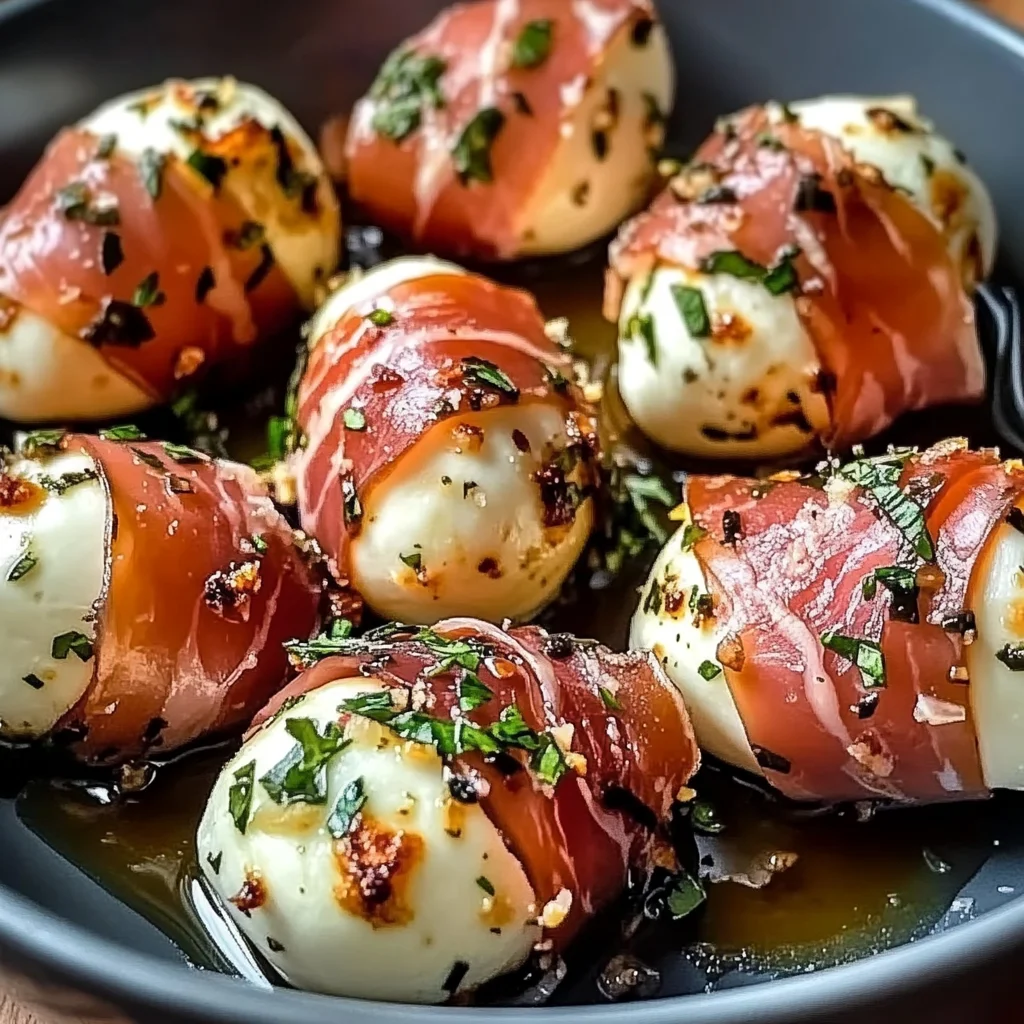
turkey slices Wrapped Mozzarella Bites
As I sit here reflecting on the simple joys of cooking, I can’t help but feel that food is so much more than just sustenance—it’s a bridge that connects us to our loved ones, to memories, and to moments that linger long after the last bite. Today, I want to share a delightful recipe that beautifully encapsulates this sentiment: turkey slices Wrapped Mozzarella Bites. Imagine taking a bite of these little treasures, where savory turkey wraps around creamy mozzarella, creating an irresistible treat that dances between salty and rich flavors. The crispy exterior gives way to the melty goodness inside, making each mouthful profoundly satisfying. Trust me when I say you’ll want to savor every moment of this culinary journey.
Every time I prepare these delightful bites, I’m reminded of gatherings with friends and family—sharing stories, laughter, and a genuine love for good food. It’s the kind of dish that feels like a warm hug; whether it’s game day or an intimate dinner party, these turkey slices Wrapped Mozzarella Bites are always a hit. They’re not just appetizers; they’re a celebration of flavor and connection. You know how some foods can bring back memories? This one is a keeper; it’s an experience waiting to unfold in your kitchen.
turkey slices Wrapped Mozzarella Bites: A Savory Symphony of Flavor
Get ready for an appetizer that will have your taste buds singing! These turkey slices Wrapped Mozzarella Bites are not only easy to whip up but also pack a flavorful punch that’s sure to impress your guests—or even just yourself on a cozy night in. With just a handful of ingredients and minimal prep time, you’re about to embark on a culinary adventure filled with warmth and comfort.
Ingredients:
Let’s gather our wonderful ingredients together as we embark on this delicious journey! Each component plays its own vital role in crafting these incredible bites.
- 1 package turkey slices. The star of our show! These turkey slices bring not only taste but also texture to our dish. When selecting turkey, look for high-quality deli meat that’s free from fillers; ideally, it should be free-range or organic if possible. The beauty of using turkey is its savory profile complements the richness of the mozzarella perfectly while providing a leaner alternative compared to other meats. If you prefer something different or need it gluten-free, you could also experiment with chicken or even plant-based deli options!
- 1 package mozzarella balls (about 12 oz). Creamy mozzarella is what makes these bites utterly intoxicating! The freshness and mild flavor of mozzarella create such harmony with the salty turkey—it’s like they were meant to be together! When choosing mozzarella balls, opt for those packed in water or brine for maximum freshness. If you can’t find them at your local store or are looking for something lower in calories, consider using part-skim mozzarella instead; it works wonderfully too!
- 2 tablespoons olive oil. Ahh, liquid gold! Olive oil isn’t just for drizzling; it adds incredible richness and helps our seasonings stick beautifully to the turkey-wrapped gems. Be sure to use high-quality extra virgin olive oil because its fruity notes will elevate this dish significantly. And if you’re feeling adventurous, try infusing your olive oil with garlic or herbs beforehand—your taste buds will thank you!
- 1 teaspoon dried oregano. This herb brings an earthy aroma that transports you directly into an Italian kitchen! Oregano’s robust flavor enhances the overall experience without overpowering the delicate notes of mozzarella and turkey. If you have fresh oregano on hand, absolutely use it! Just remember—fresh herbs are typically more potent than dried ones; so adjust accordingly.
- 1/2 teaspoon garlic powder. Garlic powder is one of those magical ingredients that adds depth without being overwhelming. It provides a subtle warmth and complexity that brings out the best in both the turkey and cheese. If you’re feeling bold, fresh minced garlic would work wonders here too—but be careful not to add too much as it can easily dominate the dish.
- 1/4 teaspoon black pepper. A pinch goes a long way! Black pepper adds just enough heat and brightness without stealing the spotlight from our main ingredients. Freshly cracked black pepper is highly recommended since its flavor profile is much more vibrant than pre-ground varieties.
- 1 tablespoon fresh basil (optional). While this ingredient is optional, I highly encourage adding fresh basil right before serving for that pop of color and aromatic sweetness! Basil pairs beautifully with both turkey and mozzarella—think pizza vibes but taken up several notches! If fresh basil isn’t available, feel free to skip it or substitute with another herb like parsley or chives.
Equipment You’ll Need:
Now that we have our ingredients ready let’s talk about some essential tools you’ll need to make this process smooth sailing! Having the right equipment can truly make all the difference in creating something wonderful.
- Baking sheet – This trusty companion will hold our tantalizing bites as they transform into crispy delights in the oven. Using parchment paper or aluminum foil can make cleanup easier while ensuring even cooking—nobody likes sticking food!
- Parchment paper or aluminum foil – Lining your baking sheet with either helps prevent sticking while allowing for easy removal once baked—this step is non-negotiable if you’re aiming for perfection!
- Small skillet – This will be used for heating up our olive oil along with seasoning—it’s important because warming spices releases their essential oils and amplifies their flavor significantly.
- Brush or spoon – You’ll need this tool for spreading that marvelous seasoned olive oil mixture onto each wrapped bite evenly; trust me—this step enhances both flavor and presentation.
Step 1: Preheat Your Oven Like An Artist Preparing Their Canvas
Before diving into wrapping those delectable bites, let’s set ourselves up for success by preheating your oven to 375°F (190°C). This initial step ensures that everything cooks evenly once we place our creations inside—the goal here is crispy perfection! As your oven warms up, line your baking sheet with parchment paper or aluminum foil; this will provide a non-stick surface which makes transferring those golden beauties much simpler later on.
Step 2: Prepare Your Turkey Slices
Next up? We’ll gently open that package of turkey slices—a job best done carefully so as not to rip any delicate pieces apart! Lay them flat on a clean surface like a cutting board or plate; this makes wrapping so much easier later on since each slice needs space to maneuver around its cheesy counterpart! Take your time here; don’t rush through preparing these lovely wraps because they deserve all your attention!
Step 3: Get Those Mozzarella Balls Ready
Once your turkey is laid out nicely before you, let’s turn our focus towards those creamy mozzarella balls nestled in their packaging waiting expectantly! Carefully remove them from their watery bath (if applicable) and drain any excess liquid off so we don’t end up with soggy bites later on—no one wants that disappointment after all this hard work! If any balls seem overly large (and sometimes they do), feel free to cut them in half so they tuck snugly within their savory blanket!
Step 4: Wrap Those Cheesy Delights
Now comes my favorite part—wrapping each mozzarella ball with love using those prepared turkey slices! Place one ball right at center stage atop each slice then carefully fold over each side until fully enclosed like tucking in a baby burrito (how adorable!). Make sure there are no gaps left exposed because we want every bit coated perfectly during baking—it’ll help keep things nice and cheesy inside while getting crispy outside!
I hope you’re feeling excited about these steps as we continue crafting this delicious appetizer together! Stay tuned as we dive deeper into seasoning magic next…
Crafting the Perfect Turkey Slices Wrapped Mozzarella Bites
Step 5: Wrapping Magic
Now that you’ve got your turkey slices laid out beautifully on a clean surface, it’s time to bring the magic of wrapping into play. Take one of the mozzarella balls, and if they’re on the larger side, don’t hesitate to slice them in half. Trust me, this little adjustment not only makes them easier to wrap but also ensures that each bite is perfectly balanced with that creamy center. Position the mozzarella ball right in the heart of the turkey slice; this is where the real fun begins! Gently but firmly fold one end of the turkey slice over the mozzarella, then roll it snugly until it’s completely enveloped. The goal here is to create a delightful little package that seals in all that molten goodness. This step is crucial because a tightly wrapped bite will keep the cheese from oozing out during baking, ensuring every mouthful remains packed with flavor and texture.
As you work through each slice, take a moment to admire how these bites start to take shape. Don’t rush this step; savor each wrap as if you’re creating little edible gifts for your taste buds. I promise you, the anticipation builds as these savory morsels come together! After wrapping all your mozzarella balls, set them aside and prepare for the next phase—the infusion of flavor.
Step 6: Seasoning with Love
With your turkey-wrapped treasures ready, let’s dive into creating an aromatic seasoning oil that will elevate these bites to a whole new level. Heat 2 tablespoons of olive oil in a small skillet over medium heat—this is where we bring out those essential flavors! As the oil warms up, sprinkle in 1 teaspoon of dried oregano, ½ teaspoon of garlic powder, and ¼ teaspoon of black pepper. Stir those seasonings in for about 30 seconds until they become fragrant; this process is known as blooming spices. Why bloom? Because it releases essential oils and intensifies their flavors! You’ll want to watch for a subtle sizzling sound and a delightful aroma wafting through your kitchen—a sure sign that you’re on the right track.
Once this fragrant concoction has formed, remove it from heat and allow it to cool slightly before applying it to your turkey-wrapped bites. Using either a brush or a spoon (I find a brush gives it an even coating), generously apply this seasoned oil to each wrapped bite. This final touch isn’t just about flavor; it creates a beautiful golden exterior as they bake.
Step 7: Arranging for Success
Now comes an exciting moment—placing your beautifully wrapped bites onto your prepared baking sheet! Carefully arrange them so they’re spaced slightly apart; this is non-negotiable because good air circulation around each bite ensures even cooking and crispiness. Picture each bite nestled together like old friends at a gathering—cozy but not too crowded! If you’ve brushed on that aromatic olive oil mixture well, you should see glistening surfaces ready to embrace heat.
As you slide this baking sheet into your preheated oven set at 375°F (190°C), let out a deep breath of anticipation! Baking these turkey slices Wrapped Mozzarella Bites transforms them from raw ingredients into beautifully cooked morsels of joy. You’ll want to keep an eye on them throughout their time in the oven—set your timer for about 10-12 minutes but know that every oven behaves differently. Look for visual cues: those edges should turn crispy and golden brown while that center remains gooey and melty.
Step 8: The Art of Baking Perfection
As those enticing aromas begin to fill your kitchen and tease your senses, it’s crucial to remain patient during these final moments of baking. The total cooking time can fluctuate based on your oven’s idiosyncrasies; some might need just under ten minutes while others may require closer to twelve or even fifteen minutes for optimal crispness. You’re looking for that perfect balance—a golden-brown outside with just enough crunch while keeping an eye on those precious mozzarella centers bubbling away beneath.
When they look like little parcels of happiness emerging from the oven, carefully remove them using oven mitts (safety first!). Let them cool for just a few minutes—this resting period allows the cheesy goodness inside to settle slightly so when you take that first bite, everything doesn’t ooze out uncontrollably (though let’s be honest…a little ooze isn’t always a bad thing!).
Final Touches: Elevating Your Bites
Step 9: The Finishing Flourish
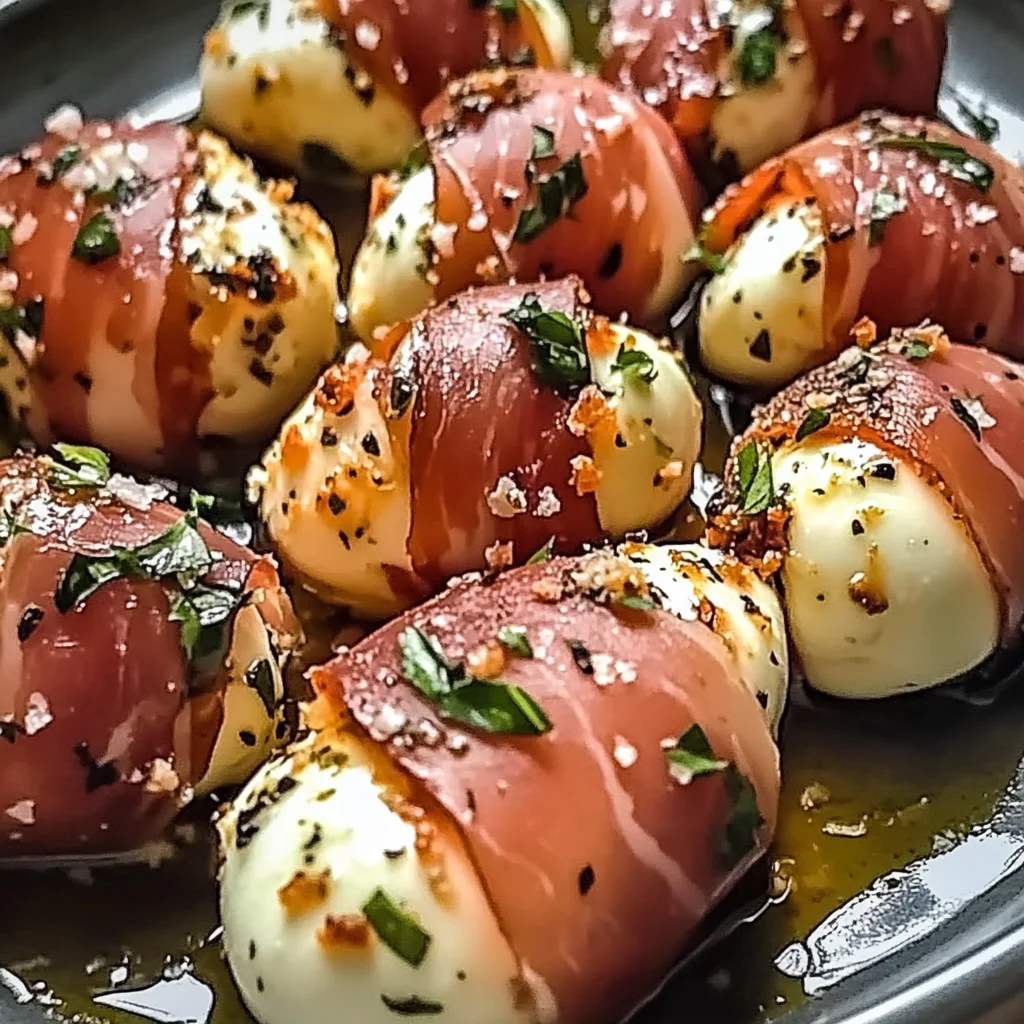
Before serving these tantalizing bites, let’s add one last flourish that brings both color and fresh flavor! If you have some fresh basil on hand—and who wouldn’t want fresh basil?—chop it finely and sprinkle it generously over your warm bites right before serving. This step adds not just another layer of flavor but also makes everything visually stunning—the vibrant green against those golden wraps is simply irresistible!
Serving immediately is key here; nothing beats enjoying these bites while they’re still warm and oozing with cheesy goodness! Gather around with friends or family (or keep them all to yourself—I won’t judge!), and watch as everyone dives in with gusto! Trust me when I say these turkey slices Wrapped Mozzarella Bites are not just appetizers—they’re little moments of joy waiting to be shared!
So there you have it—a labor of love transformed into an utterly intoxicating treat perfect for any occasion or cozy night in. I hope you enjoy making these as much as I do; remember, every bite carries with it not just flavor but warmth from my kitchen to yours! Happy cooking!
Storage and Enjoyment Tips for Your turkey slices Wrapped Mozzarella Bites
Now that you’ve just pulled your turkey slices Wrapped Mozzarella Bites from the oven and are likely savoring the aroma wafting through your kitchen, it’s time to talk about how to preserve this deliciousness for later enjoyment! Trust me, these bites are so good that it’s hard to think about leftovers, but knowing how to store them properly means you can relish those crispy, cheesy delights even after the first serving.
Storing Leftover turkey slices Wrapped Mozzarella Bites
To keep your turkey slices Wrapped Mozzarella Bites as delightful as they were fresh out of the oven, place them in an airtight container. This keeps the moisture out and preserves that precious crispiness we all adore. You can store them in the refrigerator for up to three days—though I promise you they won’t last that long if you’re anything like my friends and family! If you want to maintain their quality, consider placing a slice of bread inside the container with the bites; this little trick helps absorb excess moisture, keeping your bites crispy. When reheating, pop them back into a preheated oven at 350°F (175°C) for about 5-7 minutes. This way, they’ll regain their delightful crunch while warming up perfectly inside!
Freezing turkey slices Wrapped Mozzarella Bites for Later
If you’re planning ahead or simply want to ensure you always have a stash of these irresistible bites on hand, freezing is an excellent option! To freeze them properly, allow your wrapped mozzarella bites to cool completely before arranging them in a single layer on a baking sheet and placing it in the freezer until they are firm. Once frozen solid, transfer them into a freezer-safe bag or airtight container—this will prevent freezer burn. They’ll stay fresh in the freezer for up to three months! When you’re ready to enjoy them again, there’s no need to thaw; just bake from frozen at 375°F (190°C) for about 15-20 minutes until heated through. The convenience of having these savory bites ready at a moment’s notice is absolutely fantastic!
Turkey Slices Wrapped Mozzarella Bites

Indulge in the comforting flavors of turkey slices Wrapped Mozzarella Bites, where savory turkey envelops creamy mozzarella for a delightful treat. These crispy bites are perfect for any occasion, whether you’re hosting a game day gathering or enjoying a cozy night at home. Each mouthful delivers a satisfying crunch followed by warm, melty cheese, making them an irresistible appetizer. Easy to prepare and packed with flavor, this recipe is sure to become a favorite among friends and family. Get ready to experience culinary joy with every bite!
- Prep Time: 15 minutes
- Cook Time: 12 minutes
- Total Time: 27 minutes
- Yield: Approximately 12 bites 1x
- Category: Appetizer
- Method: Baking
- Cuisine: Italian
Ingredients
- 1 package turkey slices (about 8 oz)
- 1 package mozzarella balls (about 12 oz)
- 2 tablespoons olive oil
- 1 teaspoon dried oregano
- 1/2 teaspoon garlic powder
- 1/4 teaspoon black pepper
- Optional: 1 tablespoon fresh basil for garnish
Instructions
- Preheat your oven to 375°F (190°C) and line a baking sheet with parchment paper.
- Lay the turkey slices flat on a clean surface.
- Drain the mozzarella balls and cut larger ones in half.
- Wrap each mozzarella ball snugly with turkey slices.
- In a small skillet, heat olive oil over medium heat and stir in oregano, garlic powder, and black pepper for about 30 seconds.
- Brush the seasoned oil over each wrapped bite and arrange them on the baking sheet.
- Bake for 10-12 minutes until golden brown and crispy.
Nutrition
- Serving Size: 2 bites (70g)
- Calories: 150
- Sugar: 0g
- Sodium: 480mg
- Fat: 8g
- Saturated Fat: 2g
- Unsaturated Fat: 6g
- Trans Fat: 0g
- Carbohydrates: 2g
- Fiber: 0g
- Protein: 18g
- Cholesterol: 40mg