Coffee Cake Cookies
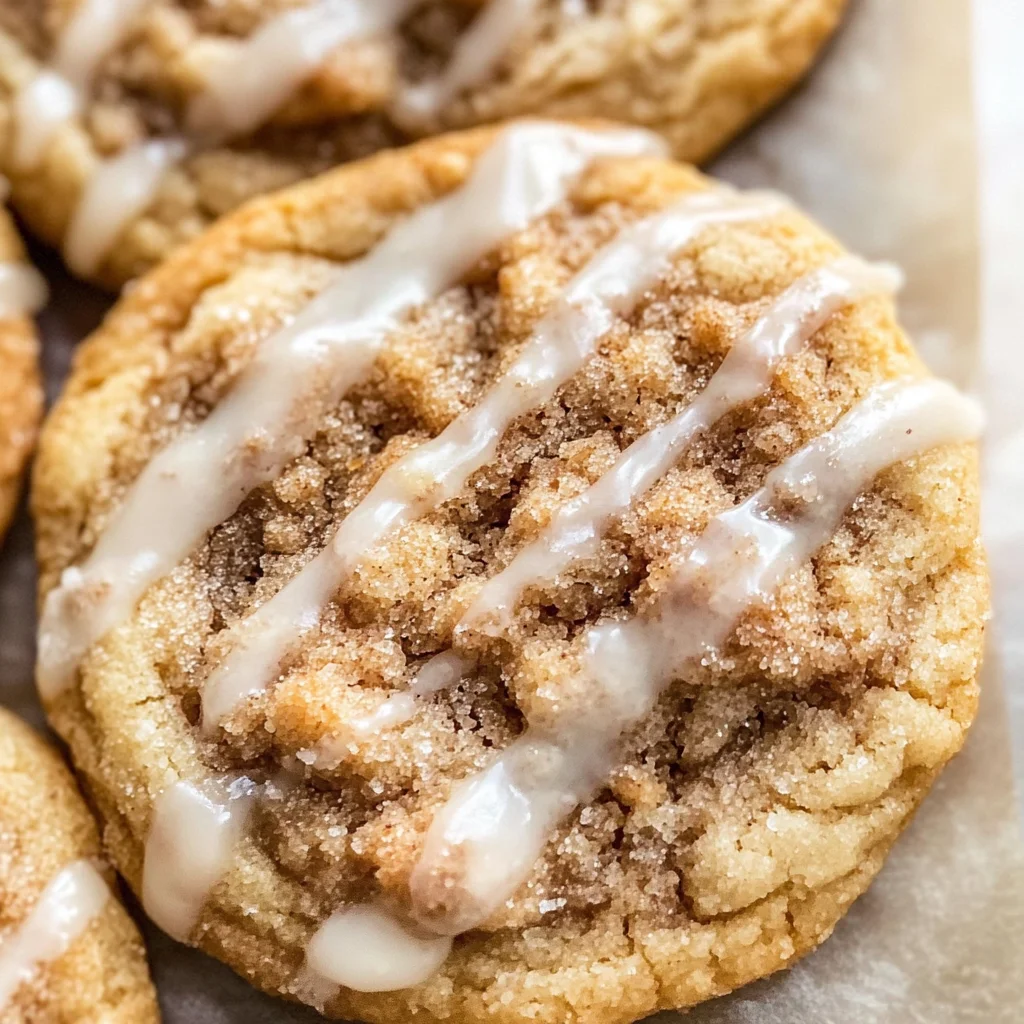
There’s something utterly enchanting about the aroma of freshly baked cookies wafting through the kitchen, isn’t there? It’s like a warm hug that instantly lifts your spirits and ignites cherished memories of family gatherings and cozy afternoons with a cup of coffee. Today, I want to share with you a recipe that beautifully marries those feelings with the comforting flavors of coffee cake: Coffee Cake Cookies. Imagine soft and chewy cookies, rich with buttery goodness, filled with crunchy cinnamon sugar crumbs, all drizzled in a sweet vanilla glaze. These cookies are not just a dessert; they are a celebration of life’s simple pleasures, an invitation to gather around the table and indulge in the warmth of togetherness.
As you embark on this delightful culinary journey with me, I promise you’ll find yourself captivated by how easy it is to transform everyday ingredients into something truly extraordinary. Each bite of these Coffee Cake Cookies sings a song of nostalgia while offering a modern twist that will make your heart skip a beat. Whether you’re preparing them for a family gathering or simply treating yourself after a long day, these cookies are bound to bring smiles all around. So, let’s roll up our sleeves and dive into this beautiful recipe—trust me, you won’t want to miss out on this experience!
Coffee Cake Cookies: A Sweet Symphony of Flavor
Everyone loves cookies, right? But when you combine the beloved classic coffee cake with the convenience of a cookie, magic happens! These Coffee Cake Cookies are soft and chewy with that signature cinnamon flavor we all adore. The addition of crunchy cinnamon crumbs within the dough takes them to another level entirely—who could resist such an indulgence? And let’s not forget about the luscious vanilla glaze drizzled on top! It adds just the right amount of sweetness and elegance that makes these cookies feel like a special treat.
Ingredients:
As we gather our ingredients for these delightful Coffee Cake Cookies, think of each one as an essential note in our symphony of flavors. Each ingredient plays its part in creating that rich and buttery taste we’re aiming for. Let’s explore what we need for this delicious adventure!
- 2 tbsp unsalted butter, melted. This melted butter provides both moisture and richness to our cookie dough. It’s essential for achieving that soft texture we’re after without making the cookies greasy or overly dense. Always choose high-quality unsalted butter to allow you to control the salt levels throughout your recipe. If you’re in a pinch, coconut oil can be used as an alternative for a dairy-free option.
- ¼ cup + 2 tbsp all-purpose flour. Flour is the backbone of any cookie; it gives structure while controlling how much they spread during baking. Make sure to spoon it into your measuring cup instead of scooping directly from the bag—this little trick ensures you don’t end up with too much flour which can lead to dry cookies.
- ¼ cup white granulated sugar. This sugar not only sweetens our cookies but also contributes to their texture; it helps achieve that perfect balance between crispy edges and chewy centers. If you’re looking for less sweetness, feel free to reduce this amount slightly without compromising on taste.
- ¼ teaspoon baking powder. This leavening agent is what will help our cookies rise slightly as they bake, lending them an airy quality that’s oh-so-delightful! Ensure your baking powder is fresh; if it’s been sitting in your pantry for months (or years!), it might have lost its potency.
- 1 tsp cinnamon. Ahh, cinnamon—the star spice! Its warm sweetness complements both coffee cake and cookie alike, making every bite feel like a cozy hug from within. Always opt for ground cinnamon over cinnamon sugar here; we want pure flavor without added sweetness.
- ½ teaspoon vanilla extract. Vanilla is what brings all our flavors together harmoniously—it enhances everything from butteriness to sweetness! Use pure vanilla extract if possible; imitation extracts just don’t provide the same depth of flavor.
- 6 tbsp unsalted butter (room temperature). The room temperature butter plays a crucial role in creaming with sugars later on; it creates air pockets that give us fluffy cookies rather than flat ones! Letting it sit out before starting ensures it’s soft enough for optimal mixing.
- ¼ cup + 1 tbsp light brown sugar (packed). Brown sugar adds moisture due to its molasses content and gives our cookies that lovely chewiness we crave! Packing it tightly into your measuring cup ensures you get all that delicious flavor.
- ¼ cup white granulated sugar (again). Since we’re layering flavors here, using both types of sugar allows us to achieve complex sweetness levels—one that’s slight caramelized from brown sugar while having clean sweetness from white sugar.
- 1 large whole egg (room temperature). Eggs bind our ingredients together while providing moisture and richness—a non-negotiable element in cookie recipes! Room temperature eggs incorporate into our mixture more smoothly than cold ones straight from the fridge.
- 1 teaspoon vanilla extract (again). We’re going deep on flavor here! Adding it twice really amplifies that aromatic quality throughout each layer of this cookie!
- 1 cup all-purpose flour (again). We’ll need more flour later on as we build upon our dough’s structure—this second addition helps ensure we have stability as well!
- ½ cup + 2 tbsp cinnamon crumbs. These crunchy treasures add texture and bursts of cinnamon flavor throughout each bite! You can easily make some by combining equal parts flour and brown sugar alongside melted butter until crumbly—so satisfying!
- ½ teaspoon baking soda. Baking soda works hand-in-hand with baking powder here as another leavening agent; it helps create lift while balancing acidity present from brown sugars!
- ¼ teaspoon salt. Salt enhances all flavors present within our delicious morsels—it’s truly amazing how just a pinch can elevate everything else!
- ½ tsp cinnamon (yet again!). More layers mean more depth—the irresistible aroma will fill your home while baking!
- ½ cup powdered sugar. This fine confectioner’s delight is what we’ll use for glazing later on; its super-fine particle size allows us effortless mixing into liquids without clumping!
- 1-2 tsp 2% milk (or milk of choice). Milk thins out our glaze while adding creaminess—it’s important not too thick nor too runny! Depending on personal preference or dietary needs choose full fat/non-dairy alternatives accordingly.
- ½ tsp vanilla extract (that familiar friend!). As always—vanilla enriches every aspect bringing brightness against sweetness!
Equipment You’ll Need:
Before diving into creating these mouth-watering treats, let’s talk about the essential tools you’ll need along the way because having reliable kitchen companions makes everything smoother!
- Mixing bowls – You’ll need at least two: one for combining wet ingredients like butter and sugars, another for dry ingredients such as flour and spices before incorporating them together seamlessly later on.
- Measuring cups and spoons – Accurate measurements are absolutely paramount here since even slight variations can affect texture or flavor significantly!
- Rubber spatula – Trust me when I say this tool will become invaluable during mixing stages—use it for scraping down sides ensuring no remnants go unnoticed lurking at bottom corners before forming dough blissfully smooth.
- Baking sheet – A good quality non-stick or parchment-lined tray ensures even distribution while preventing sticking issues during baking process so they come off easily once cooled down properly post-bake!
- Cooling rack – Allowing baked goods proper airflow helps prevent sogginess by letting steam escape quickly after removing hot trays from oven freeing those delightful circles faster than anticipated!
Preparing the Coffee Cake Cookies
Step 1: Creaming Butter & Sugars
To begin crafting these delectable Coffee Cake Cookies, let’s start by creaming together our softened unsalted butter (both melted and room temperature) along with granulated white sugar and packed light brown sugar until they resemble fluffy clouds in your mixing bowl! This process known as creaming incorporates air into fats which leads us towards achieving those wonderfully tender textures we love so much when biting into freshly baked goods! As you mix away—watch for noticeable changes; initially chunky lumps will become smooth amalgamation within minutes signaling readiness—that’s when you’ll know you’ve done right by giving patience attention during this crucial stage!
Step 2: Incorporating Egg & Vanilla
Next up comes adding in one large room-temperature egg alongside two teaspoons worth aromatic vanilla extract at this point—the golden elixir enriching every morsel ahead! Whisk vigorously until completely combined—for best results ensure no streaks remain visible post-mixing time allowing everything melded harmoniously together producing unified batter ready subsequent additions next round awaiting patiently ahead!
Step 3: Combining Dry Ingredients
Now take another bowl where previously set aside measured amounts containing flour(s), baking powder(s), soda plus salt mixed thoroughly together gently folding dry elements towards wet mixtures gradually preventing clumps forming along edges thus ensuring consistency throughout final dough created beautifully balanced across entire batch produced evenly yielding same great results regardless amounts made per occasion planned serving friends feasting together soon enough ahead—exciting times await!
Step 4: Folding In Cinnamon Crumbs
Once everything melded perfectly feels cohesive yet still somewhat sticky embrace now comes time inviting those heavenly cinnamon crumbs crafted earlier layered within dough folding softly ensuring coverage spread fair across entirety else could risk bites lacking true essence intended when sinking teeth deep inside scrumptiously baked spheres awaiting emergence shortly thereafter…
With each step taken meticulously done thoughtfully engaged passion infused throughout process transforming ordinary moments shared cooking alongside loved ones celebrating life experiences flavored uniquely captured joyfully forever remembered…
Stay tuned because next we’ll be rolling out these beauties onto baking sheets before dressing them up with their sweet glaze once cooled down properly allowing indulgent treats emerge joyful smiles everywhere served around tables filled laughter endlessly shared amongst hearts connected intimately through food enjoyed truly together…
The Joy of Baking Your Coffee Cake Cookies
Ah, my friend, we’re diving deep into the heart of cookie creation with these delightful Coffee Cake Cookies! If you’ve ever savored a slice of warm coffee cake, soaking in that heavenly aroma as you take a bite, then imagine transforming that experience into a soft and chewy cookie. Each one of these cookies is like a warm hug for your taste buds, enveloped in flavors of cinnamon and sugar, all wrapped up in a buttery dough that simply melts in your mouth. Let’s not waste any time; let’s get right back into the magic!
Step 5: Creating the Cinnamon Sugar Crumbs
Now comes the fun part—making those irresistible cinnamon sugar crumbs that will give your Coffee Cake Cookies that extra layer of texture and flavor. Start by whisking together ¼ cup plus 2 tablespoons of all-purpose flour with ¼ cup packed light brown sugar and 1 teaspoon of cinnamon in a small bowl. This mixture is going to embody the very essence of what makes coffee cake so beloved—the sweet, aromatic spice mingling beautifully with the sugary goodness. It’s crucial to combine these ingredients thoroughly because this ensures that every crumb you sprinkle has an equal distribution of flavor.
Once your dry ingredients are well blended, melt those 2 tablespoons of unsalted butter until it’s just liquid gold—don’t let it boil or burn! Pour this melted butter over your dry mixture and stir gently but purposefully until you see clumps forming. You want these crumbs to be chunky yet crumbly; think about how satisfying it is to find those little pockets of sweetness in each bite! Trust me on this: letting them sit for just a moment will allow the butter to bind them slightly more and enhance their crumbly texture. Set this bowl aside while we move on to creating the luscious cookie dough that will cradle these treasures.
Step 6: Crafting the Cookie Dough
Now it’s time to bring our dough to life! In a large mixing bowl, combine 6 tablespoons of room-temperature unsalted butter with ¼ cup granulated sugar and ¼ cup packed light brown sugar. Using either an electric mixer or a good old-fashioned whisk (which I adore for its therapeutic qualities), beat these ingredients together until they become light and fluffy—this usually takes about 3-4 minutes. Why do we spend time creaming? Well, this step incorporates air into the butter and sugars, creating tiny bubbles that expand during baking, resulting in wonderfully tender cookies.
Next, add in one large egg (also at room temperature) and one teaspoon of vanilla extract; mix until everything is fully incorporated. The egg acts as both binder and leavener here—it holds everything together while also contributing moisture which makes your cookies soft and chewy. Then, sift together your remaining flour along with ½ teaspoon baking soda, ¼ teaspoon salt, and another generous half teaspoon of cinnamon before gradually adding it to your wet mixture. Stir until just combined; be careful not to overmix! Overworking the dough can lead to tough cookies rather than those divine chewy bites we are aiming for.
Step 7: Folding in the Cinnamon Crumbs
Here’s where the magic truly happens! Gently fold in your prepared cinnamon crumbs into the cookie dough using a spatula or wooden spoon. This step is crucial because it allows the crumbs to be evenly distributed throughout without breaking apart too much—so take your time here! The goal is to create a beautiful balance between soft cookie dough and crunchy cinnamon goodness in each cookie bite. As you fold, feel free to sneak a taste of that dough—it’s simply irresistible!
Once you have achieved this harmonious blend, cover the mixing bowl with plastic wrap or a clean kitchen towel (that cute little blanket for our dough!), and let it rest at room temperature for about 10-15 minutes before baking. Why rest? This brief interlude allows the flour to hydrate fully and gives time for all those flavors to meld together beautifully—trust me on this one; patience pays off tenfold when it comes to baked goods!
Step 8: Prepping for Baking Bliss
Alright, my baking enthusiast! Now it’s time to prepare for our cookies’ grand debut into the oven—a crucial phase indeed! Preheat your oven to 350°F (175°C) while you line two baking sheets with parchment paper; this is non-negotiable as it not only helps prevent sticking but also ensures even baking. Once preheated, use a tablespoon or cookie scoop to portion out rounded balls of dough onto your prepared sheets—approximately two inches apart will do nicely since they’ll spread slightly while baking.
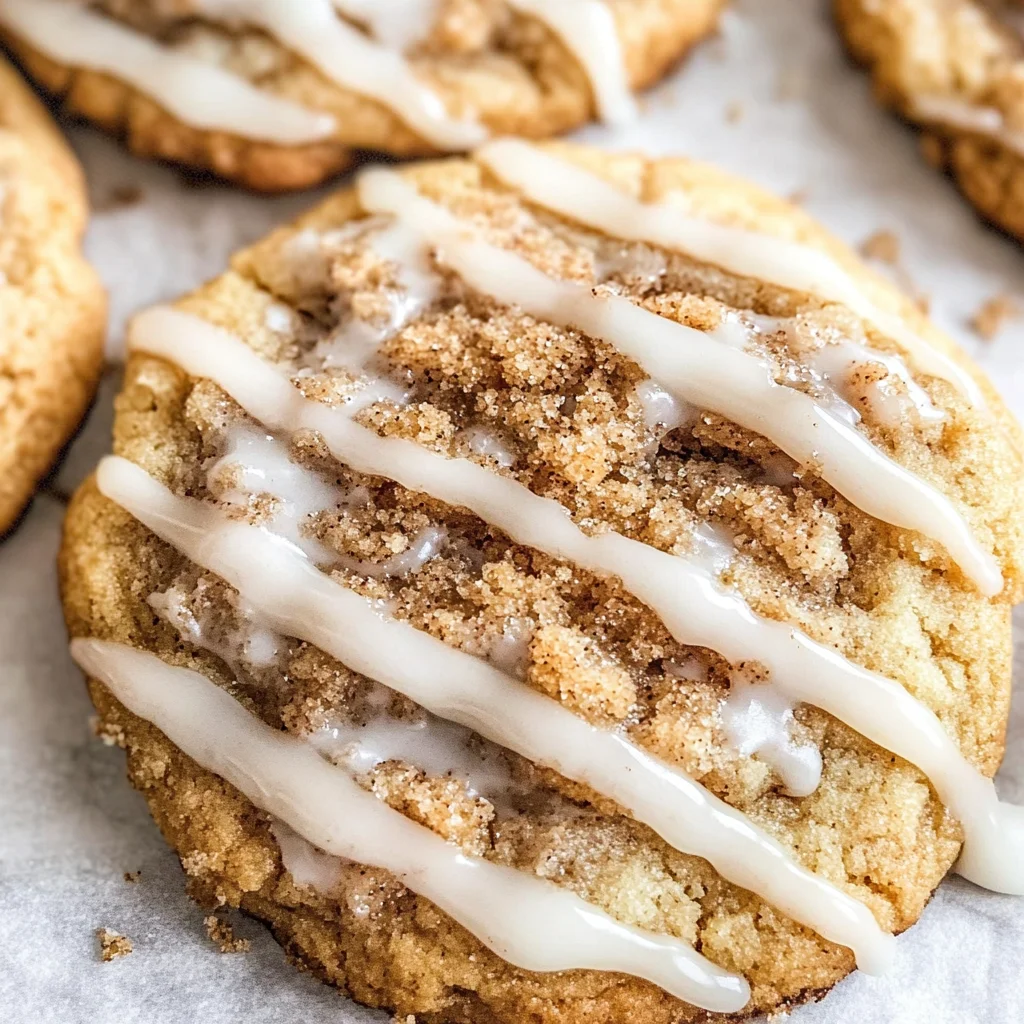
Before sliding these beauties into their warm haven, don’t forget this important touch: sprinkle a few extra cinnamon crumbs over each ball of dough! This topping isn’t just for aesthetics; it creates an added crunch factor that elevates every single bite and gives them that classic coffee cake appearance we all adore. Bake them for about 10-11 minutes or until they’re turning golden around the edges but still slightly soft in the center—remember they’ll continue cooking once removed from the oven due to residual heat.
The Final Touches – Drizzling Delight
As our Coffee Cake Cookies bake away blissfully in the oven, let’s prepare for their glorious finish! While they cool on wire racks (a step I recommend wholeheartedly because cooling helps retain their structure), gather your remaining powdered sugar and whisk it together with just enough milk—1-2 teaspoons should do—to create a smooth glaze with a drizzling consistency. Add half a teaspoon of vanilla extract into this mix for an extra pop of flavor; I promise you—it transforms something delicious into something truly extraordinary.
Once those cookies are cool enough not to melt away our lovely glaze (about 5-10 minutes should suffice), grab a fork or spoon and drizzle generously across each cookie. This simple act adds not just sweetness but also visual appeal—a final flourish that says “I care.” Allow them some time so the glaze can set slightly before devouring them whole—or sharing if you’re feeling generous!
And there you have it—your very own batch of Coffee Cake Cookies! Perfectly soft, decadently spiced with cinnamon goodness topped off with delightful glaze—a treat worthy of any occasion or simply because you deserve it today! So go ahead: embrace every moment spent crafting these delights because culinary joy like this is meant to be shared—and trust me when I say they won’t last long once you introduce them to family or friends! Happy baking!
Storage and Enjoyment Tips for Your Coffee Cake Cookies
Now that your kitchen is filled with the delightful aroma of freshly baked Coffee Cake Cookies, it’s time to dive into the joy of enjoying them! The moment you take that first bite, you’ll be captivated by the warm, buttery flavors mingling with sweet cinnamon, and I promise you, it’s a slice of heaven. But what happens when you have a few cookies left over? Don’t worry; I’ve got you covered on how to ensure they stay as delicious as the day they were baked!
Storing Leftover Coffee Cake Cookies
To keep your cookies fresh and flavorful, store them in an airtight container at room temperature. This keeps their soft, chewy texture intact while also preventing them from drying out. They’ll stay good for about 3-5 days, but trust me when I say they won’t last that long! If you want to maintain that bakery-fresh quality, consider placing a slice of bread in the container with them; the moisture will keep your cookies delightfully soft. Even after a day or two, these cookies remain profoundly satisfying, still bursting with that irresistible cinnamon flavor. If you find yourself craving a warm cookie again, simply pop one in the microwave for about 10-15 seconds and experience the liquid gold of melted goodness once more!
Freezing Coffee Cake Cookies for Later
Want to save some of those delectable treasures for a rainy day? Freezing is an excellent option! To freeze your Coffee Cake Cookies properly, allow them to cool completely before placing them in a single layer on a baking sheet lined with parchment paper. Once frozen solid (about an hour), transfer them into an airtight freezer bag or container. They can be stored frozen for up to three months. When you’re ready to indulge again, take out however many cookies you desire—no need to thaw! Just bake them at 350°F (175°C) for about 5-7 minutes straight from the freezer. This convenience factor means you’ll always have a little treat ready to brighten your day or impress unexpected guests with minimal effort.
Coffee Cake Cookies
Coffee Cake Cookies are a delightful fusion of soft, chewy cookies and the beloved flavors of traditional coffee cake. Imagine biting into a warm cookie that showcases buttery goodness, aromatic cinnamon, and crunchy crumbs, all drizzled with a sweet vanilla glaze. These cookies are perfect for gatherings or as a cozy treat while enjoying your favorite beverage. Easy to prepare and utterly irresistible, they will bring smiles to everyone who tries them.
- Prep Time: 20 minutes
- Cook Time: 11 minutes
- Total Time: 31 minutes
- Yield: Approximately 24 cookies 1x
- Category: Dessert
- Method: Baking
- Cuisine: American
Ingredients
- 2 tbsp unsalted butter, melted
- ¼ cup + 2 tbsp all-purpose flour
- ¼ cup white granulated sugar
- ¼ teaspoon baking powder
- 1 tsp cinnamon
- ½ teaspoon vanilla extract
- 6 tbsp unsalted butter (room temperature)
- ¼ cup + 1 tbsp light brown sugar (packed)
- ¼ cup white granulated sugar
- 1 large whole egg (room temperature)
- 1 teaspoon vanilla extract
- 1 cup all-purpose flour
- ½ cup + 2 tbsp cinnamon crumbs
- ½ teaspoon baking soda
- ¼ teaspoon salt
- ½ tsp cinnamon
- ½ cup powdered sugar
- 1–2 tsp 2% milk (or milk of choice)
- ½ tsp vanilla extract
Instructions
- Preheat oven to 350°F (175°C) and line baking sheets with parchment paper.
- In a mixing bowl, cream together 6 tbsp softened unsalted butter with ¼ cup granulated sugar and ¼ cup packed light brown sugar until fluffy.
- Mix in one large egg and 1 tsp vanilla extract until well combined.
- In another bowl, whisk together 1 cup all-purpose flour, ½ tsp baking soda, ¼ tsp salt, and 1½ tsp cinnamon; gradually add to the wet mixture until just mixed.
- Fold in the prepared cinnamon crumbs made from combining ½ cup + 2 tbsp flour, ½ cup packed brown sugar, and 2 tbsp melted butter.
- Scoop rounded tablespoons of dough onto prepared baking sheets and sprinkle with additional crumbs.
- Bake for 10-11 minutes until edges are golden but centers remain soft. Cool on wire racks.
- Combine powdered sugar with milk and drizzle over cooled cookies.
Nutrition
- Serving Size: 1 cookie (30g)
- Calories: 145
- Sugar: 9g
- Sodium: 85mg
- Fat: 6g
- Saturated Fat: 3g
- Unsaturated Fat: 2g
- Trans Fat: 0g
- Carbohydrates: 22g
- Fiber: <1g
- Protein: 2g
- Cholesterol: 15mg