TEXAS CAVIAR (COWBOY CAVIAR)
There’s something truly magical about gathering around a table filled with vibrant colors, enticing aromas, and flavors that dance on your palate. When I think of the culinary gems that evoke warmth and connection, Texas Caviar (Cowboy Caviar) instantly comes to mind. This dish is not just a recipe; it’s a celebration of community and joy, often making an appearance at gatherings where laughter fills the air and good times roll on. The moment you take that first bite, you’re greeted by a symphony of flavors— from the earthy black-eyed peas to the juicy sweetness of corn, all perfectly balanced by zesty lime juice. It’s an experience that transcends mere nourishment; it’s like wrapping yourself in a cozy blanket on a chilly evening.
What makes Texas caviar so special? Well, it embodies the spirit of resourcefulness and creativity found in Texan culture. This dish is a playful twist on traditional caviar, replacing fish eggs with wholesome ingredients that are as nutritious as they are delicious. Whether you’re serving it as a refreshing dip during game day or as a colorful salad at your summer barbecue, this recipe is incredibly versatile. It’s perfect for elevating any occasion or simply enjoying as part of your weekly meal prep. Trust me when I say that once you make this dish, it will find its way into your regular rotation!
TEXAS CAVIAR (COWBOY CAVIAR): A Flavorful Twist on Tradition
Let’s dive right into this delightful recipe! Texas caviar is such an easy and fulfilling dish to prepare, and best of all, it requires minimal cooking—perfect for those busy weeknights or spontaneous get-togethers with friends. As we embark on this culinary journey together, you’ll discover how beautifully each ingredient works in harmony to create something truly extraordinary.
Ingredients:
As we prepare our Texas caviar, let’s take a moment to appreciate each ingredient’s role in crafting this delightful dish. Each component brings its own unique flavor and texture to the mix.
- 1 can (15oz) black-eyed peas, drained and rinsed. These little gems are often overlooked but are packed with protein and fiber, making them not only nutritious but also wonderfully creamy once mixed with the other ingredients. Their mild flavor allows them to absorb the zesty dressing beautifully while adding a satisfying base to our salad.
- 1 can (15oz) black beans, drained and rinsed. Black beans bring their rich earthiness to the table—a deep flavor profile that pairs perfectly with the brightness of our other ingredients. They add another layer of protein and fiber while giving our Texas caviar that lovely hearty texture.
- 1 can (14oz) corn, drained. Sweet corn adds a pop of color and sweetness that brightens up our dish remarkably! If you’re feeling adventurous or have fresh corn available, using fresh kernels straight off the cob brings an unmatched sweetness and crunch that elevates every bite.
- 2 red bell peppers, finely diced. The vibrant red bell peppers contribute not just color but also a satisfying crunch along with their sweet flavor. Their crispness contrasts beautifully with the creaminess of the beans and avocado while providing essential vitamins—truly an essential touch!
- 1 jalapeño, finely diced (a few seeds are ok). Adding jalapeño introduces a delightful kick! Don’t worry if you’re sensitive to spice; removing some seeds will dial down the heat while still allowing for that tantalizing warmth to shine through.
- 1/2 red onion, finely diced. Red onions lend their sharpness and bite—this is crucial for balancing out the sweetness from our corn and bell peppers. Soaking them in cold water for just 10 minutes before dicing can soften their flavor if you prefer something milder.
- 1 large or 2 small avocados, diced. Creamy avocado adds richness that transforms our salad into something utterly indulgent yet healthy! The best way to enhance its naturally buttery flavor is by ensuring they’re perfectly ripe—look for avocados slightly soft when gently pressed.
- 1/4 cup chopped cilantro. Fresh cilantro brings an aromatic brightness that’s quintessential in Tex-Mex dishes—it’s like sunshine captured in herb form! If you’re not a fan of cilantro’s distinctive taste, feel free to swap it out with parsley for milder freshness.
- 2 limes, juice of. The juice from these limes is liquid gold; it provides acidity that ties everything together beautifully while enhancing all those vibrant flavors we’re working with—don’t skip this step!
- 3 – 4 tablespoons apple cider vinegar. Apple cider vinegar adds tanginess and depth; it’s non-negotiable here! It blends harmoniously with lime juice while helping preserve freshness in those leftovers we’re definitely going to want!
- 2 tablespoons olive oil. Liquid gold in its own right—the olive oil enriches our dressing’s texture while adding healthy fats that promote satisfaction after eating this dish.
- 1 teaspoon chili powder & 1/2 teaspoon cumin & 1/2 teaspoon garlic powder. These spices create depth within each bite; chili powder adds warmth without overwhelming heat while cumin lends its smoky essence—a true marriage of flavors that encapsulates the spirit of Southwestern cuisine!
- Mineral salt & pepper to taste. Salt is essential for amplifying flavors—we’ll adjust according to preference! A sprinkle here or there will help bring all these elements together into one harmonious blend.
Equipment You’ll Need:
Before we jump into preparation mode, let’s chat about some essential tools you’ll need on hand as partners during our culinary adventure! Having the right equipment makes everything smoother and more enjoyable—think of them as your trusty sidekicks in creating this amazing dish.
- Large mixing bowl: A sturdy bowl gives us ample space to combine all our colorful ingredients without worrying about spills—this step is crucial! It lets you toss everything together effortlessly while ensuring even distribution of those luscious flavors throughout every bite.
- Cutting board: A solid cutting board serves as your canvas; it’s where you’ll chop those veggies into delightful morsels ready to mingle in our salad masterpiece! Choose one that’s large enough so you have room to dice without feeling cramped.
- Chef’s knife: A sharp chef’s knife is key here—it allows for precise cuts which are important for both aesthetics (who doesn’t love eye-catching food?) and texture contrast within our final dish.
- Measuring cups & spoons: Precision matters when creating balanced flavors! Using measuring tools ensures we get just the right amount of spices, oils, dressings—the last thing we want is an overpowering taste throwing off this beautiful harmony we’ve built!
Now that we’re equipped with knowledge about our ingredients’ significance along with necessary tools at hand let’s move forward into preparing this delicious Texas caviar!
Step 1: Whisking Up That Flavorful Dressing
In a small bowl (I usually opt for one that’s medium-sized), whisk together apple cider vinegar, lime juice freshly squeezed from those zesty limes we’ve prepped earlier (it’ll be worth it!), olive oil, chili powder—all three spices—and generous pinches of mineral salt until well combined! This process ensures each ingredient melds seamlessly before meeting its vegetable counterparts later on—it sets up an explosion of flavors waiting ahead! If time permits (and trust me—I recommend letting it sit!), allow your dressing some time alone: resting enhances infusion as spices bloom into full glory over mere minutes!
Step 2: Prepping Your Beans
Next up? It’s time for some good ol’ rinsing magic! Drain both cans containing black-eyed peas along with black beans under cold running water until any excess liquid washes away completely—that little bit makes all difference! Rinsing effectively removes any unwanted preservatives lingering behind while also improving overall texture once combined later on—we’re aiming for ultimate satisfaction here! Once done draining/rinsing these legumes thoroughly (don’t forget they need room!), set ‘em aside where they can hang out till they meet their crunchy friends soon enough!
Step 3: Chopping Up Those Colorful Veggies
Now comes my favorite part—the chopping spree begins! Dice up those gorgeous red bell peppers until they’re fine pieces bursting forth color; don’t rush this step because each bit should shine brightly against darker hues surrounding ‘em! Next comes jalapeño which brings thrill—we aim for fine dicing here too so every mouthful contains just enough spice without overwhelming heat ruining experience altogether—trust me; I’ve made mistakes before… Finally tackle red onion next: remember soaking helps tone down sharpness if desired taste leans towards gentler side instead!
Step 4: Avocado Magic
Ahh…avocado season—my heart flutters whenever I slice into one perfectly ripe piece filled with creamy goodness inside waiting patiently beneath smooth skin exterior ready go forth upon luscious plate spread across inviting table setting ahead… To dice properly: halve avocado lengthwise then remove pit carefully using knife technique before scoring flesh lightly resulting cross-hatch pattern revealing treasure trove waiting underneath skin itself which will be spooned out easily afterwards guaranteeing no waste occurs whatsoever—a non-negotiable point I live by daily because nothing deserves waste when dealing heavenly fruits like these beauties here today!!
And there you have it—the first steps toward creating your very own Texas caviar masterpiece filled vibrant tastes textures sure capture hearts minds alike… I can’t wait until we continue assembling everything together shortly but let these initial stages marinate nicely before diving deeper into final assembly process ahead soon!!
Step 5: Letting the Flavors Dance Together
Now that your vibrant Texas caviar is assembled, it’s time for a little magic to happen. You can choose to dive right in and enjoy this colorful creation immediately, but I strongly encourage you to let it rest in the refrigerator for at least an hour—or even better, a few hours. Why wait? Well, when you allow your Texas caviar to rest, the flavors have a chance to mingle and deepen in a way that’s truly extraordinary. Think of it as a party where all the ingredients get to know each other better; the beans soak up the tangy lime and apple cider vinegar while the peppers and onions soften their sharp edges, resulting in a symphony of flavors that will leave your taste buds singing.
When you pull the bowl out of the fridge after this waiting period, you’ll notice how the ingredients have transformed. The colors may have dulled slightly as they meld together, but trust me—what you’ve created is something profoundly satisfying. You’ll want to give it another gentle stir before serving so that the dressing coats every morsel beautifully. This step is crucial; it ensures that every bite delivers an explosion of flavor instead of just a single note. So don’t rush this step! Allowing your Texas caviar to rest is non-negotiable if you want those layers of taste to shine through.
Step 6: Serving Your Masterpiece
Now comes one of my favorite parts: serving your Texas caviar! First, grab your favorite serving dish—something that showcases this colorful salad like a piece of art on display. Scoop generous portions into bowls or onto plates; feel free to add some tortilla chips or fresh veggie sticks alongside for dipping. The crunchy texture of those chips pairs perfectly with the creamy avocado and hearty beans, creating an utterly intoxicating contrast that’s hard to resist.
One thing I love about Texas caviar is its versatility—it can be served as an appetizer at parties or as a refreshing side dish during family dinners. Imagine passing around bowls filled with this delightful mix as friends gather around your table, laughter echoing off the walls while everyone dives in for their share. It’s such a beautiful experience, sharing food like this; it brings people together and creates lasting memories over flavorful bites. So go ahead and proudly present your creation—you’ve earned it!
Step 7: Leftover Love
If you find yourself with any leftovers (and I hope you do!), storing them properly is essential for keeping that fresh taste alive! Place any remaining Texas caviar in an airtight container—this will keep everything crisp and flavorful for up to 4-5 days in the refrigerator. Just remember: if you’re planning on freezing some for later enjoyment, hold off on adding those luscious avocados until you’re ready to serve it again. Avocado doesn’t freeze well; it tends to turn mushy and lose its beautiful green hue when thawed. By omitting it from the initial batch and adding fresh avocado just before enjoying leftovers, you’re ensuring each bite retains its intended texture and flavor profile.
Once stored correctly, you’ll find that each day brings new nuances to your dish—the flavors continue to evolve as they sit together in that container, offering up surprises with each scoop! If you happen upon some Texas caviar five days later, don’t hesitate; give it a good stir and taste before digging in—all those ingredients have had time to become best friends! If by chance you’ve frozen some without avocado for later use, thaw it slowly in the fridge overnight when you’re ready for another round of deliciousness.
Step 8: Final Touches – The Art of Garnishing
As you prepare to serve up your Texas caviar masterpiece, let’s talk about garnishing—this is where you can really elevate your dish from delightful to extraordinary! A sprinkle of freshly chopped cilantro right before serving not only adds a burst of color but also enhances those herbaceous notes that dance throughout the salad. If you’re feeling adventurous (and I know you are!), consider adding a thinly sliced radish or some additional jalapeño slices on top for an extra kick—it’s all about making it personal!
Visual appeal shouldn’t be underestimated; after all, we eat with our eyes first! A well-garnished dish invites everyone at the table into its world—a world filled with vibrant colors and tantalizing aromas promising delicious bites ahead. And don’t forget: good food deserves good company! Gather your loved ones around the table once more, invite them into this culinary adventure you’ve crafted with so much love and care—and watch as their faces light up with joy over each spoonful of flavor-packed excitement.
There you have it—the complete journey through making Texas Caviar (Cowboy Caviar)! I’ve poured my heart into sharing this recipe because it’s more than just food; it’s about connection and celebration. Whether you’re enjoying it alone or sharing with friends, every bite is filled with warmth and happiness—a true testament that food brings people together in ways nothing else can. So roll up your sleeves, gather those ingredients, and let’s make some unforgettable memories one scoop at a time!
Storage and Enjoyment Tips for Your TEXAS CAVIAR (COWBOY CAVIAR)
Now that you’ve whipped up this vibrant bowl of Texas caviar, it’s time to dive in and savor every bite! But what if there are leftovers? Don’t worry; I’ve got you covered with some fantastic tips for storing this delightful dip. Trust me, the flavors only get better as they mingle together, making each taste a little more extraordinary than the last!
Storing Leftover TEXAS CAVIAR (COWBOY CAVIAR)
To preserve your Texas caviar like a true culinary champion, you’ll want to store it in an airtight container—this is crucial for keeping those fresh flavors locked in. Simply place the salad in the fridge where it will stay happy for about 4 to 5 days. If you really want to keep that avocado from browning, consider adding a slice of bread right on top of the mixture before sealing the container; this little trick helps absorb moisture and keeps your salad looking vibrant. When you take it out later, don’t be surprised if it’s even more flavorful—the ingredients have had time to get cozy with one another! Just remember, no need to reheat this beauty; you can enjoy it chilled or bring it back to room temperature for a refreshing treat any time you like.
Freezing Texas Caviar for Later
If you’re looking to enjoy your Texas caviar at a later date, freezing can be a wonderful option—just make sure to omit the avocado before doing so! Pack your bean and corn mixture into a freezer-safe container, leaving a little space at the top for expansion (this is non-negotiable!). It will keep well frozen for about 2 months. When you’re ready to indulge again, simply thaw it overnight in the refrigerator. Once thawed, add in fresh diced avocado just before serving for that luscious creaminess we all love. This method makes meal prep a breeze and ensures you always have a healthy dish on hand whenever cravings strike.
Texas Caviar (Cowboy Caviar)

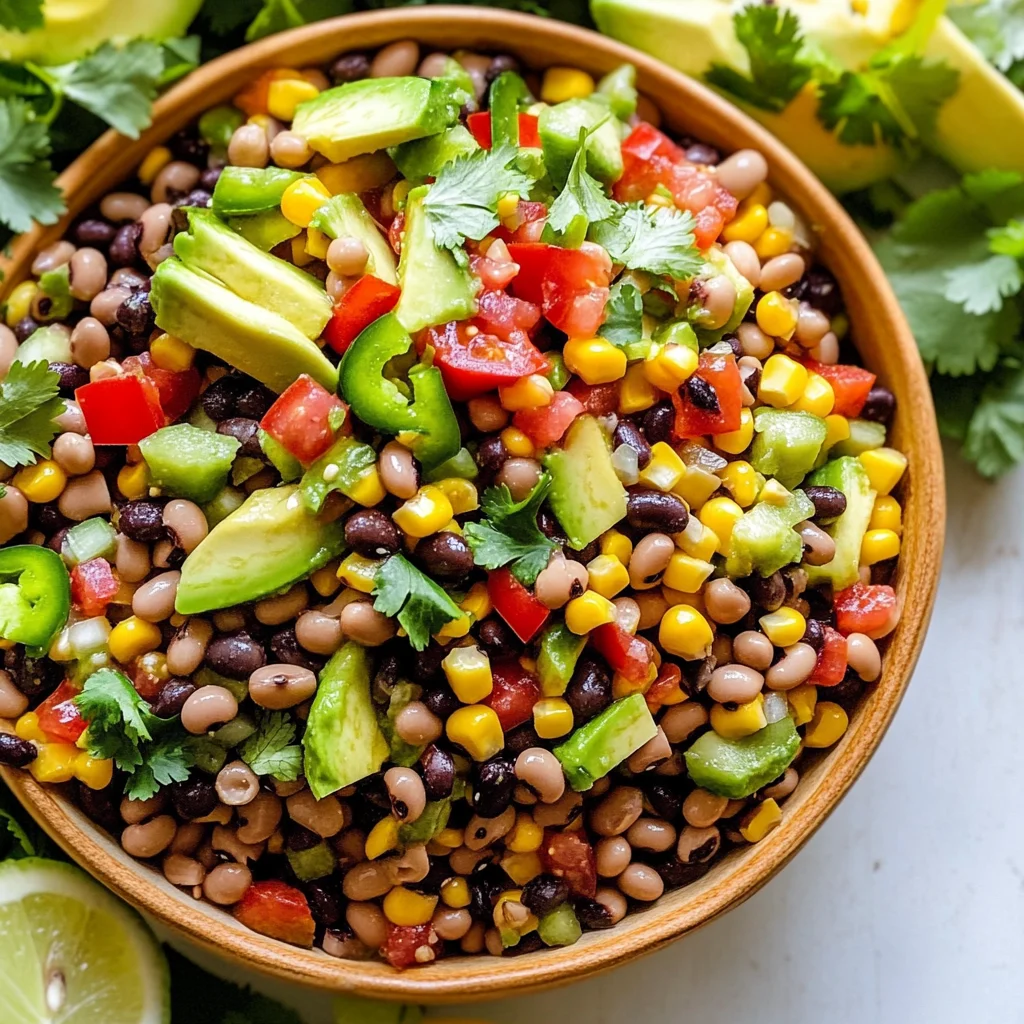
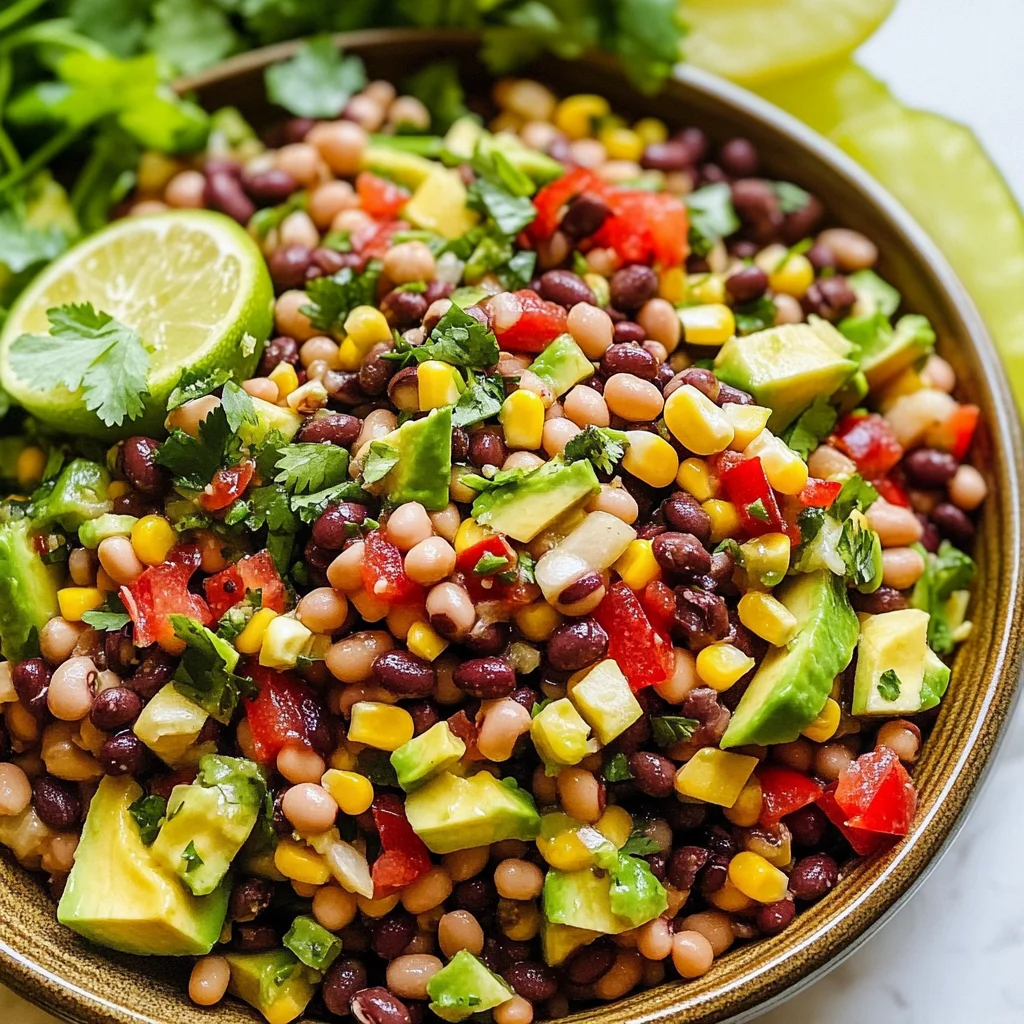
Texas Caviar, also known as Cowboy Caviar, is a vibrant and refreshing dish that brings together a medley of flavors and textures in one delightful bowl. This bean salad is not only visually appealing with its colorful ingredients but also packed with nutrition. The earthy black-eyed peas and black beans mingle beautifully with sweet corn, crunchy bell peppers, and creamy avocado, all brought together with zesty lime juice and tangy apple cider vinegar. Perfect as a dip with tortilla chips or as a side dish at your next gathering, this recipe embodies the spirit of fun and community. Plus, it’s quick to prepare, making it ideal for busy weeknights or spontaneous get-togethers.
- Prep Time: 15 minutes
- Cook Time: 0 minutes
- Total Time: 15 minutes
- Yield: Serves approximately 6
- Category: Salad
- Method: Mixing
- Cuisine: Tex-Mex
Ingredients
- 1 can (15oz) black-eyed peas, drained and rinsed.
- 1 can (15oz) black beans, drained and rinsed.
- 1 can (14oz) corn, drained.
- 2 red bell peppers, finely diced.
- 1 jalapeño, finely diced (a few seeds are ok).
- 1/2 red onion, finely diced.
- 1 large or 2 small avocados, diced.
- 1/4 cup chopped cilantro.
- 2 limes, juice of.
- 3 – 4 tablespoons apple cider vinegar.
- 2 tablespoons olive oil.
- 1 teaspoon chili powder.
- 1/2 teaspoon cumin.
- 1/2 teaspoon garlic powder.
- Mineral salt & pepper to taste.
Instructions
- In a small bowl, whisk together lime juice, apple cider vinegar, olive oil, chili powder, cumin, garlic powder, and salt until combined.
- Rinse and drain black-eyed peas and black beans thoroughly.
- Dice red bell peppers, jalapeño (remove seeds for less heat), red onion, and avocado.
- In a large mixing bowl, combine the beans, corn, diced vegetables, cilantro, and dressing; mix until everything is well coated.
- Let the mixture sit in the refrigerator for at least an hour to allow flavors to meld.
- Serve chilled or at room temperature with tortilla chips or fresh veggie sticks.
Nutrition
- Serving Size: 1 cup - 240g
- Calories: 210
- Sugar: 3g
- Sodium: 260mg
- Fat: 8g
- Saturated Fat: 1g
- Unsaturated Fat: 7g
- Trans Fat: 0g
- Carbohydrates: 31g
- Fiber: 10g
- Protein: 8g
- Cholesterol: 0mg