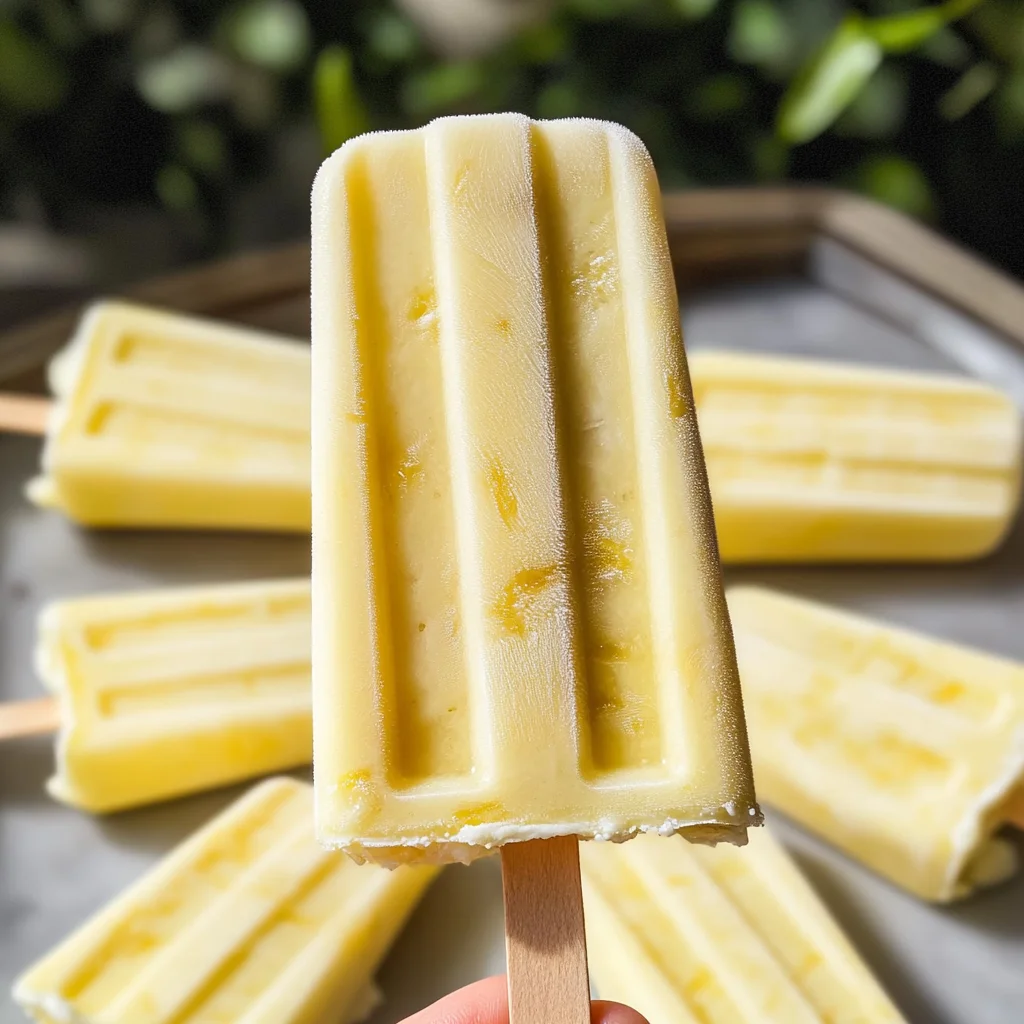
Dole Whip Popsicles
There’s something utterly magical about summer, isn’t there? As the sun shines brightly and flowers bloom vibrantly, we find ourselves craving refreshing treats that not only cool us down but also bring joy to our hearts. Enter the Dole Whip Popsicles—a delightful twist on the iconic Disney treat that ignites childhood memories of carefree days spent under blue skies. Imagine sinking your teeth into a popsicle that bursts with the sweet tang of pineapple, creamy texture, and a hint of vanilla. This isn’t just a dessert; it’s an experience, a celebration of summer captured in frozen form! With just four simple ingredients, you can recreate this refreshing delight in your own kitchen, making it perfect for kids and adults alike. I promise you, once you take that first blissful bite, you’ll be transported back to those magical moments.
Why do we love Dole Whip so much? Perhaps it’s the nostalgia tied to those sunny trips to Disney or the sheer joy of indulging in something so deliciously fruity and creamy. These Dole Whip Popsicles are more than just a refreshing treat; they represent carefree summers filled with laughter and sunshine. Perfect for pool parties or lazy afternoons, they remind us of how food can create connections and evoke fond memories. Whether sharing them with friends during a backyard barbecue or enjoying them solo while relaxing on the porch, these popsicles will elevate any occasion into something truly extraordinary.
Dole Whip Popsicles: A Taste of Summer Bliss
Let’s embark on this delightful culinary journey together as we make these incredible Dole Whip Popsicles. Trust me; they’re as easy as pie (or should I say pops?). With just four ingredients—crushed pineapple, pineapple juice, heavy whipping cream, and a touch of vanilla—you’ll be amazed at how something so simple can bring such joy. It’s like capturing summer in a popsicle mold! So roll up your sleeves and get ready to create something special that will have everyone begging for seconds.
Ingredients:
As we gather our ingredients for this tropical delight, remember that each one plays a crucial role in crafting the perfect Dole Whip Popsicle. Let’s dive into what makes these components not just functional but magical!
- 1 (20 oz) can crushed pineapple. This is the star ingredient that truly embodies the essence of the tropics! The crushed pineapple brings vibrant flavor and natural sweetness to our popsicles while providing that juicy texture we crave on hot summer days. When selecting your canned pineapple, look for brands that use minimal ingredients—ideally just pineapple and juice—without added sugars. This ensures that you’re getting pure fruit goodness without any unnecessary additives.
- 6 oz pineapple juice. Think of this juice as liquid gold! Not only does it enhance the fruity flavor profile of our popsicles, but it also adds a lovely sweetness without any added sugars—perfect for keeping our treats light and refreshing. When choosing your juice, opt for 100% pure pineapple juice with no added sugars or preservatives to keep everything natural. If you’re feeling adventurous, you could even use fresh squeezed juice for an extra burst of freshness!
- 4 oz heavy whipping cream. Now here’s where things get creamy! The heavy whipping cream is absolutely paramount in creating that luscious texture that mimics traditional Dole Whip while remaining light enough to be refreshing. Creaminess is key—look for high-fat content cream (around 36% fat) for optimal results; this will whip beautifully and create those dreamy soft peaks when blended with our fruity base.
- 1 teaspoon vanilla extract (optional). While technically optional, I highly recommend adding this little splash of magic! Vanilla extract rounds out the flavors beautifully, enhancing both the sweetness and depth of our popsicles without overpowering their tropical essence. Choose quality pure vanilla extract over imitation varieties—it makes all the difference in flavor!
- Popsicle molds. These are your essential tools for turning our delightful mixture into frozen perfection! There are various types available—silicone molds make it easy to release pops after freezing while plastic molds often come with built-in sticks for convenience. Whatever you choose, ensure they are sturdy enough to withstand freezing temperatures without breaking.
Equipment You’ll Need:
Having the right tools on hand can truly elevate your cooking experience from ordinary to extraordinary! Each piece of equipment contributes to making your culinary adventure smoother and more enjoyable.
- Blender – Your trusty blender is essential for merging all those beautiful flavors together seamlessly! A good-quality blender will ensure everything is well combined without any chunks left behind; I recommend one with varying speed settings so you can control the consistency perfectly—smooth or frothy!
- Popsicle molds – As mentioned earlier, having reliable molds is key to achieving those perfect popsicles! Look for BPA-free options if possible; they’re not only safer but tend to be easier to clean as well.
- Measuring cups and spoons – Precision is vital when creating anything delicious! Using clear measuring cups and spoons ensures you’re getting just the right amount of each ingredient—no guesswork involved here!
Now that we’ve gathered our wonderful ingredients and equipment let’s dive into preparing these fabulous Dole Whip Popsicles!
Step 1: Blend Your Pineapple Symphony
Start by combining the crushed pineapple (juice included) with additional pineapple juice in your blender. Blend on low until fully incorporated; this step allows all those vibrant flavors to meld together harmoniously into what I like to call a “pineapple symphony.” You want it smooth but not overly processed—think chunky yet cohesive! This initial blending helps release all those glorious juices locked within each piece of fruit while creating an inviting texture that’s both refreshing and satisfying.
Step 2: Creamy Integration
Next up is where we introduce our heavy whipping cream alongside optional vanilla extract into our blended mixture! Pulse gently until everything is well mixed together; here lies an exciting transformation as you watch it turn from fruity puree into a creamy concoction worthy of dessert royalty! If you’d like a fluffier texture reminiscent of classic Dole Whip softness, feel free to ramp up your blending speed slightly—it’ll whip air into your mixture beautifully while maintaining its tropical essence.
Step 3: Taste Test Delight
Ahh—the moment every cook cherishes—a taste test! Take a spoonful from your blender jar; savor its tropical goodness before pouring it into molds! If you feel it needs more richness or sweetness, don’t hesitate to add extra whipping cream at this stage—it’s all about personal preference after all! Remember: food should always be joyful!
Step 4: Fill Those Molds
Now comes one of my favorite parts—pouring our delightful mixture into popsicle molds! Fill each mold nearly full but leave some space at the top since liquid expands when frozen—that’s crucial! Once filled appropriately (and messily—I won’t judge!), insert sticks if applicable before placing them flat in your freezer.
Feel free to let them freeze overnight if time allows; I promise you’ll thank yourself when you’re biting into pure bliss tomorrow afternoon!
These initial steps pave the way toward crafting scrumptious Dole Whip Popsicles bursting with flavor while embodying everything we love about summer treats—easy preparation paired with rewarding results await us ahead!
Stay tuned as we continue exploring more delightful steps toward achieving frozen perfection together…
Step 5: Pouring with Purpose
Now that your popsicle mixture is wonderfully blended, it’s time for one of the most exciting parts—pouring it into your molds! Grab your popsicle molds and, using a ladle or a measuring cup with a spout, carefully pour the luscious mixture into each mold. Fill them up to about three-quarters full, leaving just a little room at the top. This is crucial because as the mixture freezes, it will expand slightly, and you don’t want any overflow mess in your freezer. Trust me on this; no one wants to deal with cleaning a sticky freezer mess later!
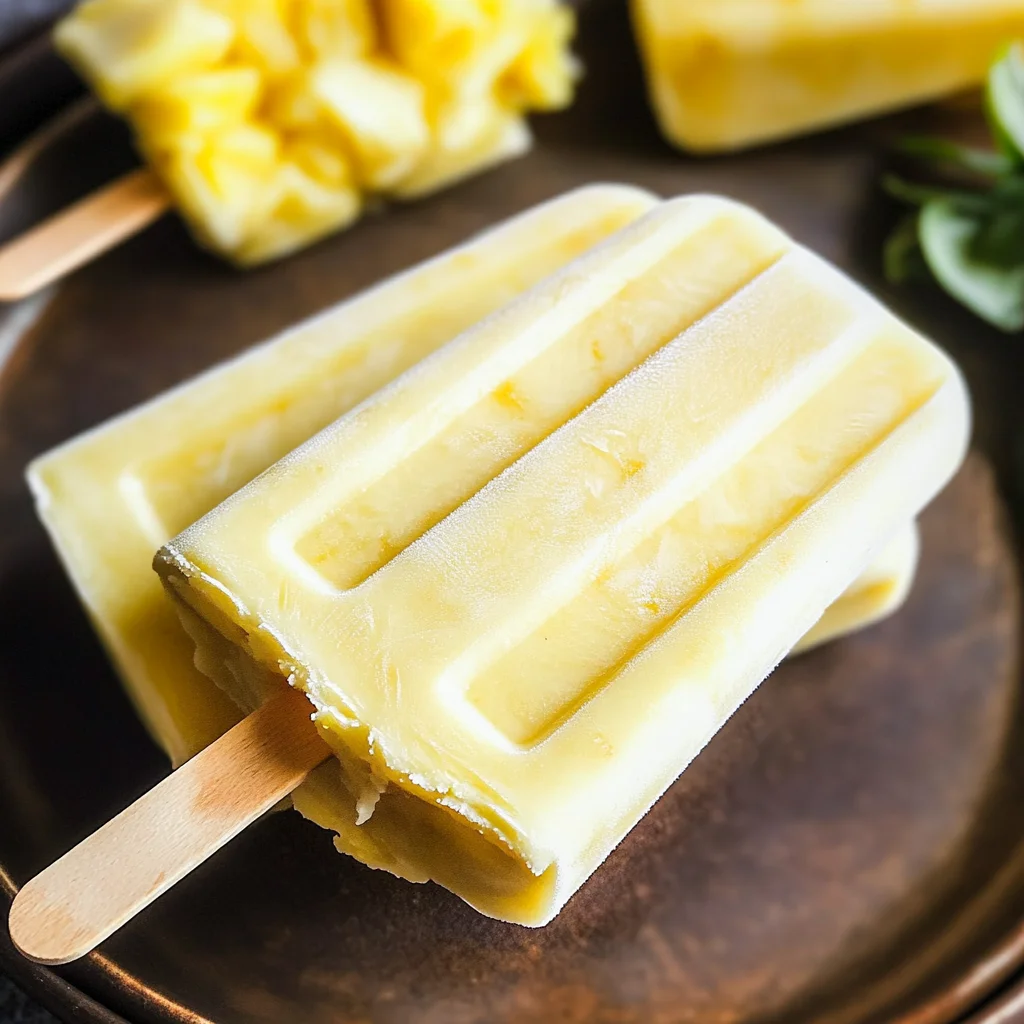
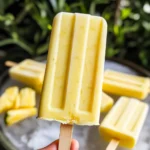
As you pour, take a moment to appreciate the vibrant yellow-orange hue of your Dole Whip Popsicles. It’s like sunshine captured in a mold! If you’re feeling adventurous, why not mix things up? You could layer the mixture by pouring in some crushed pineapple or even a touch of coconut milk for extra creaminess between layers. But remember, layering takes patience; let each layer freeze for about 30 minutes before adding another. This gives you beautiful stripes and an added texture that makes these popsicles look as good as they taste!
Step 6: The Freezing Process—Patience Is Key
Now comes the hardest part—waiting for your heavenly Dole Whip Popsicles to freeze! I know it can be tough to resist peeking every few minutes, but I promise you that patience is non-negotiable here. Allow them to freeze for at least five hours or, even better, overnight if you can manage it. Why so long? Well, when liquids freeze, they need enough time to solidify completely into that delightful popsicle form we all know and love.
During this freezing period, the flavors meld beautifully together. The sweetness of the pineapple harmonizes with the creaminess of the whipping cream, creating that utterly intoxicating flavor profile reminiscent of those coveted Disney treats. When you do finally pop them out of their molds, they should feel firm yet slightly pliable—just perfect for easy removal. If they seem too hard to get out, run warm water over the outside of the mold for about 10-15 seconds; this gentle heat will help release those frozen gems without damaging their shape.
Step 7: The Grand Reveal
The moment has arrived—the grand reveal of your homemade Dole Whip Popsicles! Carefully remove each popsicle from its mold with a gentle tug; if they resist coming out, don’t panic! A quick dip in warm water (as mentioned earlier) should do the trick. There’s something so satisfying about watching them slide out effortlessly after being encased in their icy home for hours. As they emerge, take a moment to admire their creamy texture and golden color—this is what summer dreams are made of!
But don’t rush right into devouring them just yet! Let them sit at room temperature for about 2-3 minutes before enjoying. This little wait helps soften them just enough so that each bite is not only flavorful but also incredibly creamy and easy to sink your teeth into. Imagine biting into one; you’ll experience that first burst of tropical sweetness followed by a creamy finish—truly extraordinary!
Step 8: The Final Touches
Before diving into these delicious Dole Whip Popsicles—which I’m sure you’re itching to do—let’s talk presentation because we eat with our eyes first! For an extra touch of flair that elevates these beauties from simple treats to show-stoppers worthy of any summer gathering, consider rolling them in shredded coconut or sprinkling some finely chopped nuts on top right after you remove them from their molds.
This final touch adds not only visual appeal but also textural contrast that deepens your tasting experience. The crunch from those toppings against the smoothness of the popsicle creates an exciting symphony of flavors and textures that will have everyone begging for more! And if you’re feeling particularly fancy (or perhaps looking to impress friends), why not drizzle some dairy-free chocolate sauce over the top? That delightful combination of sweet pineapple and rich chocolate is simply divine.
In conclusion, I hope this journey through making Dole Whip Popsicles inspires you as much as it does me every time I whip up a batch. Remember, cooking isn’t just about following recipes; it’s about creating memories and sharing joy with those we love. So gather your family or friends around during these warmer months and celebrate summer with these refreshing treats—you won’t regret it! Now grab one (or two) and savor every blissful bite as the flavors transport you straight back to those sunny days at Disney! Enjoy!
Storage and Enjoyment Tips for Your Dole Whip Popsicles
Now that you’ve created these delightful Dole Whip Popsicles, it’s time to savor every last bite! Picture this: on a warm summer afternoon, you pull out a popsicle from the freezer, its vibrant color gleaming in the sunlight, just waiting to bring a smile to your face. But what if you have some leftovers? No worries—these popsicles are not only easy to make but also simple to store, ensuring you can enjoy this tropical treat for days to come.
Storing Leftover Dole Whip Popsicles
To keep your leftover Dole Whip Popsicles fresh and delicious, make sure to utilize airtight containers or wrap them individually in plastic wrap. This preservation method is essential because it prevents freezer burn and helps maintain their creamy texture. Ideally, they should be stored in the freezer where they can keep for up to two months! However, I promise you won’t be able to resist munching on them long before that! One pro tip that I absolutely swear by is placing a piece of bread in the container with the popsicles—this little trick absorbs excess moisture and keeps your popsicles from becoming icy and hard. Trust me; it’s a game changer! Even after some time in storage, these popsicles will still retain their delectable flavor; they may lose a bit of their frothy texture but will remain refreshingly satisfying. When you’re ready to serve them again, let them sit at room temperature for a couple of minutes for easier removal from molds, and prepare for smiles all around.
Freezing Dole Whip Popsicles for Later
If you’re looking ahead and want to freeze extra batches of these Dole Whip Popsicles for later enjoyment, you’re making a fantastic choice! Simply pour any leftover mixture into your molds before it reaches its freezing point. Once filled, cover them with their respective lids or place sticks in if they’re not already inserted. They’ll freeze beautifully and can be kept frozen for two months as well! The best part? You can pull one or two out whenever the craving strikes—perfect for impromptu summer gatherings or simply treating yourself after a long day. This convenience factor means you can always have something refreshing at hand without any fuss. Just imagine coming home from work on a hot day and reaching into the freezer for one of these creamy delights; it’s like having a mini-vacation right at home!
Dole Whip Popsicles
Dole Whip Popsicles are a refreshing and creamy treat that captures the essence of summer in every bite. With just four simple ingredients, these popsicles offer a delightful blend of sweet pineapple and smooth creaminess, reminiscent of the beloved Disney treat. Whether you’re enjoying them poolside or sharing them at a backyard barbecue, these fruity frozen delights are perfect for kids and adults alike. Easy to make and completely customizable, these popsicles promise to brighten up any warm day. Dive into the nostalgia of summers past with each blissful bite!
- Prep Time: 10 minutes
- Cook Time: 300 minutes (freezing)
- Total Time: 5 hours 10 minutes
- Yield: Makes approximately 6 popsicles 1x
- Category: Dessert
- Method: Freezing
- Cuisine: Tropical
Ingredients
- 1 (20 oz) can crushed pineapple
- 6 oz pineapple juice
- 4 oz heavy whipping cream
- 1 teaspoon vanilla extract (optional)
Instructions
- Blend crushed pineapple (with juice) and pineapple juice in a blender until well combined.
- Add heavy whipping cream and optional vanilla extract; pulse until smooth.
- Pour mixture into popsicle molds, filling each about three-quarters full.
- Insert sticks and freeze for at least 5 hours or overnight until solid.
- To remove, run warm water over the outside of the molds if necessary.
Nutrition
- Serving Size: 1 serving
- Calories: 120
- Sugar: 10g
- Sodium: 15mg
- Fat: 8g
- Saturated Fat: 5g
- Unsaturated Fat: 2g
- Trans Fat: 0g
- Carbohydrates: 12g
- Fiber: 0g
- Protein: 1g
- Cholesterol: 30mg