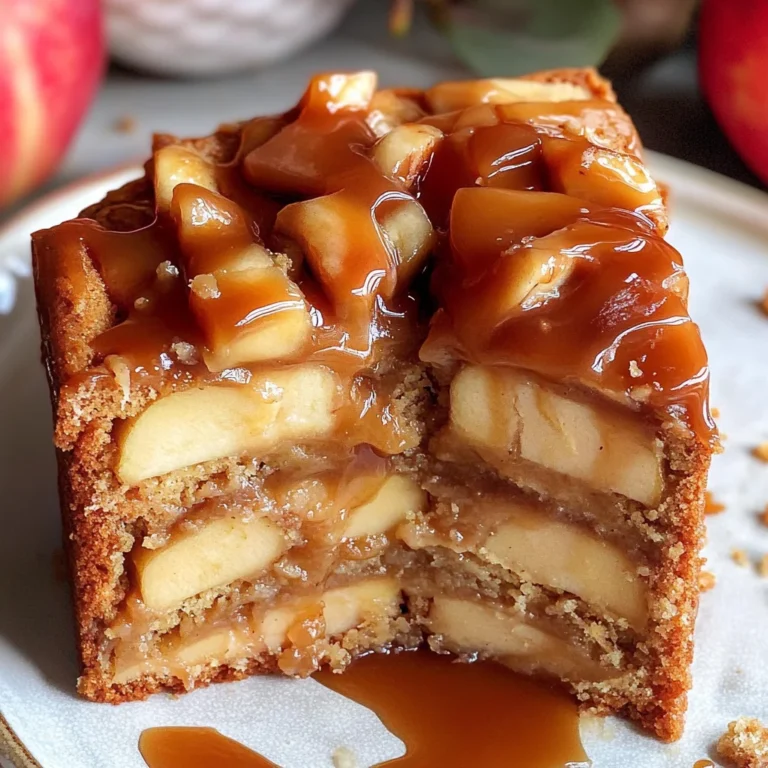
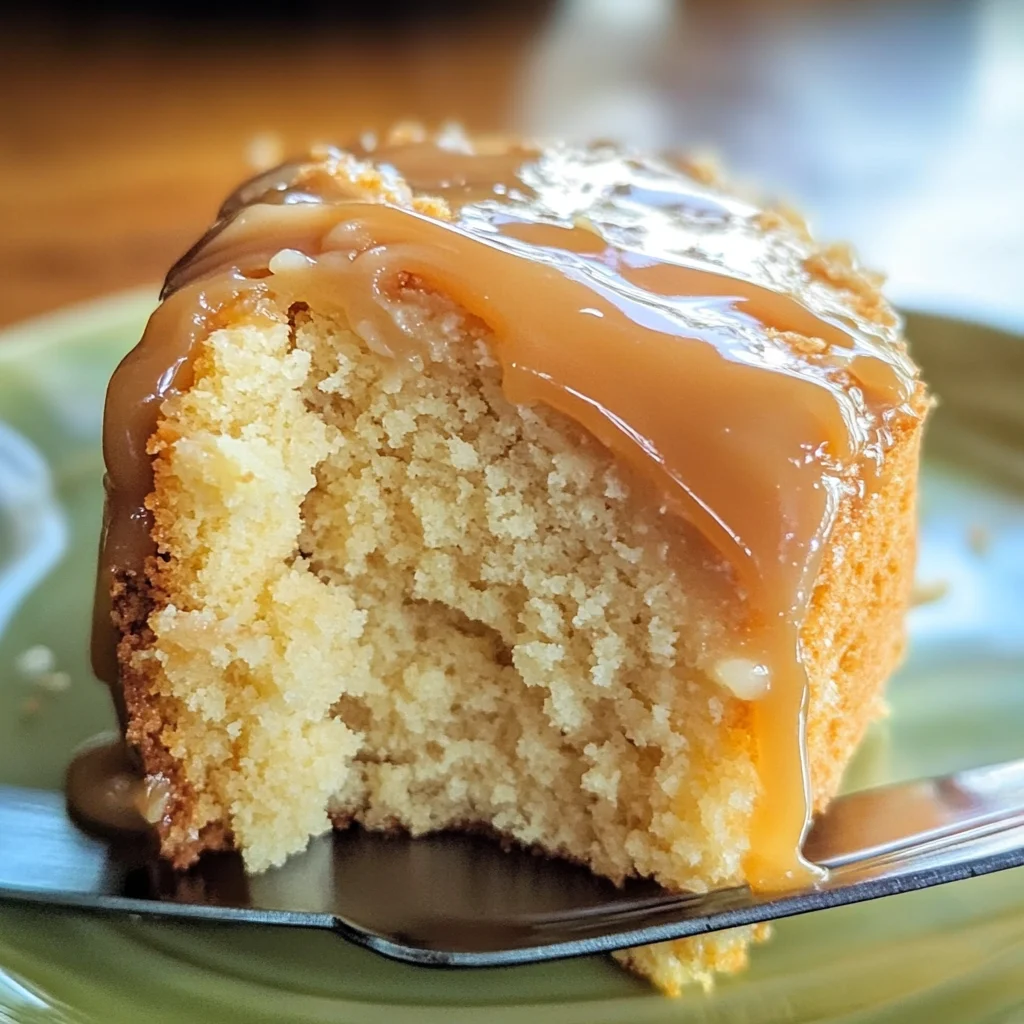
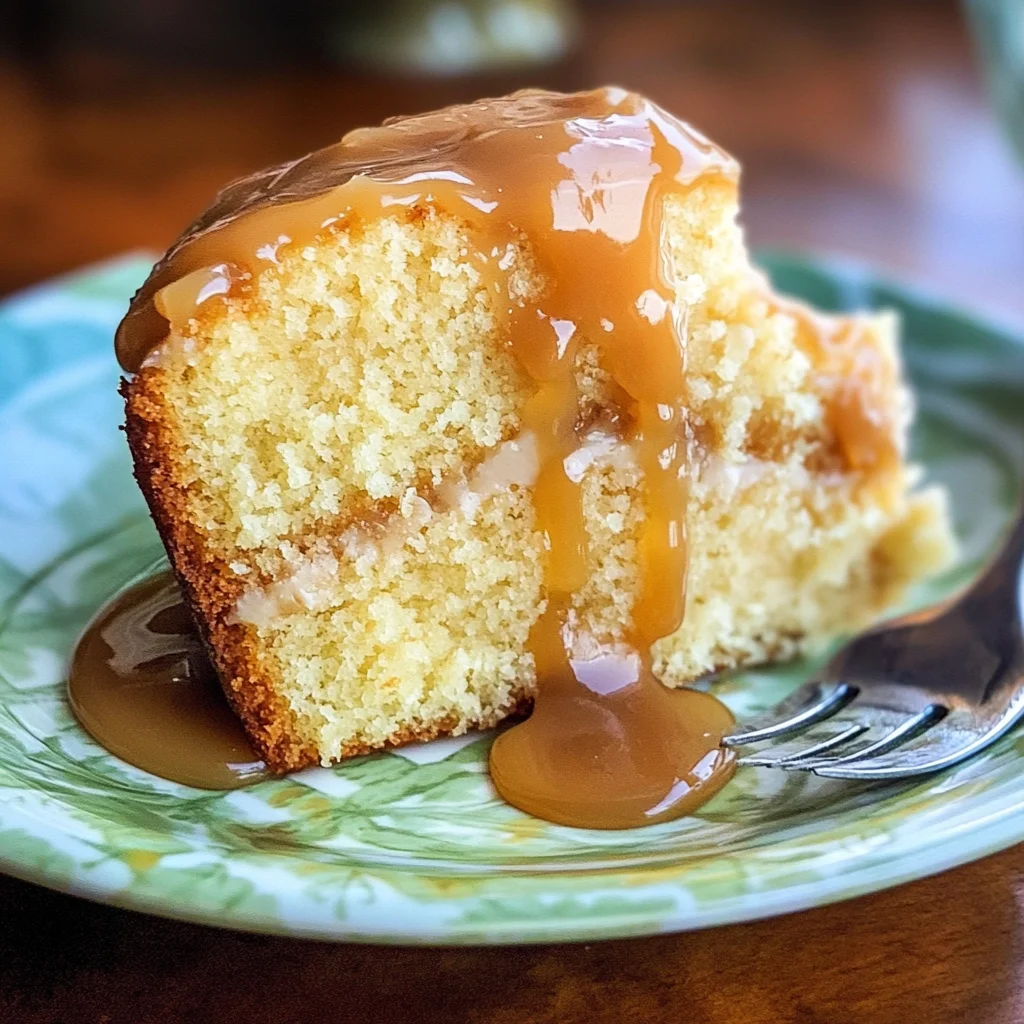
Buttermilk Cake With Caramel Icing
There’s something profoundly magical about the scents of freshly baked goods wafting through your home, isn’t there? It’s as if each note of buttery sweetness and delicate vanilla whispers tales of comfort, love, and togetherness. Today, I want to share with you a cherished recipe that has graced our family gatherings for years—a Buttermilk Cake With Caramel Icing. This cake is not just a dessert; it’s an experience that brings people together, filling hearts with joy and plates with its moist, rich goodness. The fluffy texture of the cake perfectly balances the velvety caramel icing, creating a symphony of flavors that is utterly intoxicating. Trust me when I say this: one bite and you’ll be reminiscing about your favorite moments shared around the dinner table.
As we embark on this culinary journey together, let me assure you that this recipe will become one of your go-to desserts. There’s an inviting simplicity to it that makes baking feel accessible to everyone, from seasoned bakers to those just starting out in their kitchen adventures. The buttermilk adds a delightful tang that elevates the flavor profile while ensuring that each slice remains tender and moist—an absolute must for any cake! And don’t even get me started on the caramel icing; it’s like liquid gold drizzled over your creation, transforming a humble cake into something truly extraordinary.
Buttermilk Cake With Caramel Icing: A Slice of Heaven
Let’s dive into the heart of this recipe! This Buttermilk Cake With Caramel Icing is one of those dishes that evokes comfort and warmth like no other. Perfect for birthdays, holidays, or simply as a sweet treat to brighten up your day, this cake holds a special place in my heart. I promise you’ll find yourself making it again and again!
Ingredients:
Before we start mixing and baking, let’s gather our ingredients. Each component plays a vital role in crafting this beautiful cake.
- 3 cups all-purpose flour. Flour serves as the backbone of our cake. It provides structure and stability while allowing the buttermilk to work its magic in making it soft and fluffy. Always choose a high-quality flour for optimal results; I often lean toward brands that are unbleached and enriched for added flavor and nutrition. If you’re looking for alternatives due to dietary preferences or restrictions, feel free to experiment with gluten-free flour blends—they can yield delicious results too!
- 1 teaspoon baking soda. This ingredient is absolutely paramount in giving our cake its lift! Baking soda works wonders when paired with acidic ingredients like buttermilk; it helps create those delightful air pockets that make each bite light as air. Make sure your baking soda is fresh—nothing worse than using an expired leavening agent!
- 1 cup real unsalted butter, softened to room temperature. The richness of butter contributes both flavor and moisture to our cake. Softening it is crucial because it allows for effective creaming with sugar—this process incorporates air into the batter, which is essential for achieving that perfect rise and texture we crave in our Buttermilk Cake With Caramel Icing.
- 2 cups sugar. Sugar not only sweetens our cake but also aids in achieving a tender crumb by inhibiting gluten formation during mixing. Granulated sugar yields a lovely sweetness balanced by the tanginess of buttermilk, creating a harmonious flavor profile.
- 3 large eggs. Eggs bring richness and act as emulsifiers in our batter, helping everything blend beautifully together while providing additional moisture. They also contribute to structure—ensuring our cake holds up nicely once baked.
- 2 teaspoons pure vanilla extract. A splash of vanilla extract infuses warmth and depth into our cake’s flavor profile—it’s like adding a hug in liquid form! When selecting vanilla extract, go for pure over imitation whenever possible; you’ll taste the difference.
- 1 cup full-fat buttermilk. Ahh, buttermilk—the secret ingredient that truly elevates this cake! It adds moisture while providing a subtle tanginess that balances out the sweetness beautifully. If you don’t have buttermilk on hand, fear not! You can create your own by mixing regular milk with vinegar or lemon juice—just let it sit for about 5 minutes before using.
- 1/4 cup butter (cubed or sliced). We’ll use this butter later in our caramel icing—it melts down into luscious pools of flavor! Using cold butter helps slow down the cooking process during caramelization so we can achieve that perfect golden hue without burning.
- 1/2 cup light brown sugar, packed. Brown sugar brings moisture alongside its rich molasses flavor—adding depth to our caramel icing while contributing to its irresistible stickiness!
- 1/3 cup heavy whipping cream. Cream adds luxurious richness to our icing; it helps create that silky-smooth texture we all crave when drizzling over cakes! If you’re looking for lighter alternatives due to dietary preferences or restrictions, you might consider coconut cream or almond milk—but keep an eye on quantities as they can alter thickness.
- 1 cup powdered sugar. Finally, powdered sugar gives us the sweetness needed for our icing while allowing us to control consistency easily; it’s what helps us achieve that perfect drizzle over our stunning cake!
Equipment You’ll Need:
Having the right tools at your disposal can make all the difference when creating something marvelous in your kitchen! While these may not be ingredients, they are essential partners in bringing your Buttermilk Cake With Caramel Icing to life.
- Mixing bowls: A good set of mixing bowls allows you space to combine ingredients comfortably without worrying about spills or messes—it makes everything feel less daunting!
- Electric mixer or whisk: An electric mixer will save time when creaming butter and sugar together—but if you’re feeling up for some arm workout fun (and have some patience), a sturdy whisk will do just fine too!
- Measuring cups and spoons: Precise measurements ensure consistent results every time you bake; investing in quality measuring tools is always worthwhile!
- Rubber spatula: This handy tool ensures you scrape every last bit of batter from your mixing bowl—it’s essential for maintaining balance between wet/dry ingredients so nothing goes wasted!
- 9×13 inch baking pan: A sturdy pan allows an even bake throughout; make sure yours is non-stick or well-greased so nothing sticks during release after baking!
Now that we’ve got everything prepped and ready let’s dive into preparing this delightful Buttermilk Cake With Caramel Icing!
Step 1: Preheat Your Oven
First things first: preheat your oven to 350 degrees Fahrenheit (175 degrees Celsius). This step is crucial because it ensures an even bake right from the get-go—the moment you place your batter inside becomes magical as heat envelops each layer perfectly! While that’s happening, take out your 9×13 inch baking pan so we can grease it shortly—this way we’re ready once we finish mixing up our batter!
Step 2: Cream Butter & Sugar
Now onto one of my favorite steps—creaming together our softened butter (remember how important temperature was?) along with granulated sugar until light and fluffy! This process usually takes about 3–5 minutes using an electric mixer set at medium speed but don’t rush this step—it’s where all those microscopic air bubbles form giving us that delightful rise later on during baking! You want mixture colors lighten up noticeably—the pale yellow hue indicates success here too as they’ve combined properly while becoming airy enough—that’s what we’re aiming for folks!
Step 3: Incorporate Eggs & Vanilla
Next up comes adding those three large eggs into our creamed mixture along with two teaspoons pure vanilla extract—another aromatic layer added here! Beat until fully incorporated; watch closely as mixture transforms into creamy goodness—a sign they’ve melded perfectly together again…don’t skip past checking consistency either because if they aren’t mixed well enough then your batter could end up inconsistent post-bake too!
Step 4: Alternate Dry Ingredients & Buttermilk
Now it’s time for some fun—we’ll alternate adding both dry ingredients (the flour mixture combined previously) followed by full-fat buttermilk into batter gradually until everything’s blended well without over-mixing—aiming instead toward smooth perfection here folks! Start off by adding one-third portion flour mix followed closely thereafter by half portion buttermilk before repeating these steps till fully combined…patience pays off greatly when making cakes like these trust me! Each addition contributes toward final texture which should remain slightly thick yet pourable upon completion…
And there we have it—a beautiful start to creating something truly spectacular together! As we continue through each step next time around we’ll assemble everything before diving into luscious caramel icing that’ll take this dessert straight off charts deliciousness-wise…so hang tight because magic awaits ahead!
Step 5: Creaming the Butter and Sugar to Perfection
Now that we’ve got our dry ingredients waiting patiently, it’s time to bring our butter and sugar together in a beautiful dance of creamy delight. Take your softened unsalted butter—this is crucial as it allows the butter to incorporate air, creating a light texture that will be the foundation of our Buttermilk Cake With Caramel Icing. Place the butter into your mixing bowl and add in those two cups of granulated sugar. Using either a hand mixer or a stand mixer fitted with a paddle attachment, beat these two ingredients together on medium speed for about 3-5 minutes until you see a gorgeous pale yellow mixture that’s fluffy and nearly doubled in size. Trust me on this; the creaming process is not just about mixing but rather about aerating the butter, which is absolutely paramount for achieving that melt-in-your-mouth quality we all desire.
As you cream, take a moment to inhale the sweet aroma that fills your kitchen. The sugar will help dissolve into the butter, leading to a smooth consistency that’s essential for an evenly baked cake. If you notice any lumps of butter remaining after the time is up, don’t hesitate to scrape down the sides of your bowl with a spatula to ensure everything is blended perfectly. This step lays the groundwork for your cake’s tender crumb. If you rush through it, you might end up with a dense cake rather than the soft, buttery treasure we’re aiming for.
Step 6: Adding Eggs and Vanilla – A Symphony of Flavor
Once you’ve reached that ethereal state of creamed butter and sugar, it’s time to introduce our eggs and vanilla extract into this delightful mixture. Crack open those three large eggs one at a time—be sure to let each egg fully incorporate before adding the next; this adds richness and moisture while ensuring even distribution throughout your batter. As you mix these in, you’ll notice how the mixture transforms into an even creamier batter that’s utterly intoxicating.
Next, add in those two teaspoons of pure vanilla extract—this isn’t just an afterthought; it’s what elevates this cake from good to truly extraordinary! Vanilla brings depth and complexity; it complements both the sweetness of the sugar and the richness of the butter beautifully. Allow your mixer to run on low speed just until everything is combined; over-mixing can lead to a tough cake, which is something we absolutely want to avoid. If you see any little streaks of egg yolk or vanilla lingering around, gently fold them in with your spatula until they disappear into that luscious blend.
Step 7: Introducing Buttermilk – The Moisture Magic
Ahh, now we arrive at one of my favorite parts—the addition of buttermilk! Pour in that cup of full-fat buttermilk slowly while mixing on low speed; this magical ingredient not only moistens our cake but also reacts with baking soda to create leavening power that gives our cake its beautiful rise. The tanginess from buttermilk balances out sweetness perfectly while contributing to an incredibly tender crumb—how wonderful is that?
As you mix, pay attention to how your batter comes together—it should be smooth but thick enough to hold its shape slightly when lifted with your spatula. If it feels too runny or too thick, trust your instincts! Adjustments can be made by adding more flour or buttermilk as needed (though I assure you my measurements are spot-on). Once everything’s well incorporated, take a moment to admire this velvety batter—a true testament to what’s coming next!
Step 8: Folding in Dry Ingredients – The Art of Incorporation
With our wet ingredients complete, it’s finally time to introduce our dry mixture back into the fray! This step requires some love and care because we’re going to fold in those three cups of all-purpose flour mixed with one teaspoon of baking soda gently using your spatula or wooden spoon. When folding—rather than stirring vigorously—you want to lift from underneath and turn over so as not to deflate all that wonderful air we’ve carefully whipped into our batter during previous steps.
This technique is critical because overworking your batter can lead to gluten formation which results in a chewier texture instead of that lovely softness we crave from our Buttermilk Cake With Caramel Icing. As you fold gently—but thoroughly—you’ll start noticing little pockets where flour remains dry. Don’t fret! Continue folding until no dry flour spots remain visible while being careful not to over-mix; it’s normal for some small lumps or streaks of batter still hanging around—you want them there! Once combined smoothly without any obvious signs of floury patches, consider this step complete.
Baking Your Perfect Buttermilk Cake With Caramel Icing
Ahh…the aroma filling your kitchen right now must feel like home! It’s finally time for us to transfer this heavenly batter into a prepared baking pan—an act which feels nothing short of magic!
Step 9: Pouring Into Pans – The Moment We’ve Been Waiting For
Grab two greased round cake pans (8-inch works wonderfully) and divide your luscious batter evenly between them—the goal here is uniformity so they bake at similar rates without one overshadowing another. You want each pan filled about halfway up—this gives enough room for rising while avoiding overflow disasters (which nobody wants!). As you pour in each portion, take a moment just to appreciate how silky and inviting it looks; this will undoubtedly become part of your cherished dessert repertoire!
Once you’ve finished pouring, gently tap each pan on the counter—a simple yet effective technique—to release any air bubbles trapped within the batter before placing them into an oven preheated at 350 degrees Fahrenheit. It’s important not only because it creates an even bake but also because those bubbles can disrupt how beautifully they rise together! Bake these cakes for approximately 25-30 minutes or until they’re golden brown on top; you’ll know they’re ready when a toothpick inserted into their center comes out clean (with perhaps just a few moist crumbs clinging). Keep an eye on them towards the end since ovens can vary widely—it’s better they come out slightly underbaked than overdone!
Step 10: Cooling – Patience Rewarded
Once those beauties are out of the oven—oh my goodness—the smell alone will have everyone rushing into your kitchen like bees drawn toward honey—don’t forget though; patience is key here! Allow them to cool in their pans for about 10-15 minutes before transferring them onto wire racks—a crucial step because if you try removing them too soon, you risk breaking apart all that hard work you’ve put in thus far.
After they’ve cooled enough so as not burn fingers upon touching (though warm cakes are divine!), gently loosen edges using a knife before flipping them onto racks—this ensures they’re turning out smoothly without sticking issues ruining all our progress! Letting cakes cool completely before frosting isn’t merely suggested; it’s non-negotiable if you’re aiming for perfection with caramel icing later on! Trust me when I say allowing adequate cooling results in clearer layers once assembled—a truly satisfying visual payoff once sliced!
Conclusion:
As we wrap up this delightful journey through baking my beloved Buttermilk Cake With Caramel Icing, I hope you share in my enthusiasm for creating this extraordinary dessert! It’s truly remarkable how simple ingredients like butter and buttermilk can come together to create such a moist and buttery masterpiece topped with velvety caramel icing. Each layer tells a story of warmth and love baked right into its structure—a symphony of flavors that dances on your palate and evokes nostalgic memories around family gatherings.
This recipe is not just about taste; it’s about the entire experience—the joy of mixing ingredients together, watching them transform in the oven, filling your home with an utterly intoxicating aroma that will leave everyone eagerly waiting at the kitchen door. Whether it’s for birthdays, holidays, or just because life deserves celebrating, this cake shines as a versatile dessert that fits any occasion perfectly. Imagine pulling it from the oven: the golden-brown crust beckons while the sweet scent wafts through your home—who could resist?
To enhance your enjoyment even further, consider serving your sublime creation with fresh berries or alongside a scoop of dairy-free vanilla ice cream for an indulgent treat that will impress family and friends alike. For an afternoon pick-me-up with coffee or tea, enjoy a slice with some whipped coconut cream dolloped on top—it’s absolutely heavenly! Feeling adventurous? Why not sprinkle in some chocolate chips or add crushed nuts into the batter for added texture? This recipe is wonderfully adaptable; whether you stick with classic flavors or experiment boldly, each iteration brings something new to savor.
I invite you wholeheartedly to try this recipe out for yourself! Share your stories, variations, and experiences as you bake this beautiful cake—it’s our little culinary adventure together! My friends often tell me how much they love making this dish their own; now it’s your turn! So gather those ingredients and let’s create some sweet memories today!
Buttermilk Cake With Caramel Icing
Buttermilk Cake With Caramel Icing is a delightful dessert that captures the essence of home-baked goodness. This moist, buttery cake is infused with a creamy tang from buttermilk, creating a tender crumb that melts in your mouth. Topped with rich caramel icing that drips seductively down the sides, it transforms every slice into an indulgent treat perfect for any occasion—from family gatherings to cozy afternoons at home. Easy to make and irresistible to taste, this cake invites sweet moments and cherished memories around the table.
- Prep Time: 20 minutes
- Cook Time: 30 minutes
- Total Time: 50 minutes
- Yield: Approximately 12 servings 1x
- Category: Dessert
- Method: Baking
- Cuisine: American
Ingredients
- 3 cups all-purpose flour
- 1 teaspoon baking soda
- 1 cup unsalted butter, softened
- 2 cups granulated sugar
- 3 large eggs
- 2 teaspoons pure vanilla extract
- 1 cup full-fat buttermilk
- 1/4 cup unsalted butter (for caramel icing)
- 1/2 cup light brown sugar, packed (for caramel icing)
- 1/3 cup coconut cream (for caramel icing)
- 1 cup powdered sugar (for caramel icing)
Instructions
- Preheat your oven to 350°F (175°C). Grease a 9×13 inch baking pan.
- In a mixing bowl, cream together softened butter and granulated sugar until light and fluffy.
- Beat in eggs one at a time, followed by vanilla extract.
- Alternately add flour mixture (mixed with baking soda) and buttermilk to the batter until just combined.
- Pour the batter into the prepared pan and smooth the top.
- Bake for 25-30 minutes or until a toothpick inserted comes out clean. Let cool completely before frosting with caramel icing.
Nutrition
- Serving Size: 1 slice (87g)
- Calories: 350
- Sugar: 38g
- Sodium: 210mg
- Fat: 15g
- Saturated Fat: 9g
- Unsaturated Fat: 5g
- Trans Fat: 0g
- Carbohydrates: 52g
- Fiber: <1g
- Protein: 3g
- Cholesterol: 60mg