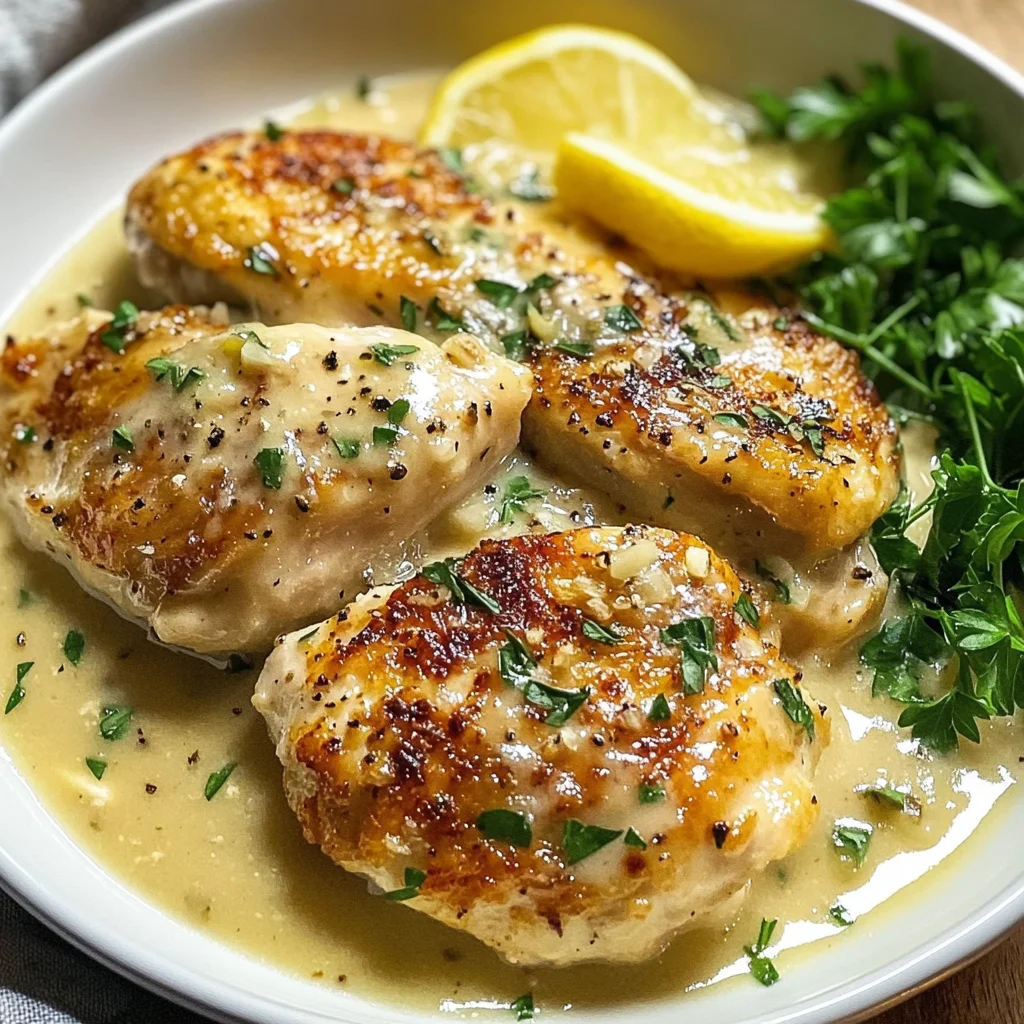
Chicken in white grape juice Sauce
There’s something truly magical about a comforting meal that wraps you in warmth and nostalgia. This Chicken in white grape juice Sauce is more than just a dish; it’s an experience that transports you to the heart of home, where laughter mingles with the aroma of garlic sizzling in olive oil. Picture this: tender chicken breasts, kissed by seasonings and enveloped in a creamy sauce that’s as vibrant as it is indulgent, all thanks to the sweet tang of white grape juice and a splash of fresh lemon. It’s the kind of meal that invites you to gather around the table with your loved ones, where every bite feels like a celebration of flavor and togetherness. Trust me when I say, once you taste this dish, it will become a cherished favorite in your kitchen repertoire.
As we embark on this culinary journey together, I want to share with you not just the steps but the heart behind each ingredient and technique. Cooking is an art form, a dance between flavors and aromas, and this recipe captures that beautifully. The combination of dry white grape juice with creamy Parmesan cheese creates a symphony on your palate—sweetness mingling with savory notes, all enhanced by the brightness of freshly squeezed lemon juice. Whether it’s a casual weeknight dinner or a special occasion, this Chicken in white grape juice Sauce will elevate any meal into something truly extraordinary.
Chicken in White Grape Juice Sauce: A Delightfully Creamy Comfort
Let’s dive right into this delightful recipe that promises to impress both family and friends alike! With its easy-to-follow steps and comforting flavors, you’ll find that creating this dish feels less like work and more like a joyful expression of love. So grab your apron, roll up those sleeves, and let’s get cooking!
Ingredients:
Before we start cooking, let’s take a moment to appreciate the star players in our Chicken in white grape juice Sauce. Each ingredient has its role to play in crafting those irresistible flavors we crave.
- 2 large boneless skinless chicken breasts. The foundation of our dish—the chicken—should be high-quality for optimal flavor and tenderness. Look for firm, plump breasts without any blemishes; they should have a nice pink hue when fresh. By pounding them thinner, we allow for quicker cooking while ensuring they soak up all that delicious sauce. This step not only contributes to even cooking but also results in juicier chicken that’s bursting with flavor.
- 2 teaspoons Italian seasoning. This aromatic blend typically includes herbs like thyme, basil, oregano, and rosemary. It adds an earthy depth to our dish that complements both the chicken and the sweet notes from the grape juice beautifully. If you’re feeling adventurous or have some fresh herbs on hand, feel free to substitute—just remember that fresh herbs are often more potent than dried ones!
- Salt/Pepper. These humble seasonings are absolutely paramount—they enhance every other flavor present in our dish. Don’t shy away from seasoning generously; it ensures your chicken has layers of flavor right from the first bite.
- ¼ cup flour. This ingredient serves multiple purposes: it helps create that golden crust when searing our chicken while also thickening our sauce later on. Use all-purpose flour for its versatility; just make sure to tap off any excess before cooking so we don’t end up with a gummy texture.
- 2 tablespoons olive oil. Not only does olive oil lend richness to our skillet-fried chicken, but it also has a high smoke point which is crucial for achieving that coveted golden-brown crust without burning. Opt for extra virgin olive oil if possible—it brings an added layer of flavor that enhances every aspect of this dish.
- 1 cup dry white grape juice (see notes). This liquid gold is what sets our sauce apart! It provides sweetness balanced by acidity—a perfect marriage for our savory elements. When choosing your grape juice, look for brands without added sugars or preservatives; it should taste crisp yet slightly sweet.
- 3 tablespoons butter. Butter is essential here—not just for richness but also for adding depth to the sauce as it melds with our other ingredients during cooking. Using unsalted butter allows you to control the saltiness without compromising on flavor.
- 4 cloves garlic (minced). Ahh, garlic—the aromatic powerhouse! Minced garlic infuses our sauce with an unmistakable warmth and fragrance that elevates every component of this dish. Freshly minced offers maximum flavor; when purchasing garlic bulbs, choose ones that feel firm and heavy.
- 1 teaspoon Worcestershire sauce. While traditionally made with anchovies, there are excellent vegetarian versions available today! Worcestershire sauce adds umami complexity—a burst of savory goodness that rounds out our sweet elements beautifully.
- 1 cup chicken broth. Homemade or store-bought broth can significantly change your dish’s profile—opt for low-sodium varieties if you’re watching salt intake! Broth brings moisture back into our chicken while enriching the sauce overall.
- 2 tablespoons cornstarch (+ 2 tablespoons cold water) (optional). Cornstarch acts as a thickener if you desire a heartier consistency for your sauce; mix it thoroughly with cold water until smooth before adding it into the bubbling mixture—this step helps prevent clumping!
- ¼ cup heavy cream. This luscious ingredient transforms our sauce into something extraordinary—it brings silky richness while balancing out sweetness from the grape juice perfectly! Ensure it’s at room temperature before stirring into hot liquids so it doesn’t curdle.
- 1/3 cup Parmesan cheese (freshly grated). Freshly grated cheese melts better than pre-packaged shreds—it adds incredible creaminess along with nutty flavors that harmonize beautifully within our sauce! Always opt for quality cheese; look for blocks rather than bags whenever possible.
- 2 tablespoons fresh lemon juice (see notes). The bright acidity from freshly squeezed lemon juice adds vibrancy to our rich sauce—it’s like sunshine on your plate! Always choose real lemons over bottled options for maximum freshness—after all, who doesn’t love squeezing their own?
- Fresh Parsley (to garnish)—A simple yet effective way to add color and freshness at serving time! Parsley not only looks beautiful but also offers subtle herbal notes that contrast wonderfully against rich flavors.
- 1 teaspoon each: dried parsley, mustard powder—These little additions enhance complexity while contributing layers of flavor throughout your dish!
- ½ teaspoon each: dried oregano, dried basil—Familiar companions from Italian cuisine—they work harmoniously alongside other ingredients delivering fragrant herbal notes essential to classic comfort food flavors!
Equipment You’ll Need:
Now that we have everything laid out before us like an artist’s palette ready for painting culinary masterpieces let’s talk about what tools will help us create this unforgettable meal! Having the right equipment makes all the difference between chaos and joy in your kitchen escapades!
- Large skillet – A sturdy skillet is crucial here; something large enough to fit both pieces of chicken comfortably without overcrowding ensures even cooking and browning without creating steam instead! A stainless steel or cast iron skillet gives excellent heat retention necessary for achieving those flavorful brown bits at the bottom which contribute immensely toward making an incredible sauce later on!
- Meat mallet or rolling pin – For flattening those chicken breasts down evenly—this allows them not only cook faster but absorb flavors better too! If you don’t have one handy don’t fret—a heavy pot could easily do double duty here!
- Silicone spatula – Perfectly designed not just for scraping up those tasty brown bits left behind after searing; silicone spatulas are heat-resistant—they won’t scratch non-stick surfaces either! They’ll help us mix sauces smoothly without worrying about damaging any cookware along the way!
- Measuring cups & spoons – Precision matters when following recipes carefully measuring out liquids vs solids may seem tedious sometimes—but trust me—it pays off big-time when everything turns out exactly how intended!
Preparing Chicken in White Grape Juice Sauce
Step 1: Tenderizing Our Chicken Breasts
Begin by slicing each chicken breast in half lengthwise; this technique allows us to create thinner pieces ideal for quick cooking while maximizing surface area exposure during flavor absorption later on! Once sliced up place them inside either gallon freezer bags or between sheets of saran wrap—both options keep things tidy during pummeling sessions ahead! Using textured side facing downwards grab hold of your trusty meat mallet (or rolling pin) then gently pound until they reach about half-inch thickness—the goal isn’t brute force here but rather even distribution across each piece so they cook uniformly without drying out! Take care not rush through this process because undercooked poultry can lead unpleasant outcomes both taste-wise & health-wise—we want juicy perfection instead!
Step 2: Seasoning That Chicken
After ensuring evenly flattened pieces pat them dry completely using paper towels—this crucial step helps eliminate excess moisture which could hinder browning once hitting hot oil later on during searing phase! Next comes seasoning magic: sprinkle generous amounts Italian seasoning alongside salt & pepper across both sides until coated evenly—all these flavors will seep deep within making every bite utterly satisfying later on—we’re building layers upon layers here folks!.
Step 3: Dredging Delightfully
Now here’s where things get exciting—time to dredge those seasoned beauties through flour before frying them up golden brown!. Take shallow bowl filled halfway with flour dip each piece ensuring complete coverage shaking off any excess afterward—that fine dusting creates lovely crust once exposed high heat allowing us achieve desired texture rather than mushy blandness because nobody wants sad soggy meat!.
Step 4: Searing Magic
Heat two tablespoons olive oil inside large skillet over medium-high temperature until shimmering begins signaling readiness—from there gently lay down dredged pieces making sure not overcrowd pan allowing them crisp properly instead steaming away their deliciousness!. Allow them fry undisturbed around four-five minutes per side keeping watch till golden brown emerges taking care flip only once avoiding unnecessary flipping interrupts forming perfect crusts—we want sear marks showcasing hard-earned effort!.
I can already smell how incredible this will turn out—you’re doing wonderfully thus far my friend! Continue following along as we create liquid gold next step awaits us soon enough…
Cooking Your Chicken in White Grape Juice Sauce to Perfection
Step 5: Building a Flavorful Foundation
Now that your chicken is perfectly seared and resting, it’s time to transform those delightful brown remnants left in the skillet into a luscious sauce that will envelop the chicken in a symphony of flavors. First, turn off the heat for a moment and add the apple vinegar. This step is crucial because the acidity from the vinegar helps to deglaze the skillet by lifting all those flavorful bits stuck to the bottom—these are pure flavor gold! After adding the vinegar, set your heat back to medium and grab a silicone spatula; trust me, this tool is your best friend here. As you gently scrape the bottom and sides of the skillet, you’ll see those remnants dissolve into the liquid, creating an intoxicating base for your sauce.
Let this mixture bubble gently for about 10 minutes until it reduces by half, intensifying its flavor. You’re looking for a balance where you can still taste the sweetness from the grape juice but with an added depth from that tangy vinegar. Don’t rush this step—allowing it to reduce properly will concentrate those flavors beautifully. After about 10 minutes, when you notice that rich aroma wafting up and see that your sauce has thickened slightly, it’s time to continue with our next layer of flavor.
Step 6: Infusing Garlic and Butter Bliss
With your sauce bubbling away, it’s now time to elevate it with butter and garlic—a combination that’s nothing short of extraordinary! Add three tablespoons of butter into your simmering sauce along with four cloves of minced garlic. The butter adds a luxurious richness while also helping to create that silky texture you want in your sauce. Stirring this in will give you a truly decadent mouthfeel that will cling beautifully to each piece of chicken.
As you cook this for just about a minute, watch closely—the goal is to allow the garlic to become fragrant without browning too much because burnt garlic can introduce bitterness, which we definitely want to avoid! The moment you start smelling that heavenly aroma wafting through your kitchen, know you’re on the right track. Following this aromatic introduction, add in one teaspoon of Worcestershire sauce along with one cup of chicken broth. This addition is non-negotiable; Worcestershire adds umami depth while chicken broth enriches everything into a cohesive whole. Bring this mixture to a gentle boil so that all these components meld together—the bubbling action encourages deeper interaction between flavors.
Step 7: Thickening It Up—The Cornstarch Magic
If you’re dreaming of a thicker sauce that’s almost creamy yet still light enough not to weigh down your lovely dish, then it’s time for some cornstarch magic! In a small bowl, combine two tablespoons of cornstarch with two tablespoons of cold water until completely uniform; this is known as making a slurry. The reason we use cold water here is simple: if you were to add dry cornstarch directly into hot liquid without mixing it first, you’d end up with clumps instead of smoothness—and nobody wants that!
Once you’ve achieved that silky consistency in your slurry, slowly stir it into your bubbling sauce as it continues boiling. You’ll see immediate transformation; within moments, your once-thin liquid will thicken considerably as it cooks further. Keep an eye on it as you stir; if you’re aiming for an even creamier texture (and who wouldn’t?), let it bubble away for another couple of minutes until you reach your desired consistency. Remember that patience pays off here—thickening takes time but results in such profound satisfaction when you take that first savory bite!
Step 8: Creamy Indulgence—Adding Dairy Delight
Now comes one of my favorite parts of making this Chicken in white grape juice Sauce—the introduction of heavy cream! Lower the heat to low; we don’t want anything boiling furiously here as we incorporate our creamy element—it would split under high heat and spoil all our hard work! Slowly drizzle in one-quarter cup of heavy cream while continuously stirring; this process allows for even distribution throughout the entire sauce without curdling anything.
Once incorporated fully, stir in freshly grated Parmesan cheese—it melts beautifully and adds nutty undertones while enhancing creaminess further. As it melts seamlessly into our sauce, take a moment to appreciate how these ingredients transform what was already delicious into something truly extraordinary! Trust me on this: tasting at this stage is essential; adjust salt or pepper if needed based on your personal preference because every palate is different! Now we’re close—but there’s one more transformative step before serving!
Final Touches: Completing Your Culinary Masterpiece
Step 9: Bringing Brightness—The Finishing Touch
With everything now blended together into divine harmony, it’s time for our final flourish—a splash of fresh lemon juice! This bright citrus note cuts through all that richness we’ve built up and brings balance back into play; without it, everything might feel just too heavy. So squeeze two tablespoons worth over your bubbling masterpiece and gently stir it in just before removing from heat.
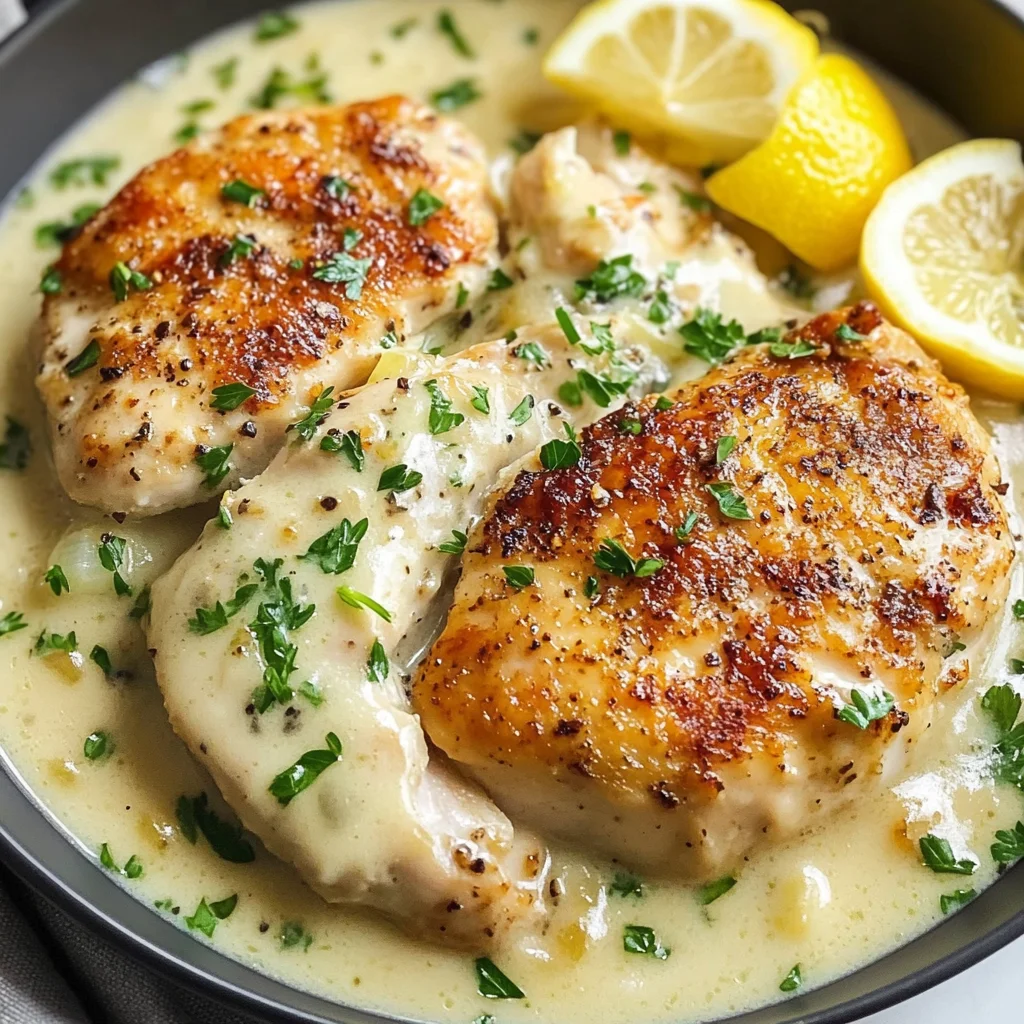
This step is absolutely paramount—the acidity from lemon juice not only brightens flavors but also enhances other ingredients’ profiles so they shine brightly rather than being muddled together. As you garnish with freshly chopped parsley before serving—oh my goodness—you’ll be met with an utterly intoxicating visual feast that’ll make anyone eager to dig in!
Serving suggestions abound here; I love pairing my Chicken in white grape juice Sauce with creamy mashed potatoes or roasted green beans tossed lightly in olive oil—not only does it complement beautifully but creates a well-rounded meal everyone at the table will adore! Take pride knowing you’ve created something incredibly flavorful yet deceptively simple—I promise you’ll find joy not just in cooking but also watching loved ones relish every last bite! Enjoy every moment—you’ve earned it!
Storage and Enjoyment Tips for Your Chicken in white grape juice Sauce
Now that you’ve crafted this utterly intoxicating Chicken in white grape juice Sauce, it’s time to bask in the glory of your culinary creation! The aroma wafting through your kitchen, the golden-brown chicken glistening with a rich sauce, and that first bite—oh my! But let’s not forget about the practicality of savoring this dish beyond one delightful meal. If you’re anything like me, you’ll want to enjoy every last morsel and perhaps even share it with loved ones. So, let’s talk about how to preserve those flavors for another day.
Storing Leftover Chicken in white grape juice Sauce
When it comes to storing your leftovers, I highly recommend using an airtight container—this is absolutely paramount for keeping the flavors locked in and preventing any unwanted moisture from sneaking in. Simply transfer your leftover Chicken in white grape juice Sauce into the container and pop it into the refrigerator where it will keep beautifully for about 3 to 4 days. Now, if you want to take a pro tip from my kitchen experience, consider placing a slice of bread inside the container alongside your chicken; this little trick absorbs excess moisture and helps maintain that wonderfully creamy texture we all adore. Trust me when I say that even after a few days in the fridge, those vibrant flavors only deepen and become even more profound, making each bite as satisfying as when it was freshly made! When you’re ready to indulge again, simply reheat it gently on the stove over low heat or in the microwave with short bursts until warmed through—just be careful not to overdo it!
Freezing Chicken in white grape juice Sauce for Later
If you’re looking to extend the life of your delicious creation even further, freezing is an excellent option! To freeze your succulent chicken, allow it to cool completely before transferring it into a freezer-safe bag or container. Make sure to remove as much air as possible before sealing—it’s crucial for preventing freezer burn which can dull those exquisite flavors. When stored properly, your Chicken in white grape juice Sauce can last up to three months in the freezer without losing its charm. When you’re ready to enjoy it again, simply thaw it overnight in the refrigerator and reheat on the stovetop or microwave until it’s piping hot. This convenience factor is just unbeatable; imagine pulling out a homemade meal from your freezer on a busy weeknight—it’s like having a gourmet dinner prepped just for you!
So whether you’re savoring every bite fresh off the skillet or enjoying flavorful leftovers later on, this Chicken in white grape juice Sauce is sure to bring warmth and joy back into your kitchen!
Chicken in White Grape Juice Sauce

Savor our delicious Chicken in white grape juice Sauce that’s easy to prepare! Experience its creamy goodness today—your taste buds will thank you!
- Prep Time: 15 minutes
- Cook Time: 25 minutes
- Total Time: 40 minutes
- Yield: Serves 4
- Category: Main
- Method: Frying
- Cuisine: American
Ingredients
- 2 large boneless skinless chicken breasts
- 2 teaspoons Italian seasoning
- Salt and pepper to taste
- ¼ cup flour
- 2 tablespoons olive oil
- 1 cup dry white grape juice
- 3 tablespoons butter
- 4 cloves garlic (minced)
- 1 teaspoon Worcestershire sauce
- 1 cup chicken broth
- ¼ cup heavy cream
- 1/3 cup freshly grated Parmesan cheese
- 2 tablespoons fresh lemon juice
- Fresh parsley (for garnish)
Instructions
- Tenderize chicken breasts by slicing them in half lengthwise and pounding to about half-inch thickness. Season both sides with Italian seasoning, salt, and pepper.
- Dredge the seasoned chicken in flour, shaking off excess.
- Heat olive oil in a large skillet over medium-high heat. Sear chicken until golden brown on both sides, about 4–5 minutes per side. Remove and set aside.
- Add apple vinegar to deglaze the skillet, scraping up brown bits.
- Stir in butter, minced garlic, Worcestershire sauce, and chicken broth; bring to a gentle boil.
- If desired, thicken sauce with a cornstarch slurry (mix cornstarch with cold water).
- Lower heat and stir in heavy cream and Parmesan cheese until melted and smooth.
- Finish with fresh lemon juice before serving; garnish with parsley.
Nutrition
- Serving Size: 1 chicken breast with sauce (200g)
- Calories: 400
- Sugar: 8g
- Sodium: 650mg
- Fat: 23g
- Saturated Fat: 10g
- Unsaturated Fat: 12g
- Trans Fat: 0g
- Carbohydrates: 18g
- Fiber: 1g
- Protein: 30g
- Cholesterol: 100mg