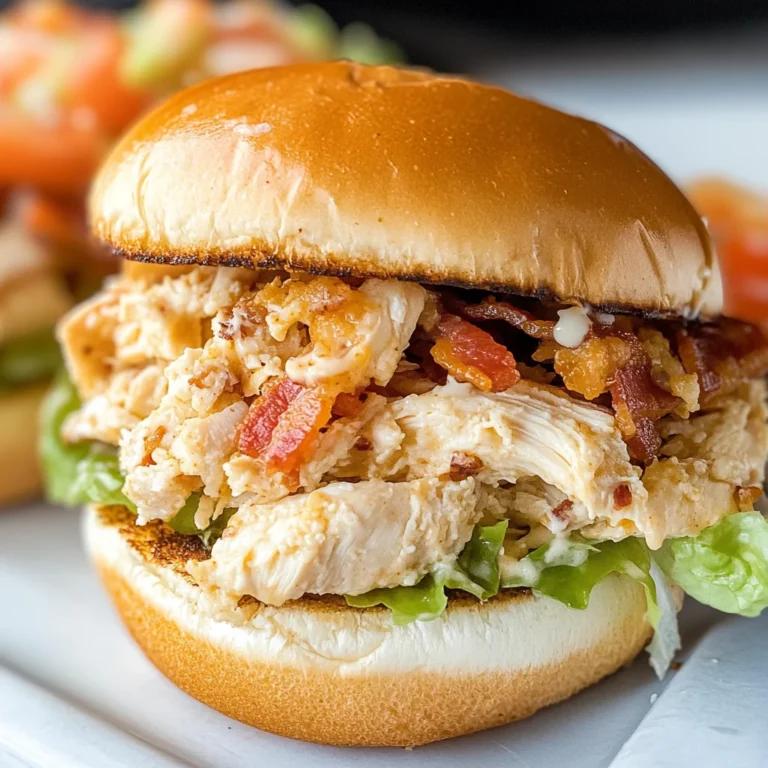
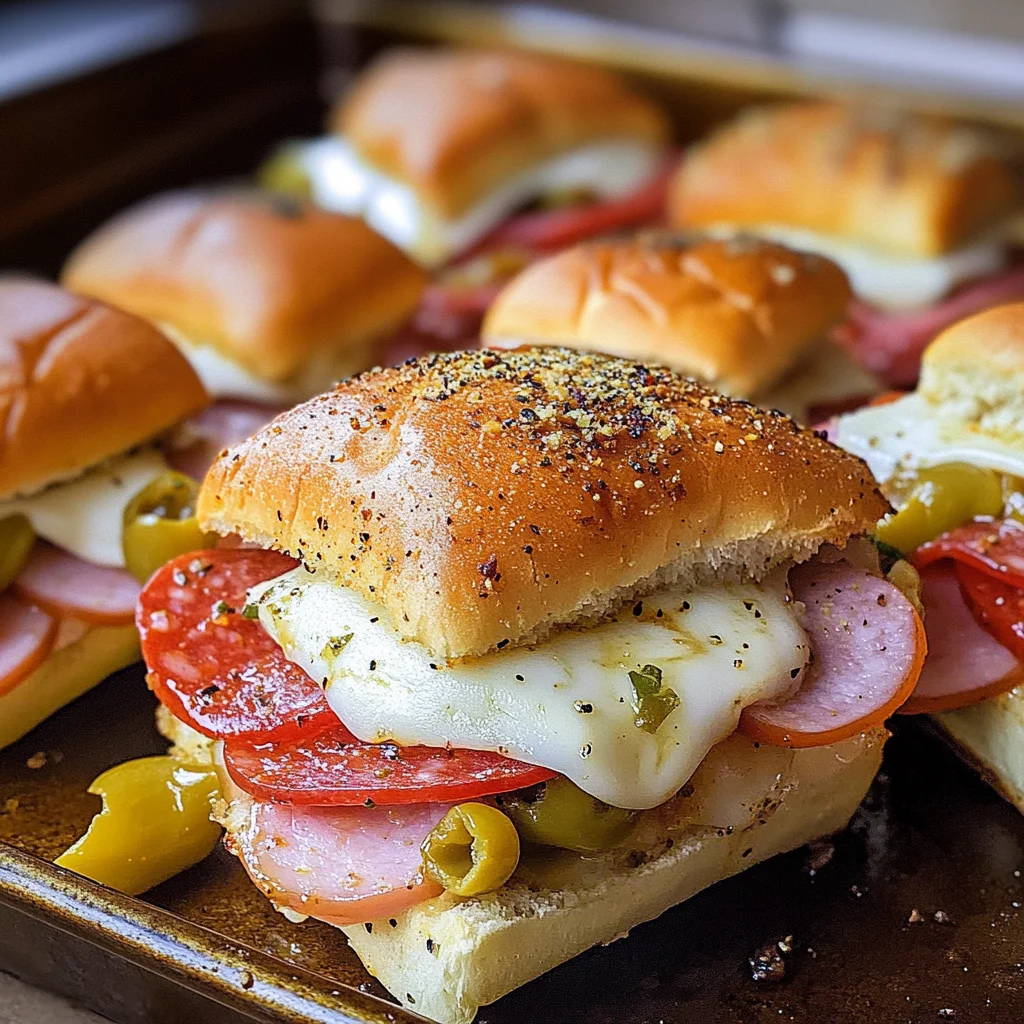
Hot Italian Sub Sliders
There’s something truly magical about food that brings us together, isn’t there? The aroma wafting through the kitchen, the laughter shared over a meal, and the joy of creating something delicious from simple ingredients can turn an ordinary day into a celebration. Today, I’m beyond excited to share with you my treasured recipe for Hot Italian Sub Sliders. These little beauties are not just sandwiches; they’re a delightful experience bursting with flavor that will leave your taste buds dancing! Imagine biting into soft, pillowy rolls filled with layers of savory turkey ham and pepperoni, gooey provolone cheese melting into the mix, and a delightful kick from spicy peppers. It’s comfort food at its finest, perfect for tailgating or any gathering where you want to impress without breaking a sweat.
What makes these sliders particularly special is how effortlessly they come together. With just a handful of ingredients and minimal prep time, you’ll have a dish that feels extravagant but is completely hassle-free. As we dive into this recipe, I promise you will find yourself captivated by the symphony of flavors and textures—the buttery tops crisping to perfection in the oven, the aroma of garlic mingling with Italian herbs filling your kitchen as they bake. Trust me when I say that once you serve these sliders to friends or family, they will be clamoring for more and asking for your secret.
Hot Italian Sub Sliders: A Flavorful Delight for Any Occasion
Let’s embark on this culinary journey together! These Hot Italian Sub Sliders are not only incredibly satisfying but also versatile enough to be enjoyed at any time of the day—from lunch to dinner or even as an indulgent snack while watching your favorite game. They are sure to become a staple in your recipe repertoire!
Ingredients:
As we prepare to dive into these divine Hot Italian Sub Sliders, let’s take a moment to appreciate each ingredient that plays a vital role in bringing this dish to life.
- 12 pack rolls, halved lengthwise (I recommend Kings Hawaiian rolls). The foundation of our sliders starts here! These soft, slightly sweet rolls provide a wonderful contrast to the savory fillings. Their pillowy texture means they soak up all the flavors without falling apart—a non-negotiable quality for any good slider. If you’re looking for alternatives, consider using soft sub rolls or even whole grain options for a healthier twist.
- 6 oz package of chicken ham, thinly sliced. This ingredient is crucial as it adds depth and heartiness to our sliders without overwhelming them. Chicken ham is leaner than traditional ham but still packed with flavor—think of it as adding a comforting hug to every bite. When choosing chicken ham, look for brands that offer natural ingredients without fillers; this will ensure you get the best taste possible.
- 5 oz package of turkey slices, thinly sliced. Turkey brings another layer of flavor while keeping things light and enjoyable. It balances beautifully with our other meats while contributing protein without the unnecessary heaviness. Look for freshly sliced deli turkey if you can; it tends to have better flavor and texture than pre-packaged options.
- 5 oz package of turkey pepperoni, thinly sliced. Ah, turkey pepperoni—the secret weapon in elevating these sliders! It packs all the classic pepperoni flavor but is made from turkey for a lighter touch. Its spice adds an exciting kick that harmonizes perfectly with our other ingredients. If you prefer more traditional pepperoni or need vegetarian options instead, don’t hesitate to explore those avenues!
- 9 slices provolone cheese. Now we’re getting into the gooey goodness! Provolone cheese melts beautifully and offers a mild yet rich flavor profile that’s simply irresistible in sandwiches. When selecting your cheese, opt for fresh provolone rather than pre-shredded versions; fresh slices melt better and provide that creamy texture we desire.
- 1/3 cup pepperoncini, sliced. These tangy little gems add zest and brightness to our sliders—a burst of flavor that keeps every bite exciting! Not only do they complement our meats splendidly, but their slight heat balances out the richness beautifully. If you’re feeling adventurous or want more heat, feel free to add some extra slices!
- 1/3 cup pickled hot cherry peppers, sliced. Similar to pepperoncini but often packing more heat, these peppers bring an extra layer of complexity and spice that will tantalize your taste buds! Their sweetness combined with heat creates an utterly intoxicating experience on your palate—don’t skip them if you enjoy some zing!
- 1/4 cup salted butter, melted. This golden liquid is where magic happens! Brushing melted butter over our sliders ensures they develop that golden-brown crust during baking while adding richness and flavor throughout the entire dish—it’s absolutely paramount!
- 1 tsp Italian seasoning. A blend of herbs that evokes memories of rustic Italian kitchens—this seasoning ties everything together wonderfully! It adds aromatic notes like oregano and basil which perfectly complement our fillings’ flavors and brings out their essence even more.
- 2 cloves garlic, crushed (I recommend fresh over jarred). Fresh garlic infuses our dish with aromatic warmth and enhances all other flavors present within this slider masterpiece! Crushing garlic releases essential oils that create an enticing aroma as they cook—a true game-changer in adding depth.
- 1 cup marinara sauce. Finally, we arrive at the dipping sauce—essentially liquid gold when paired with these sliders! Marinara is rich in flavor with hints of sweetness from tomatoes balanced by herbs—a perfect accompaniment that’s both comforting and familiar.
Equipment You’ll Need:
Before we get started making these sensational Hot Italian Sub Sliders, let’s chat about some essential tools that will make this process smooth sailing! While not technically ingredients, having the right equipment can truly elevate your cooking experience—think of them as steadfast partners in creating something wonderful.
- Baking sheet or pan – This will be your canvas where all those delicious layers come together! A sturdy baking sheet ensures even cooking throughout so that every slider bakes uniformly—nobody wants one side crispy while another stays soggy!
- Aluminum foil – A trusty companion in keeping moisture locked inside during baking; covering your sliders prevents them from drying out while allowing them to steam just enough before achieving golden perfection on top.
- Small bowl for mixing – Essential for combining our melted butter with garlic and herbs; it allows us to evenly distribute these flavors across all sliders rather than leaving any behind!
Preparing the Hot Italian Sub Sliders
Step 1: Preheat Your Oven
First things first: let’s set up our environment by preheating your oven to 350 degrees Fahrenheit (175 degrees Celsius). This step might seem simple but trust me—it’s crucial because we want those sliders baking evenly right from the start! Preheating allows our oven temperature stabilized before putting anything inside so we can achieve that beautiful golden-brown crust on top while ensuring everything inside gets heated through properly too.
Step 2: Assemble Your Sliders
Now comes one of my favorite parts—the assembly! Begin by laying down the bottom halves of your rolls on a baking sheet or pan spacious enough for all twelve pieces comfortably without overcrowding them (crowding leads uneven cooking!). Start layering with thin slices of chicken ham directly onto each roll’s surface; try not skipping this step because it forms such an important base layer packed full of flavor right off-the-bat! Next up goes turkey slices followed closely by delectable turkey pepperoni topped off generously by luscious provolone cheese—oh my goodness can you imagine how heavenly this combination already sounds? Last but certainly not least sprinkle on those tangy pepperoncini along with spicy cherry peppers before placing back on top bun like finishing touches on art piece!
Step 3: Brush On That Flavored Butter
At this point we should have assembled beautiful little sandwiches ready waiting patiently—and now it’s time we give them some love via brushing on seasoned butter mixture we’ve prepared earlier combining melted butter chopped fresh garlic plus herbal notes from Italian seasoning blend itself creating aromatic experience everyone will adore soon enough once baked together lovingly until bubbly goodness emerges outta oven moments later…
Step 4: Bake Away!
Cover those precious sliders with aluminum foil gently ensuring no steam escapes while allowing everything inside cooks evenly well without burning tops prematurely—that way when total elapsed time reaches around thirty minutes mark you can peel back foil revealing visually stunning sight golden brown crust glimmering invitingly beckoning everyone nearby instantly turning heads towards mouthwatering aroma emanating forth…
Stay tuned as we continue crafting these extraordinary Hot Italian Sub Sliders together—I promise each step brings us closer toward uniting flavors exploding blissfully within every bite shared amongst friends gathered around table enjoying life through scrumptious food experiences crafted straight from heart’s passion!
Step 5: Layering the Flavors
Now that we have our rolls prepped and ready, it’s time to dive into the heart of this recipe: layering those flavors! Start by taking the bottom half of your beautiful, soft rolls and laying them out on a baking sheet. I love using Kings Hawaiian rolls for their slight sweetness, which beautifully balances the savory elements of this dish. Begin with a generous layer of chicken ham; you want to make sure every bite has that delicate meatiness that will serve as a fantastic base. Follow this with an equally hearty layer of turkey slices, then add a delightful sprinkle of turkey pepperoni. Oh, can you just imagine how these meats are going to meld together? It’s like a warm hug from your favorite Italian deli!
Next, we’re not stopping there—oh no! Go ahead and lay down your slices of provolone cheese, allowing them to overlap slightly. This melty layer is absolutely paramount because it acts as both a binding agent and a flavor powerhouse—can you picture that gooey goodness? Don’t forget to add your pickled hot cherry peppers and sliced pepperoncini; they bring a twangy zest that cuts through the richness of the cheeses and meats. Trust me on this one: without this zing, our sliders would miss out on that utterly intoxicating flavor profile we crave in a great Italian sub. Once everything is layered beautifully, carefully place the top halves of your rolls back on—this is where all those flavors will come together like a symphony in the oven!
Step 6: Crafting Your Flavorful Butter Mixture
Let’s move on to what I like to call our magic butter mixture! In a small bowl, combine 1/4 cup of melted salted butter with 1 teaspoon of Italian seasoning and two cloves of freshly crushed garlic. This step is crucial because it introduces layers upon layers of flavor that will envelop your sliders in deliciousness. The melted butter acts as a carrier for the spices and garlic, allowing them to soak into the bread while adding richness to each bite. When you crush fresh garlic instead of using jarred versions, you unleash essential oils that bring out an aromatic quality that’s simply unmatched; it’s like inviting an old friend back into your kitchen.
Once you’ve mixed these ingredients together until they’re well combined, grab your pastry brush (or even just use the back of a spoon if you’re feeling rustic) and generously coat the top buns with this luscious mixture. Make sure to get into all those nooks and crannies—it’s essential for achieving that golden-brown crust we all love! As you brush it on, visualize how this simple act transforms your sliders from ordinary to extraordinary—you’ll be amazed at how much depth it adds. Don’t rush this step; let each slider soak up that buttery goodness while thinking about how tantalizing they’ll be once they emerge from the oven.
Step 7: The Importance of Baking
Now comes the moment we’ve all been waiting for: baking these beauties! Preheat your oven to 350 degrees Fahrenheit if you haven’t already—this is critical because it ensures an even cook throughout the sliders. Once your oven is nice and hot, cover your assembled sliders with aluminum foil; this creates steam inside which keeps everything moist while it bakes. Bake them for about 30 minutes until they turn golden brown on top; you’ll know they’re ready when you can see that beautiful color forming around the edges.
But why cover with foil? It’s simple! This step allows us to trap moisture so that we avoid dry bread—the last thing we want! Keeping an eye on them during baking is important; halfway through, peek under the foil (carefully!) just to check their progress without letting too much heat escape. You should see melted cheese bubbling up slightly at the sides—that’s when you’ll really start salivating! If they haven’t browned enough after about 25 minutes, feel free to remove the foil for the last five minutes for a crispy finish—they deserve nothing less than perfection!
Step 8: Slicing and Serving Your Sliders
Once those thirty glorious minutes have passed, it’s time for one final reveal! Carefully remove your Hot Italian Sub Sliders from the oven and allow them to rest for just about five minutes before slicing—this is absolutely paramount because it gives everything time to set up nicely so that when you cut into them, they don’t fall apart like an overzealous sandwich at lunchtime! While you’re waiting (and trust me, it’s worth every second), take in those amazing aromas wafting through your kitchen—they’ll have everyone gathering around in sheer anticipation.
With a sharp knife in hand (you don’t want any jagged edges here), slice through those perfectly baked rolls where you’ve marked them earlier; aim for about twelve sliders in total or whatever suits your crowd best. As you cut through each one, revel in how wonderfully cheesy they look inside—those layers are practically begging to be devoured! Now comes my favorite part: serving them alongside a cup of marinara sauce for dipping. This adds yet another level of flavor as you dunk each slider into that rich tomato sauce—it’s honestly divine!
Final Touches
As you’re bringing these Hot Italian Sub Sliders to the table, don’t forget about presentation! Arrange them on a large platter or cutting board; maybe even sprinkle some fresh parsley or grated Parmesan over the top if you’re feeling fancy—it elevates not just their appearance but also their taste experience! And remember: these sliders aren’t just food; they’re an invitation for laughter and stories shared among friends or family gathered together around good food.
I promise you will absolutely love making—and eating—these sliders as much as I do. They are perfect for tailgates or cozy nights in front of the TV while watching movies or sports events with friends. So gather up some good company, dip into that marinara sauce, and watch as everyone digs in eagerly—you might even find yourself needing to make another batch before long because they’ll disappear faster than you can say “Hot Italian Sub Sliders!” Enjoy every moment—and every bite!
Storage and Enjoyment Tips for Your Hot Italian Sub Sliders
Now that you’ve pulled those glorious Hot Italian Sub Sliders out of the oven, the aroma wafting through your kitchen is simply intoxicating. I can almost hear the joyful chatter of friends and family as they gather around to dig into this masterpiece. But what happens if you have leftovers? Fear not! I’m here to guide you on how to preserve this delightful creation so that every bite remains just as delicious as when it first came out of the oven.
Storing Leftover Hot Italian Sub Sliders
When it comes to storing your leftover Hot Italian Sub Sliders, choosing the right container is key. A tightly sealed glass or plastic container will work wonders in keeping these little gems fresh. If you have a bit of extra time, wrap them gently in aluminum foil before placing them in the container; this helps maintain their soft texture while keeping moisture at bay. Ideally, you’ll want to enjoy them within three days for the best flavor and quality. However, if you find yourself with some leftover sliders after that mark, don’t worry too much—the bread may lose a bit of its initial softness, but trust me, they’ll still be delicious! When ready to enjoy again, simply pop them in a preheated oven at 350 degrees F for about 10 minutes or until warmed through. This little trick revives their warm embrace and melts that provolone all over again!
Freezing Hot Italian Sub Sliders for Later
If you’re looking to extend the life of your Hot Italian Sub Sliders even further, freezing is an excellent option! To do this properly, wrap each slider tightly in plastic wrap followed by a layer of aluminum foil—this double-layer protection will help prevent freezer burn and keep those flavors intact. These beauties can stay frozen for up to three months without losing too much of their magic. When you’re ready to indulge again, there’s no need to thaw; simply place them directly into a preheated oven at 350 degrees F and heat for about 15-20 minutes until they’re thoroughly warmed up. The convenience factor here is absolutely paramount—you can whip up a batch and have delicious snacks or meals on hand whenever cravings strike!
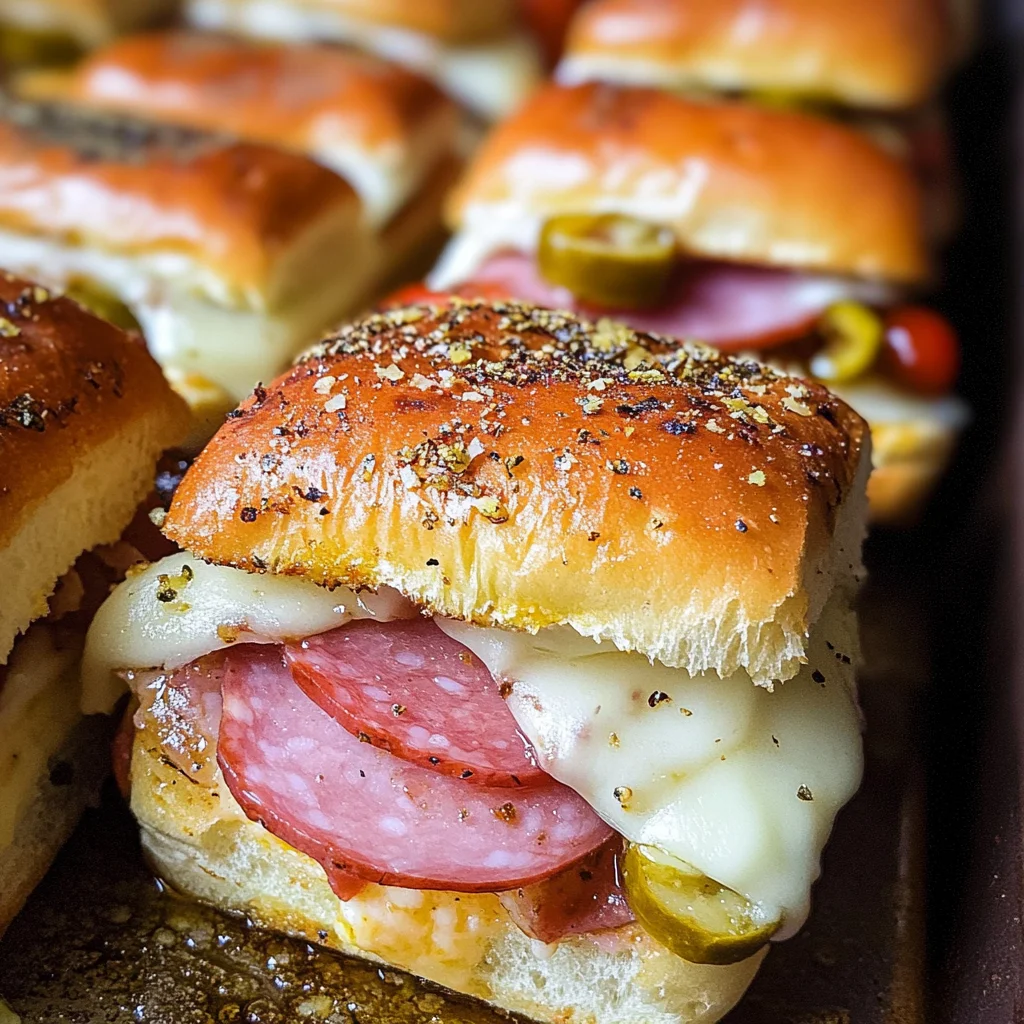
Hot Italian Sub Sliders

Hot Italian Sub Sliders are a delightful fusion of flavors that will elevate any gathering. These savory bites combine layers of tender turkey chicken ham, turkey slices, and zesty turkey pepperoni, all enveloped in soft rolls and topped with gooey provolone cheese. The addition of tangy pepperoncini and pickled hot cherry peppers adds a burst of flavor that keeps every bite exciting. Perfect for tailgating or family gatherings, these sliders are easy to prepare and sure to impress your guests. Serve them with marinara sauce for dipping, and watch them disappear in no time!
- Prep Time: 15 minutes
- Cook Time: 30 minutes
- Total Time: 45 minutes
- Yield: Serves 12 sliders 1x
- Category: Main
- Method: Baking
- Cuisine: Italian
Ingredients
- 12 pack rolls (e.g., Kings Hawaiian rolls)
- 6 oz chicken chicken ham, thinly sliced
- 5 oz turkey slices, thinly sliced
- 5 oz turkey pepperoni, thinly sliced
- 9 slices provolone cheese
- 1/3 cup pepperoncini, sliced
- 1/3 cup pickled hot cherry peppers, sliced
- 1/4 cup salted butter, melted
- 1 tsp Italian seasoning
- 2 cloves garlic, crushed
- 1 cup marinara sauce for dipping
Instructions
- Preheat your oven to 350°F (175°C).
- Arrange the bottom halves of the rolls on a baking sheet.
- Layer with chicken chicken ham, turkey slices, turkey pepperoni, provolone cheese, pepperoncini, and hot cherry peppers.
- Place the top halves back on the rolls.
- In a bowl, mix melted butter with garlic and Italian seasoning; brush this mixture over the tops of the sliders.
- Cover with aluminum foil and bake for approximately 30 minutes until golden brown.
- Remove from the oven and let cool for five minutes before slicing.
- Serve warm with marinara sauce for dipping.
Nutrition
- Serving Size: 1 slider (90g)
- Calories: 300
- Sugar: 2g
- Sodium: 780mg
- Fat: 15g
- Saturated Fat: 7g
- Unsaturated Fat: 6g
- Trans Fat: 0g
- Carbohydrates: 30g
- Fiber: 1g
- Protein: 12g
- Cholesterol: 40mg