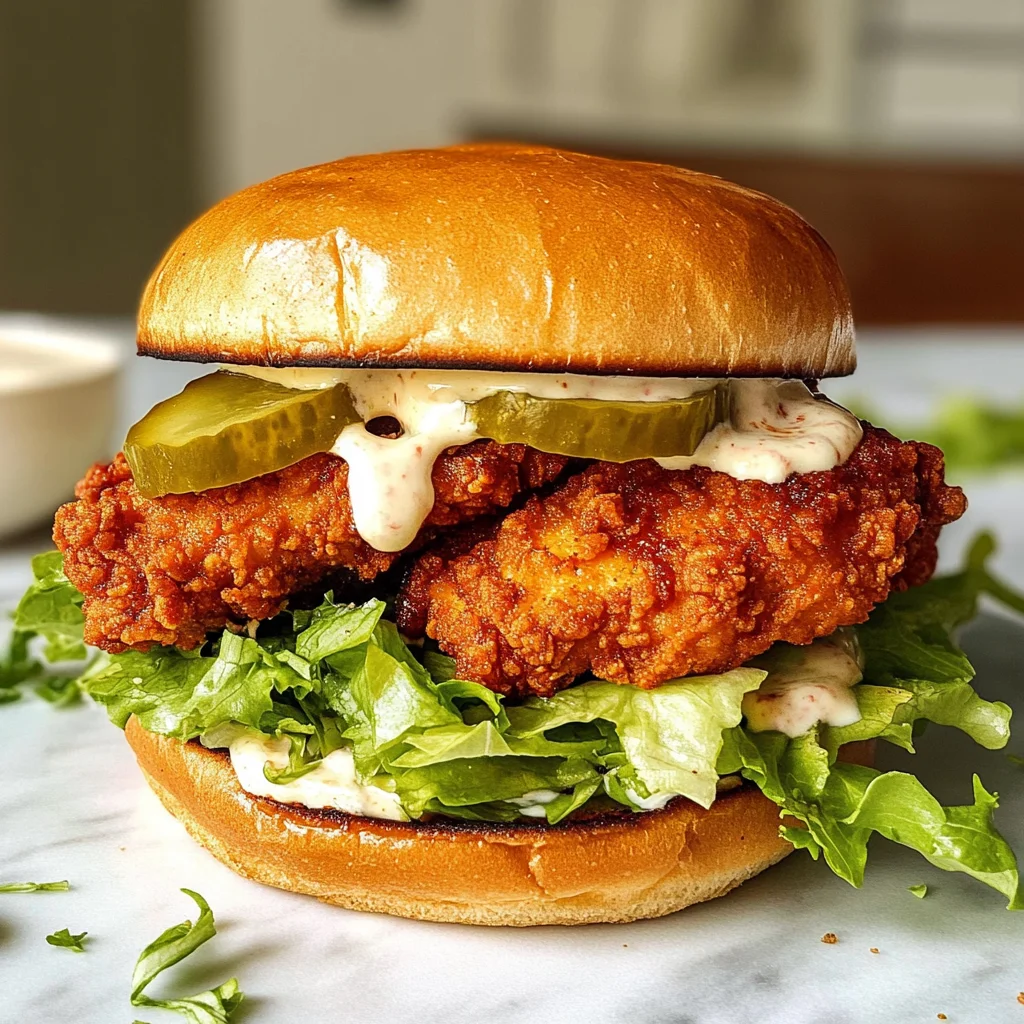
Juicy Air Fryer Chicken Sandwich with a Flavorful Coating
There’s something utterly magical about the way food can evoke memories and create moments of joy, isn’t there? The aroma of a sizzling chicken sandwich wafting through the air, the sound of laughter at the dinner table, and the warmth of community all meld into what I like to call a culinary symphony. This isn’t just any meal; it’s the Juicy Air Fryer Chicken Sandwich with a Flavorful Coating—a delightful dish that marries tradition with modern convenience. Imagine sinking your teeth into a perfectly crispy exterior, revealing a tender, juicy chicken breast inside, all while feeling a sense of accomplishment for crafting such a masterpiece in your own kitchen. The combination of spices dances on your palate, while the spicy mayo adds that perfect kick to elevate this sandwich from simple to sublime.
As we embark on this culinary adventure together, I want you to feel empowered and excited! Cooking should be an expression of love and creativity, not merely a chore. This recipe is not only a healthier take on your classic comfort food but also an opportunity for you to share something special with friends or family. Whether it’s a casual weeknight dinner or a weekend gathering, this Juicy Air Fryer Chicken Sandwich is sure to impress and satisfy everyone at your table. Trust me—once you make it, it will become one of those go-to recipes that you turn to time and again.
Juicy Air Fryer Chicken Sandwich with a Flavorful Coating: A Delightfully Crispy Experience Awaiting You
Let’s dive into creating what will soon be your new favorite sandwich! With just a handful of ingredients and some love, we’ll transform basic chicken breasts into something extraordinary. Your air fryer will work its magic, ensuring each bite is both crispy and juicy—what could be better than that?

Ingredients:
Before we get cooking, let’s gather our ingredients! Each one plays an essential role in building layers of flavor and texture that you’ll absolutely adore.
- 2 boneless, skinless chicken breasts. Choosing high-quality chicken is paramount here; look for organic or free-range options if possible. These birds have had more space to roam and generally taste better because they are raised without antibiotics or artificial hormones. The absence of skin keeps our sandwich lighter while still allowing us to achieve that desirable juiciness when marinated properly.
- 1 cup buttermilk. This ingredient does wonders for our chicken! The acidity in buttermilk acts as a tenderizer, breaking down proteins and making the meat remarkably tender while infusing it with flavor. If you don’t have buttermilk on hand, fear not! You can easily create a substitute by mixing regular milk with a splash of vinegar or lemon juice—just let it sit for about 5 minutes to curdle.
- 1 cup all-purpose flour. This is our coating base—the star player in achieving that golden-brown crust we’re after. But not all flours are created equal; selecting all-purpose flour ensures versatility since it can absorb moisture without becoming too heavy or dense. For gluten-free friends out there, feel free to swap this with gluten-free flour blends designed for all-purpose use!
- 1 teaspoon paprika. Paprika adds beautiful color and mild spice that enhances the overall profile of our coating without overwhelming the other flavors at play. It’s also rich in antioxidants! When selecting paprika, consider smoked paprika for an extra layer of depth if you’re feeling adventurous.
- 1 teaspoon garlic powder. Garlic powder brings an aromatic punch—conveniently concentrated yet easy to sprinkle in for instant flavor enhancement without the need for chopping fresh garlic! It complements almost every savory dish beautifully.
- 1 teaspoon onion powder. Much like garlic powder, onion powder is my secret weapon when I want an underlying depth of flavor without the hassle of fresh onions’ tears! It gives that sweet yet pungent essence that pairs splendidly with our spices.
- Salt and pepper to taste. These two humble seasonings are absolute essentials; they amplify flavors beautifully! Don’t skimp here—season generously so every bite sings with flavor.
- 1/2 cup mayonnaise. A creamy base for our spicy mayo sauce; mayonnaise provides richness and balances out spiciness with its luscious texture! Look for high-quality mayonnaise—homemade versions are even better if you’re up for it!
- 2 tablespoons hot sauce. Here’s where we crank up the heat! Hot sauce introduces just enough spice to give your sandwich character without overpowering its essence. Adjust according to your personal preference—everyone’s tolerance level varies!
- 4 hamburger buns. Choose soft yet sturdy buns that can hold up against juicy fillings without falling apart—brioche buns offer sweetness that contrasts beautifully with savory elements here!
- Lettuce, tomato, and pickles for topping. Fresh toppings add crunch and brightness while providing balance to the richness of our fried chicken; they’re non-negotiable companions on our journey toward sandwich nirvana!
Equipment You’ll Need:
Before we get started cooking up this delicious feast, let’s make sure you have everything you need on hand! Having the right tools makes your cooking experience smoother and even more enjoyable—think of them as essential partners in achieving greatness in your kitchen.
- Air fryer: This magical device will transform ordinary ingredients into crispy delights using hot air circulation instead of excess oil—perfect for making healthier versions of fried favorites like our Juicy Air Fryer Chicken Sandwich! If you don’t own one yet, consider investing because they save time while offering exceptional results.
- Shallow dish: You’ll need one for marinating those lovely chicken breasts in buttermilk—a flat surface allows more contact between the meat and marinade so flavors penetrate deeply.
- Separate mixing bowl: This helps us combine dry ingredients seamlessly; having separate bowls reduces messiness during prep time!
- Cooking spray: A must-have when working with any air fryer; this ensures nothing sticks while providing ultimate crispiness during cooking!
With these ingredients gathered and tools ready at hand, you’re well-equipped for success as we embark on making this Juicy Air Fryer Chicken Sandwich with a Flavorful Coating together!
Step 1: Marinate Your Chicken Breasts
The magic truly begins here as we prepare our chicken by soaking it in buttermilk—a crucial step I can’t emphasize enough! Start by placing those beautiful boneless chicken breasts into a shallow dish filled with 1 cup of buttermilk, allowing them to bathe luxuriously in this creamy goodness for at least 30 minutes (but if you have time to spare, an hour would be even better!). Why marinate? The buttermilk tenderizes the meat while infusing it with subtle tangy flavors that set the stage for what’s coming next—the longer they soak up this liquid gold goodness, the more succulent they’ll become when cooked.
Step 2: Prepare Your Flavorful Coating
While we wait patiently (and trust me; it’s worth every minute!), let’s move onto creating our flavorful coating mixture! In another bowl or dish—a wider surface area allows easier dredging later—combine 1 cup all-purpose flour along with paprika, garlic powder, onion powder plus salt & pepper (adjust according to taste). Stir this mixture well until everything’s evenly blended—it should look like sandy beach paradise! Take note: seasoning your flour mixture is absolutely paramount because this will form that glorious crust around each piece during frying; skip this step at your peril!
Step 3: Dredge That Beautiful Chicken
Once those precious breasts have soaked long enough (I’m talking about divine tenderness now!), remove them from their milky bath and let any excess drip off gently before dredging them straight into your seasoned flour mixture. Make sure every inch gets coated thoroughly—you want each bite bursting forth flavors galore as soon as someone takes their first crunchy bite! Remember: don’t rush this step; giving proper attention here leads directly toward achieving maximum crispiness later on when frying takes place!
Step 4: Preheat Your Air Fryer
Now comes another exciting part: preheating that fabulous air fryer until it reaches 375°F (190°C)! This takes about 5 minutes typically but ensures we’ve got optimal conditions ready when it’s finally time to cook those gorgeous pieces coated luxuriously within their crunchy shells…so don’t skip waiting patiently either—it builds anticipation wonderfully too! While waiting patiently during preheating stages (savoring aromas drifting up), spray vegetable oil lightly across basket surfaces beforehand so nothing sticks once placed inside later down road…
Stay tuned because we’re just getting started on creating these irresistible sandwiches that’ll delight everyone around any table setting imaginable…
Step 5: Perfectly Air-Fried Chicken Breasts
Now that your chicken has marinated beautifully in the buttermilk, it’s time to create that utterly intoxicating coating. This step is crucial because the buttermilk not only tenderizes the chicken but also infuses it with moisture, ensuring that every bite remains juicy and succulent as it cooks. Take each chicken breast out of the buttermilk, allowing any excess to drip off – we don’t want to drown our coating! Then, gently dredge the chicken in your seasoned flour mixture. Make sure you’re covering every inch; this is where the magic happens! The flour mixture will form a crispy outer shell that contrasts beautifully with the juicy interior. Trust me on this: get in there with your hands and really press that flour into the chicken; it’s a tactile experience that makes all the difference.
As you coat each piece, lay them on a plate or baking sheet lined with parchment paper. This step allows the coating to adhere better and prevents any sticking as you transfer them to the air fryer. Once all your chicken breasts are coated, pause for just a moment to admire those golden nuggets of potential deliciousness. You want to ensure they are well-coated without clumps or patches—watch for any spots where the flour might have missed, as these can lead to uneven cooking. Remember, patience here pays off immensely; taking the time to ensure even coverage will yield that desired crunch when cooked!
Step 6: Air Frying Magic Begins
Next up, we’re diving into the world of air frying—a technique that transforms humble ingredients into crisped perfection with far less oil than traditional frying methods. Preheat your air fryer to 375°F (190°C). This temperature is absolutely paramount, allowing for even cooking while achieving that coveted golden-brown exterior. While it preheats—this usually takes about 3-5 minutes—take a moment to lightly spray your air fryer basket with cooking spray. This step ensures our chicken doesn’t stick and helps achieve an even crisper finish.
Once preheated, carefully place your breaded chicken breasts in a single layer in the basket; avoid overcrowding because airflow is essential in an air fryer! You want each piece of chicken to have enough space around it so that hot air can circulate freely, creating an incredible crunchy texture on all sides. Cook them for 20-25 minutes, flipping halfway through—this flipping is non-negotiable! It allows both sides to get that glorious golden hue and facilitates even cooking throughout. As they cook, keep an eye on them toward the end of the cooking time; you’ll know they’re done when they reach an internal temperature of 165°F (75°C). This temperature guarantees safety while keeping everything juicy inside—you definitely don’t want undercooked chicken!
Step 7: Crafting Your Spicy Mayo Delight
While your chicken transforms into crispy goodness within the air fryer, let’s whip up a spicy mayo that will elevate your sandwich to new heights! In a small bowl, combine 1/2 cup of mayonnaise with 2 tablespoons of hot sauce—now you can choose your preferred level of heat here! I personally adore using a chipotle sauce for its smoky depth, but feel free to experiment with flavors until you find what tickles your taste buds just right. The beauty of this spicy mayo lies not only in its flavor profile but also in its creamy texture, which complements our crunchy chicken perfectly.
Whisk those two ingredients together until they form a harmonious blend; it should be smooth and creamy with a slight kick at the end—the perfect balance! Taste it before serving; this simple act enhances your culinary skills by helping you adjust seasoning according to your preference. If you find it too spicy or bland, don’t hesitate to tweak it—a dash more mayonnaise can mellow things out if needed! Remember, this isn’t just a condiment; it’s an essential component that ties everything together beautifully. Set aside your spicy mayo while we move on—we’ll rock those buns next!
Step 8: Toasting Buns for Ultimate Satisfaction
Ahh, let’s not overlook one of my absolute favorite steps: preparing those buns! Toasting adds another layer of flavor and texture that truly elevates our Juicy Air Fryer Chicken Sandwich with a Flavorful Coating from good to extraordinary! While your chicken finishes cooking—perhaps during those last few minutes—grab four hamburger buns and arrange them cut side up in the air fryer basket after removing the cooked chicken (you can always do this while waiting for it to cool). Give them a light spray of cooking oil or brush them delicately with melted vegan butter if you’re feeling indulgent—this will add richness as they toast.
Toast them at 375°F (190°C) for about 3-4 minutes or until they’re beautifully golden brown and slightly crisp on top—that satisfying crunch will add such fun texture when you take a bite into your sandwich! Keep an eye on these beauties as they toast because they can go from perfect to overdone rather quickly—the aroma wafting through your kitchen will be hard to resist! When they’re ready, remove them carefully from the basket (they’ll be hot!), and let’s prepare for our grand assembly!
Conclusion:
As we wrap up our cooking adventure with this Juicy Air Fryer Chicken Sandwich with a Flavorful Coating, I hope my enthusiasm has been contagious! It’s incredible how something so simple can transform into such an extraordinary dish; every bite bursts with flavor and brings joy that is absolutely heartwarming. The combination of the crunchy coating paired with juicy chicken creates textures that dance on your palate while the spicy mayo adds just enough zing to keep things exciting. This is not just any sandwich; it’s a celebration of flavors that brings comfort and delight long after mealtime has passed.
Why should this recipe be on your must-try list? Well, beyond its irresistible taste lies an experience that brings people together. Whether you’re whipping these up for a weeknight family dinner or serving them at a gathering with friends, there’s something undeniably special about sharing homemade food made from love. Picture this: pulling those golden-brown sandwiches out of the air fryer while their crispy aroma fills your kitchen—who could resist taking a bite immediately? It’s versatile enough for casual lunches or festive occasions alike—you might find yourself returning to it time and again.
When it comes time to serve these delicious sandwiches, imagine savoring one alongside crispy sweet potato fries or perhaps nestled next to a vibrant salad drizzled with zesty vinaigrette. For an afternoon pick-me-up during cozy chats with friends over iced tea or lemonade, these sandwiches shine through effortlessly! And if you’re feeling adventurous on game night? Pair them with some homemade coleslaw for added crunch and freshness—it complements every flavor beautifully.
Feeling adventurous? This recipe is wonderfully adaptable! You can switch things up by adding different spices into the flour coating or experimenting with various toppings like avocado slices or jalapeños for an extra kick—believe me; each variation enhances your sandwich experience uniquely! I encourage you to try it out and make it yours; share your delightful creations and stories because food is all about connection and love. Let’s inspire each other through our kitchens!
Juicy Air Fryer Chicken Sandwich with a Flavorful Coating

Indulge in the delightful experience of a Juicy Air Fryer Chicken Sandwich with a Flavorful Coating. This healthier twist on comfort food combines crispy, golden-brown chicken with a zesty spicy mayo, creating an explosion of flavor in every bite. Perfect for casual weeknight dinners or weekend gatherings, this recipe is simple yet satisfying. With tender chicken marinated in buttermilk and coated in a savory blend of spices, you can enjoy the crunch without the guilt. The addition of fresh lettuce, juicy tomatoes, and tangy pickles elevates this sandwich to new heights. Get ready to impress family and friends with a dish that’s not just about nourishment but also about bringing people together around the dining table.
- Prep Time: 10 minutes
- Cook Time: 25 minutes
- Total Time: 35 minutes
- Yield: Serves 4
- Category: Dinner
- Method: Frying
- Cuisine: American
Ingredients
- 2 boneless, skinless chicken breasts
- 1 cup buttermilk
- 1 cup all-purpose flour (or gluten-free flour)
- 1 teaspoon paprika
- 1 teaspoon garlic powder
- 1 teaspoon onion powder
- Salt and pepper to taste
- 1/2 cup mayonnaise
- 2 tablespoons hot sauce
- 4 hamburger buns
- Lettuce, tomato, and pickles for topping
Instructions
- Marinate chicken breasts in buttermilk for at least 30 minutes.
- In a separate bowl, mix flour, paprika, garlic powder, onion powder, salt, and pepper.
- Remove chicken from buttermilk and dredge in the seasoned flour mixture.
- Preheat air fryer to 375°F (190°C). Lightly spray the basket with cooking spray.
- Arrange chicken in the air fryer basket in a single layer; cook for 20-25 minutes, flipping halfway through until golden brown and cooked through (internal temperature of 165°F).
- While chicken cooks, mix mayonnaise and hot sauce for spicy mayo.
- Toast buns in the air fryer for about 3-4 minutes until golden.
- Assemble sandwiches by spreading spicy mayo on toasted buns, layering lettuce, tomato, pickles, and crispy chicken.
Nutrition
- Serving Size: 1 sandwich
- Calories: 520
- Sugar: 3g
- Sodium: 890mg
- Fat: 22g
- Saturated Fat: 3g
- Unsaturated Fat: 18g
- Trans Fat: 0g
- Carbohydrates: 54g
- Fiber: 3g
- Protein: 29g
- Cholesterol: 80mg