Brown Sugar Pop Tart Cookies: A Delicious Twist on a Classic Treat
There’s something truly magical about baking that transcends the mere act of preparing food; it’s a heartfelt embrace, an expression of love that we can share with those we hold dear. When I think of my childhood, the memories that pop up often involve sweet treats made in cozy kitchens—flour dusting the countertops, the warm scent of sugar and spice wafting through the air, and laughter echoing against the walls. This is exactly the kind of experience I want to recreate with these Brown Sugar Pop Tart Cookies: A Delicious Twist on a Classic Treat. They are not just cookies; they are little bites of nostalgia wrapped in a delightful package, filled with warm brown sugar and cinnamon goodness. Each bite is like a hug for your taste buds—a symphony of flavors that dances on your palate.
Imagine pulling out a tray of these gorgeous cookies from the oven, their golden edges beckoning you closer. The aroma fills your kitchen, wrapping around you like a comforting blanket. It’s this very experience that has kept me baking over the years, and it’s what makes these Brown Sugar Pop Tart Cookies so special to share with friends and family. Perfect for any occasion—from casual gatherings to festive celebrations—these cookies are more than just a sweet treat; they bridge the gap between tradition and innovation while offering that familiar warmth we all crave. Trust me when I say that when you take a bite, you’ll be transported back to simpler times while savoring something entirely new.
Brown Sugar Pop Tart Cookies: A Delicious Twist on a Classic Treat: Sweet Memories in Every Bite
Let’s embark on this delightful culinary adventure together! These Brown Sugar Pop Tart Cookies are not just easy to make; they’re infused with love and nostalgia. With their soft cookie base filled with sweet brown sugar cinnamon goodness and topped with creamy icing, every bite offers a perfect blend of textures and flavors that will have everyone reaching for seconds (and maybe thirds!). So, gather your ingredients, roll up your sleeves, and let’s create something truly extraordinary!
Ingredients:
As we dive into this recipe for our delectable Brown Sugar Pop Tart Cookies, let’s consider each ingredient we’ll be using—a collection of simple yet essential components that come together to create magic in our kitchens.
- 1 cup unsalted butter, softened. This is crucial for creaming properly and creating that light, airy texture we’re aiming for in our Brown Sugar Pop Tart Cookies: A Delicious Twist on a Classic Treat. Softened butter blends beautifully with sugars to form an emulsion that traps air bubbles during mixing—this is what gives our cookies their delicate crumb and melt-in-your-mouth quality. Be sure to take it out of the fridge at least half an hour before you start baking, or even better—let it soften at room temperature while you gather your other ingredients.
- 1 cup packed brown sugar. Brown sugar isn’t just about sweetness; it adds moisture and depth to baked goods thanks to its molasses content. When mixed into our cookie dough, it helps create that soft texture while infusing every bite with rich caramel notes. Look for dark brown sugar if you want an even deeper flavor profile; otherwise, light brown will work wonderfully as well!
- 1/2 cup granulated sugar. Ahh, granulated sugar—the classic sweetener! It plays a vital role here by providing structure as well as sweetness. The combination of both types of sugar is non-negotiable for achieving that perfect balance between soft chewiness and slight crispness around the edges.
- 2 large eggs. Eggs serve several key functions in baking—they provide moisture, richness, and stability to our dough while also acting as a binding agent to hold everything together beautifully. Make sure they’re at room temperature to ensure they incorporate smoothly into your mixture without causing any lumps!
- 1 teaspoon vanilla extract. This liquid gold is absolutely paramount in elevating our flavor profile! Vanilla adds warmth and depth that enhances all other ingredients’ natural flavors—it’s like giving every bite a gentle hug! Always choose pure vanilla extract over imitation for optimal results.
- 3 cups all-purpose flour. Flour provides structure; it’s what gives our cookies their form! Using all-purpose flour strikes a lovely balance between tenderness and sturdiness—perfect for holding up our filling without becoming overly crumbly or tough.
- 1 teaspoon baking powder. This leavener is responsible for creating lightness in our cookies by producing carbon dioxide gas when it reacts with moisture or acid in the dough—this creates those delightful little pockets of air! It’s important not to skip this step because without it your cookies may turn out dense instead of fluffy.
- 1/2 teaspoon baking soda. Baking soda works alongside the baking powder but requires an acid (like brown sugar) to activate its leavening properties effectively! It contributes additional lift while also promoting browning—leading us to those beautifully golden edges we crave!
- 1/2 teaspoon salt. Salt is essential—it amplifies sweetness while also balancing flavors overall! It might seem small but trust me when I say this tiny sprinkle makes all the difference; don’t skip this step!
- 1 cup brown sugar (for filling). Yes! We’re doubling down on brown sugar because we want an explosion of flavor inside each cookie! The rich taste combined with cinnamon will create an irresistible filling that oozes warmth as you bite into them.
- 1 tablespoon cinnamon. Cinnamon is my favorite aromatic spice—it brings warmth and comfort reminiscent not only of baked goods but also cozy winter evenings spent by the fire or family gatherings around holiday tables! A generous tablespoon will ensure each mouthful bursts forth with fragrant spice!
- 1/4 cup milk. Milk adds moisture while also enriching our dough slightly without making it too wet or sticky—we want just enough liquid here to help bind everything together perfectly!
- 1 cup powdered sugar (for icing). This lovely sweet dust is what transforms our cookies from delicious treats into stunning showstoppers! The icing adds sweetness on top along with visual appeal—who wouldn’t want some sparkle?
- 1–2 tablespoons milk (for icing consistency). Just like before when making dough adjustments—you’ll need some milk here too! Start off slowly by adding one tablespoon first until reaching desired smoothness before proceeding further if needed—that way you’ll avoid runny messes!
- Sprinkles (optional)—because who doesn’t love sprinkles? They add color and festivity—a joyful touch perfect for celebrating any occasion or simply brightening up an ordinary day!
Equipment You’ll Need:
Having the right tools makes cooking not only easier but also more enjoyable! While these items may not be ingredients per se, they play critical roles alongside our beloved components as partners in creating something wonderful.
- Mixing bowls — Sturdy mixing bowls are essential for combining ingredients efficiently without worrying about spills or messes during mixing processes—opt for glass or stainless steel versions which won’t retain odors over time.
- Electric mixer or whisk — Whether you’re using an electric mixer or opting for good old-fashioned elbow grease with a whisk—the goal remains steadfast: achieving creamy perfection in mixing butter & sugars together until light & fluffy!
- Rolling pin — This handy tool helps flatten out dough evenly into desired thicknesses—plus it allows us control over shape size & ensures uniformity across batches so no one cookie feels left out!
- Baking sheet lined with parchment paper — Parchment paper prevents sticking while helping achieve even browning across surfaces—it really elevates both presentation & taste alike by ensuring nothing burns onto trays either!
- Cookie cutter (optional) — If you’re feeling creative (or want more than rectangles), grab yourself some festive-shaped cutters but remember: shapes don’t matter nearly as much as how delicious they’ll taste after all said & done!
Now that we have gathered everything necessary let’s dive deep into preparing those scrumptious Brown Sugar Pop Tart Cookies: A Delicious Twist on a Classic Treat together!
Step 1: Creaming Together Butter & Sugars
In your trusty mixing bowl—or perhaps one that’s seen many happy bakes before—start by combining your softened unsalted butter along with both packed brown sugar & granulated sugar at once using either electric mixer set at medium speed or whisk manually until mixture becomes light-colored & fluffy after approximately 2–3 minutes’ time elapsed here; this process known as “creaming” incorporates air into batter which creates texture desired later on when baked fully through! Don’t rush this step; taking time now ensures proper aeration occurs leading us towards those delightful airy bites later on down line without any dense surprises lurking within them unexpectedly either since nobody wants chewy hockey pucks masquerading as cookies instead right?
Step 2: Incorporating Eggs & Vanilla Extract
Once you’ve achieved that lovely creamy mixture described above—you’ll gently introduce two large eggs one at-a-time beating well after each addition followed closely behind by pouring measured vanilla extract right into mix too! Eggs help bind everything together seamlessly whilst adding richness throughout entire batch giving us flavors reminiscent childhood memories associated closely tied experiences shared amongst loved ones gathered ‘round tables enjoying homemade delights created lovingly from scratch—it’s such an integral part so don’t forget those little moments matter most when baking together too!
Step 3: Whisking Dry Ingredients
In another bowl altogether—in order keep things organized—we’ll combine three cups all-purpose flour along side teaspoonfuls each baking powder plus baking soda sprinkled liberally throughout evenly dispersed then follow suit next adding half teaspoon salt next too stir gently using whisk until contents blended uniformly throughout completely ensuring no lumps remain visible whatsoever preceding further steps ahead where we’ve got lots more exciting things coming soon enough down line already waiting patiently here ready unfold themselves gloriously once given chance shine bright under oven’s warm embrace later along journey ahead…
Step 4: Merging Wet & Dry Mixtures
Now comes time join forces between dry ingredients mixed prior alongside wet elements combined earlier previously—we’ll gradually incorporate flour mixture directly into creamed butter-sugar concoction prepared beforehand taking care not overmix since doing so could lead tough textured results rather than ideal softness expected upon final bake outcome desired ultimately hence why patience plays key role here especially during stirring phases ahead as always watching carefully ensuring smooth transitions occurring regularly whenever possible too…
As we move forward crafting these delightful Brown Sugar Pop Tart Cookies: A Delicious Twist on a Classic Treat remember every single step contributes cumulatively towards end result being truly memorable experience shared amongst friends loved ones alike making lasting impressions long after delicious crumbs have been savored completely gone forevermore leaving behind only cherished memories captured within hearts minds alike forevermore…
Step 5: Roll Out the Dough with Love
Now comes the part where your kitchen begins to fill with that intoxicating aroma of warm butter and sugar. It’s time to divide your dough into two equal portions, which will help you manage the rolling process better. Dust your work surface with a light sprinkle of flour—this is crucial to prevent sticking and ensure a smooth roll-out. Gently flatten one portion into a disk, then roll it out to about 1/4-inch thickness using a rolling pin. You want to aim for an even thickness, as this ensures that each cookie bakes uniformly, preventing some from being overdone while others remain soft.
As you roll, take a moment to appreciate the texture beneath your fingertips; it should feel soft but not sticky. If you notice it clinging too much, don’t hesitate to sprinkle on a bit more flour. Remember, patience is key here—take your time to achieve that perfect rectangle shape. Once you’ve rolled it out, use a sharp knife or pizza cutter to cut the dough into rectangles measuring approximately 3×4. This shape is reminiscent of traditional Pop-Tarts and allows for generous filling without spilling over during baking. Trust me on this—those perfectly shaped cookies will look so inviting when they come out of the oven!
Step 6: Repeat the Process
With one batch rolled out and cut into beautiful little rectangles, it’s time to repeat the same process with the second portion of dough. The repetition might feel tedious, but think of it as an opportunity to refine your dough-rolling skills! Each time you roll out another batch, you’re not just preparing cookies; you’re creating special memories in your kitchen. As you cut out the second set of rectangles, try to place them as close together as possible on your work surface—this minimizes waste and gives you more cookies to enjoy in the end.
Once you’ve got all your rectangles cut out, stack them neatly on a parchment-lined baking sheet or plate while you prepare for assembly. Keeping them cool before baking helps maintain their structure and prevents spreading during baking—an important factor in achieving those delightful shapes that are so characteristic of Pop-Tarts. The anticipation builds as you envision how these treats are coming together!
Step 7: Preheat and Prepare Your Baking Sheet
While you’re assembling your cookie masterpieces, it’s time to preheat your oven to 350°F (175°C). This step is non-negotiable; having your oven at the right temperature ensures even cooking and helps achieve that golden-brown color we all adore. While waiting for it to heat up, line a baking sheet with parchment paper if you haven’t already done so—this prevents sticking and makes cleanup a breeze.
As the oven warms up, gather your cut rectangles and prepare for filling! You’ll want to have that delightful brown sugar and cinnamon mixture on hand—it’s where the magic truly happens. Spoon about one tablespoon of this sweet filling into the center of each rectangle. Be careful not to overfill; I know it can be tempting because that rich brown sugar mixture smells heavenly! However, less really is more when it comes to maintaining those charming shapes during baking.
Step 8: Seal Those Sweet Treats
Now comes an exciting part where you’ll transform these simple dough rectangles into something truly extraordinary! Carefully take another rectangle from your prepared stack and place it over the filled rectangle. It’s important now to seal those edges tightly; this is what holds all that deliciousness inside while they bake. Use your fingers or a fork (for an extra touch of charm!) to press down around the edges firmly. Not only does this create those lovely crimped designs reminiscent of classic Pop-Tarts but seals in that liquid gold filling beautifully.
Once you’ve sealed all the cookies, take a moment for quality control: gently lift one cookie at a time and feel its weight in your hands; they should feel sturdy yet delicate—a balancing act between soft cookie goodness and substantial form! Place them carefully on your lined baking sheet about an inch apart; they will spread slightly during baking but shouldn’t merge into one giant cookie! Bake them in that preheated oven for about 12-15 minutes until they’re just lightly golden around the edges—a sign that they’re ready for their much-deserved cooling period.
Conclusion:
As we wrap up our journey through making these Brown Sugar Pop Tart Cookies—a truly extraordinary twist on a classic favorite—I hope you’re feeling the same excitement I do every time I bake this recipe! It’s not just about combining ingredients; it’s about creating memories wrapped in warmth and sweetness that transports us back to simpler times. The combination of buttery dough with that sweet brown sugar and cinnamon filling is nothing short of magical—a comforting hug in cookie form! Each bite is an invitation to linger in cozy moments filled with laughter and love.
This recipe is undeniably a must-try—not only because of its deliciously nostalgic flavor but also due to the sheer joy it brings while baking. Whether you’re aiming to impress guests at your next gathering or looking for an afternoon pick-me-up during your quiet time at home, these cookies shine like stars on any occasion. Picture pulling them from the oven while their enchanting aroma fills your kitchen—it’s bound to make hearts flutter and mouths water!
When it comes to serving suggestions, imagine savoring one with a steaming cup of coffee or tea; there’s something about that pairing that feels like home. For an afternoon indulgence, consider enjoying them alongside fresh fruit or yogurt—it’s the perfect balance of sweet and refreshing. And for an even more decadent experience? Try heating one up slightly and topping it with a scoop of vanilla plant-based ice cream—it’ll feel like dessert heaven!
Feeling adventurous? This recipe is wonderfully adaptable! You could easily swap out cinnamon for nutmeg or even add chocolate chips into your filling for an extra touch of delight. Wanting some fruity flair? Toss in some dried cranberries or chopped nuts for added texture and flavor exploration! No matter how you choose to modify it, I encourage you to embrace creativity in your kitchen—after all, cooking should be an adventure filled with passion and joy. I can’t wait to hear how your own creations turn out—so please share your experiences and let’s connect over our mutual love for baking!
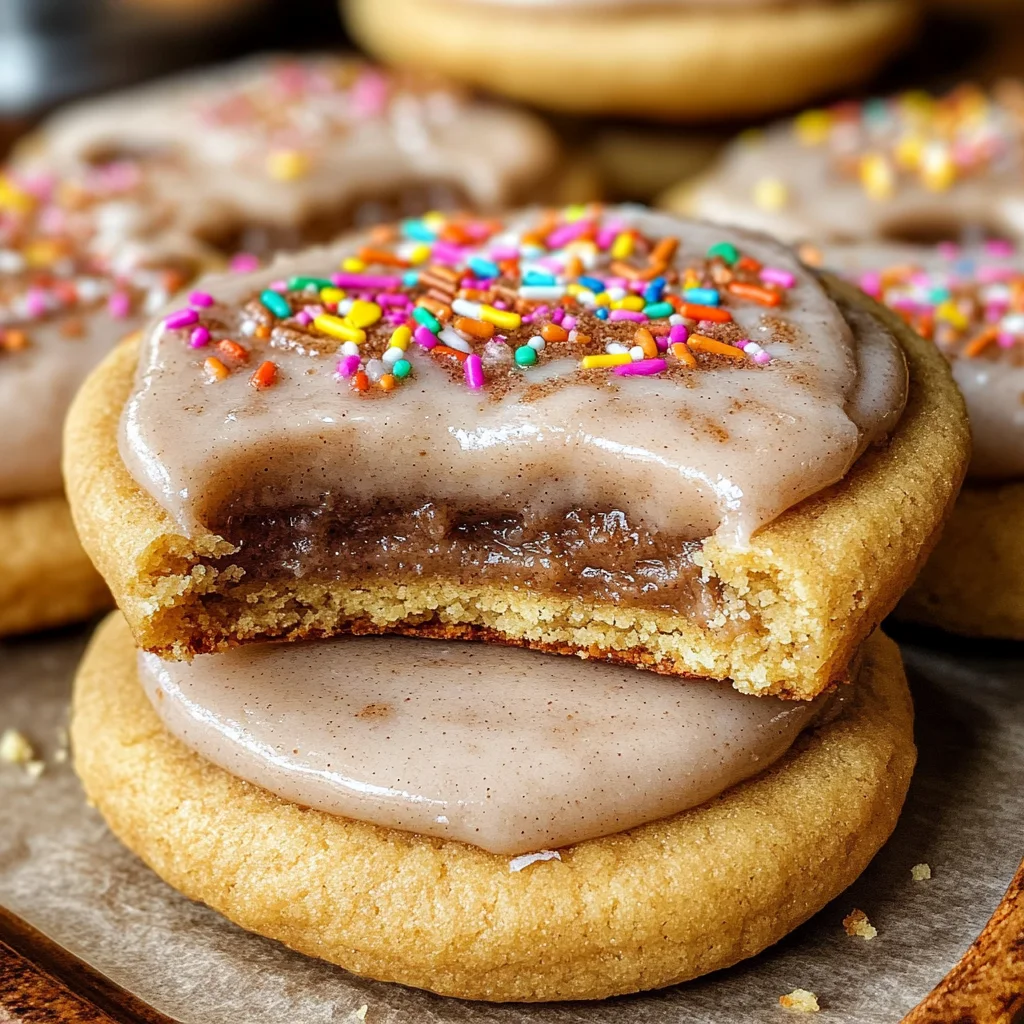
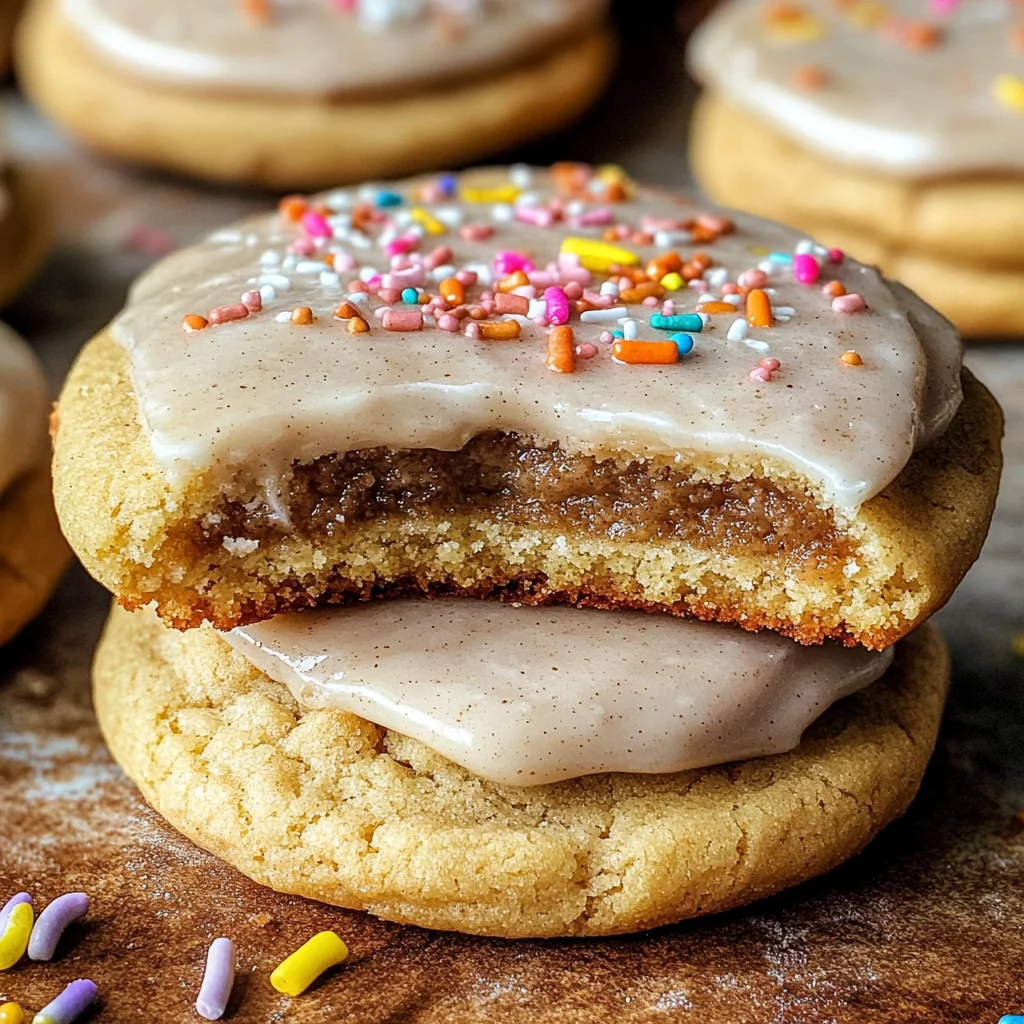
Brown Sugar Pop Tart Cookies: A Delicious Twist on a Classic Treat
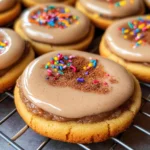
Indulge in the nostalgia of childhood with these irresistible Brown Sugar Pop Tart Cookies. They capture the essence of cozy kitchens filled with love and laughter, transforming a classic treat into a delightful cookie experience. With a soft and chewy base, these cookies are generously filled with warm brown sugar and cinnamon, then topped with creamy icing for an extra touch of sweetness. Perfect for any occasion, these treats will transport you back to simpler times while offering a modern twist that everyone will love. Whether you’re sharing them at gatherings or enjoying them solo, each bite envelops you in comfort and joy.
- Prep Time: 20 minutes
- Cook Time: 15 minutes
- Total Time: 35 minutes
- Yield: Approximately 24 cookies 1x
- Category: Dessert
- Method: Baking
- Cuisine: American
Ingredients
- 1 cup unsalted butter, softened
- 1 cup packed brown sugar
- 1/2 cup granulated sugar
- 2 large eggs
- 1 teaspoon vanilla extract
- 3 cups all-purpose flour
- 1 teaspoon baking powder
- 1/2 teaspoon baking soda
- 1/2 teaspoon salt
- 1 cup brown sugar (for filling)
- 1 tablespoon cinnamon
- 1/4 cup milk
- 1 cup powdered sugar (for icing)
- 1–2 tablespoons milk (for icing consistency)
- Sprinkles (optional)
Instructions
- Preheat your oven to 350°F (175°C) and line a baking sheet with parchment paper.
- In a mixing bowl, cream together softened butter, packed brown sugar, and granulated sugar until light and fluffy.
- Add eggs one at a time, mixing well after each addition. Stir in vanilla extract.
- In another bowl, whisk together flour, baking powder, baking soda, and salt.
- Gradually blend the dry ingredients into the wet mixture until just combined.
- Roll out dough to about 1/4-inch thickness and cut into rectangles.
- Fill half the rectangles with the brown sugar-cinnamon mixture; cover with remaining dough rectangles and seal edges.
- Bake for 12-15 minutes until golden around the edges. Cool before icing.
Nutrition
- Serving Size: 1 cookie
- Calories: 210
- Sugar: 14g
- Sodium: 90mg
- Fat: 9g
- Saturated Fat: 5g
- Unsaturated Fat: 3g
- Trans Fat: 0g
- Carbohydrates: 31g
- Fiber: <1g
- Protein: 2g
- Cholesterol: 30mg