Chocolate Protein Pudding
There’s something profoundly satisfying about creating a dessert that not only tastes amazing but also nourishes your body. This Chocolate Protein Pudding is more than just a sweet treat; it’s a delightful embrace of flavor and health, a luscious dessert that whispers promises of comfort while fueling your day with protein goodness. Let me tell you, the first time I whipped this up in my kitchen, it felt like magic. The rich aroma of cocoa powder swirling through the air was intoxicating, and the smooth texture as it set in the fridge was nothing short of perfection. As I spooned it into bowls, I couldn’t help but feel that this was more than just food—it was an experience, a revelation that indulging in something delicious doesn’t have to come at the expense of our well-being.
Imagine sinking your spoon into a velvety cloud of chocolatey bliss, where every bite is creamy and decadent yet guilt-free. With just the right balance of sweetness and depth from cocoa, this Chocolate Protein Pudding is like a warm hug on a chilly evening or a joyful celebration after a long day. The beauty of this recipe lies not only in its taste but also in its ease—perfect for those busy weeknights when you need something quick yet fulfilling. Trust me when I say that this pudding will become your new go-to dessert idea, whether you’re meal prepping for the week or simply looking for a comforting evening treat.
Chocolate Protein Pudding: A Decadent Delight for Every Occasion
Let’s dive into this delightful recipe! This Chocolate Protein Pudding is not only simple to make but incredibly versatile—perfect for breakfast, an afternoon snack, or even as a healthy dessert after dinner. It’s silky smooth, rich with chocolate flavor, and packed with protein to keep you satisfied without any unnecessary additives. So grab your mixing bowl, and let’s embark on this culinary adventure together!
Ingredients:
As we start gathering our ingredients for this luscious Chocolate Protein Pudding, think of each one as an essential note in a beautiful symphony of flavors. Each ingredient contributes its unique character to create something truly extraordinary.
- 2 cups (480ml) unsweetened almond milk. This creamy base is essential for achieving that luxurious texture we desire in our pudding. Almond milk is light yet rich enough to carry the chocolate flavor beautifully without overpowering it. When selecting almond milk, always go for unsweetened varieties to control sugar levels better; you want the natural nuttiness to shine through without added sweetness competing with your cocoa.
- 1/2 cup (50g) unsweetened cocoa powder. Here comes the star of our show! The cocoa powder infuses our pudding with deep chocolate notes that are utterly intoxicating. It’s important to choose high-quality cocoa powder—look for brands labeled as “Dutch processed” for a smoother finish and richer flavor profile. If you’re feeling adventurous, try mixing in some dark chocolate cocoa powder for an even more profound taste experience!
- 1/4 cup (30g) plant-based protein powder (vanilla or chocolate flavored). This ingredient is what transforms our indulgent dessert into something nutritious and energizing. It adds that extra kick of protein which is fantastic if you’re looking to fuel up post-workout or simply stay satiated longer. Make sure to check the ingredient list on your protein powder; you’ll want one free from artificial additives for the best flavor and health benefits.
- 1/4 cup (60ml) maple syrup or agave nectar. Sweetness plays an important role here; it balances out the bitterness of the cocoa while adding complexity with its rich flavor profile. Maple syrup brings warmth and depth that sugar simply can’t replicate; plus, it’s unrefined which aligns perfectly with our goals of keeping things wholesome.
- 2 tablespoons chia seeds. These tiny powerhouses are crucial because they act as thickeners while also providing fiber and omega-3 fatty acids! As they absorb liquid and swell up during chilling, they help give our pudding that perfect consistency. I love using chia seeds because they’re virtually tasteless; they add nutrition without altering the lovely chocolate flavor we’re aiming for.
- 1 teaspoon pure vanilla extract. Ahh, vanilla—the secret weapon in so many recipes! This little addition brings warmth and aromatic sweetness that elevates all other ingredients harmoniously. Always opt for pure vanilla extract instead of imitation; trust me—it makes all the difference in both taste and quality.
Now that we’ve gathered everything we need let’s ensure we have all the right tools before diving into making this delightful pudding!
Equipment You’ll Need:
Having the right tools can turn your cooking experience from ordinary to extraordinary! They’re like trusted friends who help you along every step of your journey toward creating something wonderful.
- Mixing bowl – A sturdy mixing bowl is essential here; it gives you ample space to whisk together all those beautiful ingredients without making a mess! Opt for glass or stainless steel as these materials provide durability and won’t retain odors or stains over time.
- Whisk – A good whisk will be your best friend in ensuring everything blends seamlessly together into one luscious mixture—no lumps allowed! Look for one with sturdy wires that can handle thicker mixtures like ours without bending out of shape.
- Spatula – A silicone spatula is perfect for scraping down the sides of your bowl and incorporating every last bit into your pudding mixture. It’s also fantastic when transferring your pudding into containers later on; no wasted deliciousness here!
- Measuring cups & spoons – Precision matters when baking or cooking! Having accurate measuring tools will guarantee you get those ratios just right every time—you’ll appreciate this especially when balancing flavors like sweetness versus bitterness!
With all our ingredients prepped and necessary equipment at hand, let’s get started on preparing this irresistible Chocolate Protein Pudding!
Step 1: Whisking Up Magic
In a large mixing bowl, combine your almond milk and unsweetened cocoa powder first—this step sets the foundation for all those dreamy flavors we crave! Use your whisk here to mix them vigorously until fully combined; you should see no clumps remaining as everything melds beautifully together into liquid gold. Don’t rush this step; taking time to thoroughly blend ensures an even distribution of cocoa throughout your pudding so each bite bursts with rich chocolate goodness.
Step 2: Sweeten the Deal
Next up comes adding our sweetener—maple syrup—and plant-based protein powder! Pour both ingredients directly into your chocolate mixture while continuing to whisk steadily until incorporated fully. You’ll notice how silky smooth everything looks now—a true testament to patience paying off! This step is absolutely paramount because it balances out any bitterness from cocoa while ensuring our protein blend integrates smoothly too—this way; no gritty surprises await us later!
Step 3: Chia Seeds Join In
Now let’s fold those magical chia seeds into our mixture! Gently sprinkle them across the surface while using your spatula to incorporate them evenly throughout—the goal here is no clumping! Chia seeds will soak up moisture over time making things wonderfully thick so don’t skip or rush this step either—it’s crucial for achieving that perfect pudding consistency we’re after!
Step 4: Chill Out
Once everything has been mixed well together, it’s time to transfer our vibrant concoction into individual serving bowls or jars—whatever suits your fancy! Cover them with plastic wrap or lids if using jars then slide them gently into the refrigerator where they’ll chill out comfortably for at least two hours—or overnight if you can stand waiting! This resting period allows flavors to deepen while giving chia seeds ample time to work their thickening magic—we promise it’ll be worth every second once you dive back in later!
Stay tuned as we continue crafting more steps toward finishing off this delightful Chocolate Protein Pudding masterpiece!
Crafting Your Creamy Chocolate Protein Pudding
Step 5: Whisking to Perfection
Now, it’s time to dive into the heart of our Chocolate Protein Pudding by combining your ingredients with a touch of love and care. In a medium mixing bowl, you’ll want to add the unsweetened cocoa powder and your choice of protein powder—perhaps a rich chocolate variety or a creamy vanilla for a different twist. Slowly pour in the almond milk, about 2 cups to start, while whisking vigorously. This step is crucial because it ensures that all those dry ingredients blend seamlessly into the liquid, creating a luscious base without any lumps. As you whisk, feel the transformation; what starts as a somewhat gritty mixture will soon become an incredibly smooth and velvety concoction.
The science here is fascinating! Cocoa powder and protein powder are both hydrophilic, meaning they love water. By gradually introducing the almond milk and whisking continuously, you allow the powders to hydrate evenly, which prevents clumping. You should whisk for about 2-3 minutes until you achieve a beautifully homogeneous mixture that glistens invitingly under your kitchen light. Don’t rush this step; take your time to enjoy the gentle rhythm of whisking as it creates air bubbles that contribute to the pudding’s final silky texture. If at any point you notice stubborn clumps refusing to dissolve, don’t hesitate to switch to an immersion blender for a few quick pulses—this will save your pudding from any grainy texture.
Step 6: The Sweetening Symphony
Next up is adding sweetness! This is where we introduce our natural sweetener—maple syrup or agave nectar will work beautifully here. I usually recommend starting with about 1/4 cup of maple syrup; however, feel free to adjust according to your taste preference! Pour it slowly into your mixture while continuing to whisk vigorously. I promise you, this addition not only enhances the flavor but also transforms the texture further into that sumptuous pudding consistency we’re aiming for.
Remember that sweetness can be subjective; some like it sweeter than others. Keep tasting along the way! When you add sweeteners like maple syrup or agave nectar, they bring their own unique flavors that complement our rich cocoa base beautifully. It’s almost like composing a symphony of flavors where each note plays off one another—deep chocolate harmonizing with warm caramel undertones from the maple syrup creates an utterly intoxicating experience on your palate. Aim for a balance that feels just right for you; after all, this pudding is meant to be an expression of your tastes!
Step 7: Incorporating Our Secret Ingredient
Now comes my favorite part—the addition of cornstarch! Many might think this step is optional, but trust me, it’s absolutely non-negotiable if you desire that perfect creamy thickness in your Chocolate Protein Pudding. Take about 3 tablespoons of cornstarch and mix it with just enough cold almond milk (about 1/4 cup) in a separate small bowl until it forms a smooth slurry—this technique is known as “slurry,” and it’s vital because it helps prevent any clumping when we introduce it back into our main mixture.
Once you’ve created that silky slurry, gently fold it into your chocolate mixture while continuing to whisk over medium heat on the stove in a saucepan. The heat activates the cornstarch’s thickening power, which will begin transforming our liquid into a luxurious pudding within minutes! Keep stirring consistently and watch as that glossy mixture slowly thickens and bubbles begin to form around the edges—this visual cue signals that we’re on track! It typically takes around 5-8 minutes for this magical transformation to happen, so stay attentive and keep moving; we want every bit of this pudding base cooked evenly to avoid any raw cornstarch flavor.
Step 8: Cooling Down for Flavor Development
Once you’ve reached that beautiful thickened consistency—think custard-like—you will want to remove it from the heat immediately. This part is crucial because continuing to cook can lead to over-thickening or even burning on the bottom of your pan! Transfer your Chocolate Protein Pudding into individual serving bowls or one large bowl if you’d prefer family-style servings. Now here comes the patience part; cover these bowls tightly with plastic wrap (to avoid condensation ruining our beautiful surface) and let them chill in the refrigerator for at least two hours—or even better overnight if you can resist diving in right away.
Why chill? Well, cooling allows all those flavors we’ve worked so hard to develop meld together wonderfully over time; I promise you’ll notice how much richer and deeper this dessert becomes after resting! Plus, chilling helps set up that perfectly spoonable texture we crave when digging into something as delightful as chocolate pudding. I often find myself giddy with excitement during this waiting period because I know what’s coming next—a truly extraordinary treat awaits!
Final Touches
Step 9: Garnishing Your Masterpiece
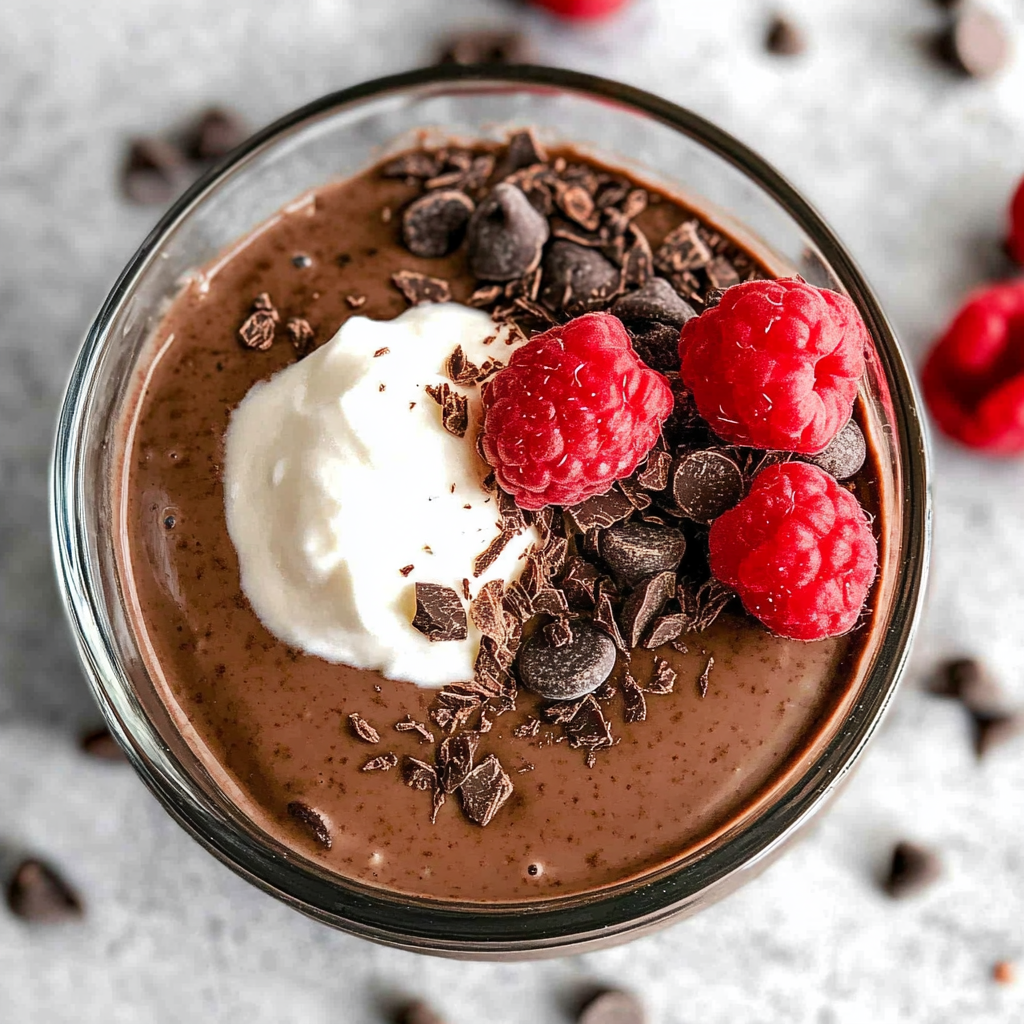
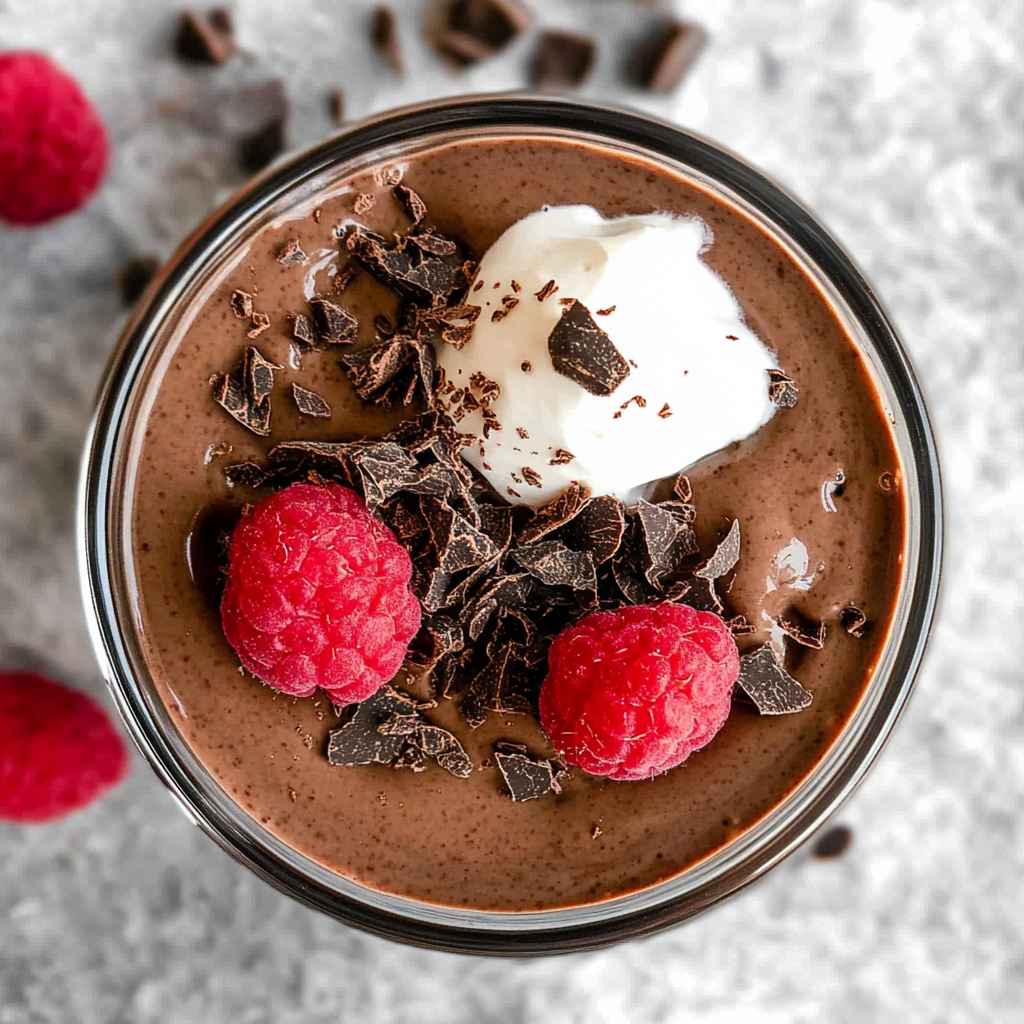
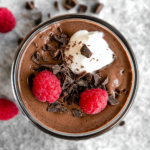
After waiting patiently through those couple of hours (or overnight!), it’s finally time for my favorite moment: garnishing! This is where you can really get creative and let your personality shine through. Consider topping each serving with fresh berries—raspberries provide such a vibrant contrast against the rich chocolate—or perhaps some sliced bananas if you’re feeling indulgent. A dollop of coconut whipped cream adds an airy brightness too!
As you prepare these toppings, think about textures—crunchy nuts like walnuts or almonds would also provide an intriguing juxtaposition against our smooth pudding base. Drizzle some additional maple syrup over top for an extra touch of sweetness if desired—it creates an inviting sheen that’s simply irresistible. Remember, presentation matters; we eat first with our eyes! So take pride in how you serve this dessert—it enhances not just enjoyment but also elevates this simple recipe into something truly special.
And there you have it—the ultimate Chocolate Protein Pudding ready for devouring! Each spoonful promises layers upon layers of flavor combined with guilt-free satisfaction thanks to its healthy protein content. Trust me when I say this dessert will become one of your go-to favorites—perfect for meal prep or simply indulging yourself after dinner one evening amidst good company or quiet reflection at home.
So gather around friends or family when you serve this masterpiece—you’ll be basking in compliments before long as they savor every single bite! Enjoy every moment—you deserve it!
Storage and Enjoyment Tips for Your Chocolate Protein Pudding
Now that you’ve crafted your rich and creamy Chocolate Protein Pudding, it’s time to savor every luscious bite! But before you dive in, let’s chat about how to keep this delightful dessert fresh so you can enjoy it for days to come. Trust me, this pudding is too good to simply devour all at once; it deserves the chance to shine over multiple occasions. Whether you’re saving some for a late-night snack or meal prepping for the week ahead, knowing how to store it properly will make all the difference in preserving its velvety texture and indulgent flavor.
Storing Leftover Chocolate Protein Pudding
To ensure your leftovers remain as divine as when they were freshly made, I recommend using an airtight container. This is absolutely crucial—keeping air out helps maintain that smooth, creamy consistency we all adore. Store it in the refrigerator, where it’ll happily reside for up to five days. If you want a little pro tip for keeping things fresh, consider placing a slice of bread in with your pudding; this genius trick helps absorb any excess moisture and keeps your treat delectably thick! After storage, you might notice that the flavors deepen even further; it’s like letting them develop a bit of character with time. When you’re ready to indulge again, just give it a good stir to reintroduce the silky texture or enjoy it chilled straight from the fridge—I promise you won’t regret either option!
Freezing Chocolate Protein Pudding for Later
If you’ve made more than you can handle (or simply want to save some for a rainy day), freezing your Chocolate Protein Pudding is an absolutely fantastic idea! To do this properly, spoon your pudding into freezer-safe containers, leaving a little room at the top since it will expand as it freezes. It will keep beautifully frozen for up to three months—how convenient is that? When you’re ready to indulge again, simply transfer it to the fridge overnight or leave it out on the counter for a couple of hours; when thawed, give it a gentle stir to reclaim its luxurious creaminess. Freezing is such a great option because not only does it allow you to enjoy this special treat at your leisure, but it also makes meal prep feel like less of a chore while still treating yourself. Isn’t that just wonderful?
Chocolate Protein Pudding
Indulge in the rich, creamy delight of Chocolate Protein Pudding—a guilt-free dessert that satisfies your sweet cravings while boosting your protein intake. This luscious pudding is easy to whip up, making it perfect for meal prep or a quick snack after a long day. Infused with high-quality cocoa and sweetened naturally, this recipe promises a delectable experience without any unnecessary additives. Each spoonful envelops you in chocolatey bliss, making it an ideal treat for any occasion. Enjoy it chilled, topped with fresh fruits or nuts for added texture and flavor. Dive into this healthy yet indulgent dessert today!
- Prep Time: 10 minutes
- Cook Time: None
- Total Time: 0 hours
- Yield: Approximately 4 servings 1x
- Category: Dessert
- Method: None
- Cuisine: American
Ingredients
- 2 cups unsweetened almond milk
- 1/2 cup unsweetened cocoa powder
- 1/4 cup plant-based protein powder (vanilla or chocolate)
- 1/4 cup maple syrup or agave nectar
- 2 tablespoons chia seeds
- 1 teaspoon pure vanilla extract
Instructions
- In a large mixing bowl, whisk together almond milk and cocoa powder until smooth.
- Add the plant-based protein powder and maple syrup; whisk until fully incorporated.
- Gently fold in chia seeds and vanilla extract.
- Pour the mixture into serving bowls or jars and refrigerate for at least 2 hours to set.
- Serve chilled, garnished with fresh fruit or nuts if desired.
Nutrition
- Serving Size: 1 serving
- Calories: 180
- Sugar: 11g
- Sodium: 115mg
- Fat: 6g
- Saturated Fat: 0.5g
- Unsaturated Fat: 5g
- Trans Fat: 0g
- Carbohydrates: 25g
- Fiber: 6g
- Protein: 8g
- Cholesterol: 0mg