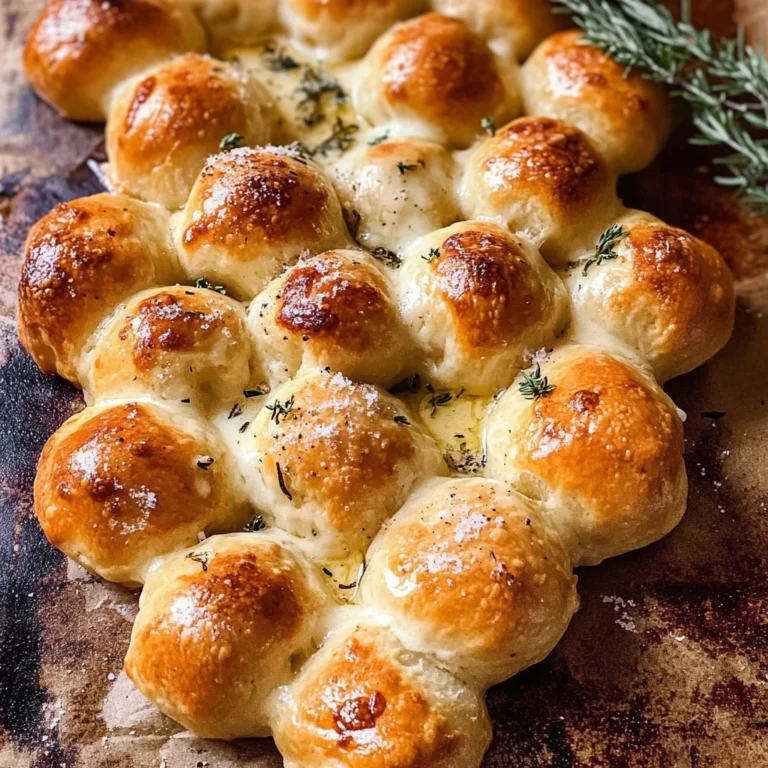
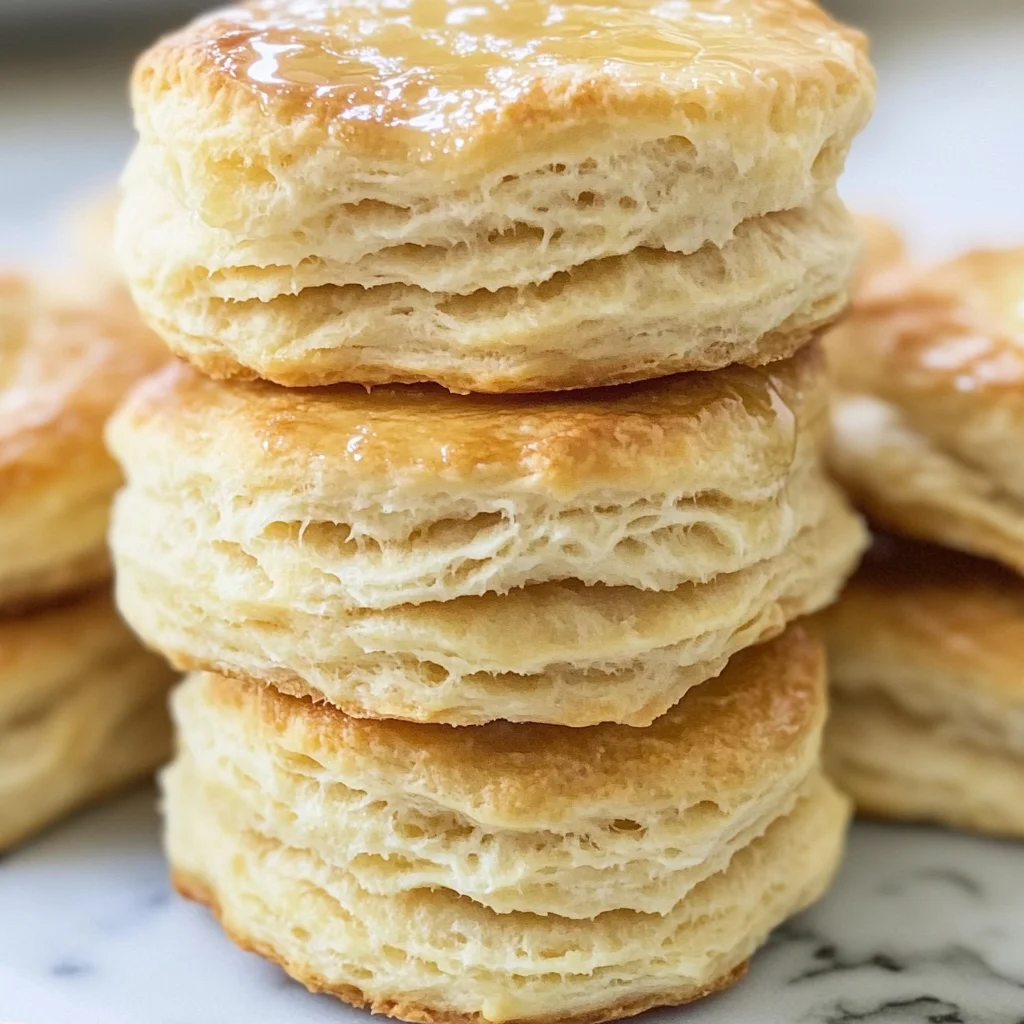
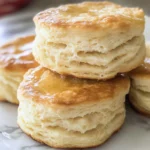
The BEST Biscuits Recipe
There’s something profoundly satisfying about the smell of freshly baked biscuits wafting through your home. It’s an aroma that transcends mere cooking; it evokes memories of family gatherings, lazy Sunday mornings, and comfort food that wraps you in a warm embrace. When I think of biscuits, I think of soft, flaky layers that practically melt in your mouth and have just the right touch of butteriness. This is not just any biscuit recipe; this is The BEST Biscuits Recipe, crafted with love and simplicity, using only six ingredients that come together to create pure magic. I promise you’ll find yourself reaching for these delightful morsels again and again, whether you’re slathering them with jam for breakfast or pairing them with gravy for dinner.
What makes these biscuits so special? It’s all about the technique and the quality of the ingredients. Each component plays a vital role in achieving that perfect balance of texture and flavor. The way we handle the dough, the way we incorporate cold butter, and even how we shape our biscuits contribute to their lightness and flakiness. These are not just baked goods; they are an experience—one that invites you to slow down, savor each bite, and perhaps even share with friends (if you can bear to part with them!). So grab your apron, preheat that oven, and let’s embark on this delicious journey together.
The BEST Biscuits Recipe: Flaky Perfection Awaits
These homemade biscuits are incredibly easy to make and only require six simple ingredients. Each one contributes to creating a biscuit that’s buttery, flaky, and utterly irresistible. Whether you’re serving them at breakfast or dinner, trust me when I say they will be gone before you know it!
Ingredients:
As we dive into this delightful culinary adventure, let’s take a moment to appreciate each ingredient that makes up The BEST Biscuits Recipe. Understanding what each one brings to the table will set us up for success.
- 2 ½ cups all-purpose flour. Flour is the backbone of any biscuit recipe—the foundation upon which everything else is built. It’s essential to use all-purpose flour here because it strikes the perfect balance between protein content and tenderness. Look for flour that feels soft and finely milled; this ensures a light texture in your baked goods. If you’re looking for alternatives due to dietary needs or preferences, a gluten-free all-purpose blend can work wonders too! Just be sure it contains xanthan gum or another binder to mimic the gluten structure.
- 1 tablespoon baking powder. This is our rising agent—think of it as the little helper that gives our biscuits their fluffy lift. Baking powder reacts with moisture in our dough to release carbon dioxide gas bubbles as it heats up in the oven. This process is crucial because it creates those airy pockets we love so much in biscuits! Always check your baking powder’s expiration date—old baking powder can lead to flat biscuits rather than those beautiful golden domes.
- 2 teaspoons granulated sugar. A pinch of sugar helps balance flavors while contributing a subtle sweetness to our biscuits—a non-negotiable element if you ask me! Sugar also aids in browning through caramelization during baking, giving our biscuits a lovely golden hue on top. Don’t worry if sugar isn’t your thing; it’s perfectly fine to reduce this amount or leave it out altogether if you prefer a more savory biscuit.
- ¾ teaspoon salt. Salt enhances every other flavor present in our biscuits; it’s like magic dust! It acts as a flavor enhancer while also strengthening gluten strands in the flour—now that’s multitasking! Always opt for fine sea salt or kosher salt for even distribution throughout your dough without leaving any gritty texture behind.
- ½ cup unsalted butter. Butter is the star player here—it adds richness and flavor while ensuring flakiness through its fat content. Chilling your butter before grating (yes, grating!) allows us to incorporate small bits throughout our dough rather than melting into it completely—this is crucial for achieving those tender layers we crave in our biscuits! For those who prefer alternatives due to dietary restrictions, coconut oil can provide similar results but may impart a slight flavor difference.
- 1 cup whole milk (or buttermilk or ½ cup of each). The liquid component binds everything together while also activating our baking powder for leavening. Whole milk creates richness and tenderness; however, buttermilk adds a tangy depth that elevates these biscuits even further! If you’re feeling adventurous—or simply want an extraordinary flavor—mix both milks for an unforgettable taste experience!
- Optional: milk, buttermilk, cream or melted butter (for brushing on biscuit tops). Brushing the tops before baking gives them an appealing sheen while enhancing browning—who doesn’t love a gorgeous golden biscuit? This step is entirely optional but highly recommended if you’re aiming for presentation perfection!
Equipment You’ll Need:
Now that we have gathered our ingredients let’s talk about some essential tools that will make crafting these incredible biscuits seamless and enjoyable! Having the right equipment transforms cooking from an obligation into pure joy.
- Mixing bowl – A large mixing bowl allows ample space for combining all your dry ingredients without fear of spills! Choose one that’s sturdy and easy to clean; glass bowls are fantastic because they let you see what’s happening inside as you mix.
- Box grater – This tool will play an unexpected but critical role in getting your butter perfectly integrated into the flour mixture without warming it up too much. Grating keeps pieces small enough to distribute evenly throughout while still maintaining their coldness—a key factor in achieving flaky layers!
- Fork – A humble yet mighty tool! A fork comes in handy not only when mixing but also during kneading steps—use it gently at first until everything comes together beautifully!
- Biscuit cutter – Opt for one measuring around 2¼ inches across; this size guarantees nice portions without being overly large or too small! Using a straight-down motion prevents twisting which could seal edges instead of allowing them room to rise during baking.
- Parchment paper – Lining your baking sheet with parchment ensures easy release after baking while preventing unwanted sticking issues—a baker’s best friend!
Let’s roll up those sleeves and get started on preparing these heavenly bites!
Preparing The BEST Biscuits Recipe
Step 1: Chill Your Butter
To begin this journey toward light-as-air biscuits, you’ll want to place your unsalted butter into the freezer for at least 20 minutes prior to starting any mixing activities—trust me on this! Chilling solidifies butter’s fat content so when grated into our dry ingredients later on; it stays distinct rather than melting away completely into grease during mixing stages—a common pitfall many encounter when trying homemade recipes at home! Once ready (and frosty), remove from freezer and grate immediately using your box grater—it’s like magic how quickly those cold shavings capture air around them!
Step 2: Preheat Your Oven
While letting our chilled butter work its wonders later on down below—the next task involves preheating that trusty oven of yours! Set it at 425°F (220°C) with one rack positioned toward upper third—this positioning allows optimal heat circulation around biscuit tops ensuring they puff up beautifully without burning underneath before finishing off nicely above! Make sure you’ve lined a baking sheet with parchment paper beforehand—it guarantees seamless removal once baked beauties emerge from their warm cocooned spaces post-cooking time elapses.
Step 3: Combine Dry Ingredients
In a large mixing bowl (the one we lovingly selected earlier), pour in those precious dry ingredients: all-purpose flour, baking powder sugar & salt together seamlessly whisk until they’ve formed an invitingly aromatic cloud readying itself as the base layer upon which everything else will build upon subsequently throughout upcoming steps ahead! Take note here—don’t rush this step as thorough incorporating ensures no lumps form later down line—creating smooth dough consistency vital towards ultimate success here!
Step 4: Add Grated Butter
Now comes my favorite part—adding back our frosted grated butter shavings into well-combined flour mixture from earlier! Using forks gently toss until small bits are evenly distributed amongst dry elements resembling coarse meal-like texture emerges—this may take some elbow grease but don’t fret if things seem stubborn at first—they’ll yield eventually under gentle coaxing efforts made by hand movements alongside fork assistance provided earlier within rhythmical motions employed throughout entirety needed within process undertaken here today!
Stay tuned as we continue crafting these irresistible gems layer by layer…
The BEST Biscuits Recipe: A Journey to Flaky Perfection
Homemade biscuits have an almost magical quality that can transform any meal into a special occasion. They are not just baked goods; they are fluffy clouds of buttery goodness that beckon you with their fragrant aroma and golden tops. As we continue our journey toward creating The BEST Biscuits Recipe, let’s dive into the next steps that will help you craft these delightful treats. Trust me, each step is filled with its own importance and reasoning, ensuring your biscuits turn out perfectly every single time.
Step 5: Bringing it Together – The Art of Mixing
Now, it’s time for one of the most crucial moments in our biscuit-making adventure: bringing all those ingredients together! Pour the full cup of milk or buttermilk into your bowl filled with the dry mixture. This is where the magic happens—watch as the liquid transforms those dry ingredients into a cohesive dough. It might look a bit shaggy at first, and that’s absolutely normal! The key here is to use a fork to gently stir until the dough begins to cling together. You want to be careful not to overmix it; biscuits thrive on minimal handling, which keeps them light and fluffy.
But why is this step so important? Well, the milk hydrates the flour, activating gluten—a protein that gives structure—but too much mixing can lead to tough biscuits. So, if you notice a few bits of flour stubbornly clinging on without incorporating, don’t fret! Just add an extra tablespoon or two of milk or buttermilk if you feel like your dough is still too dry. Remember, patience is key here; take your time and allow those ingredients to mingle lovingly before moving on.
Step 6: Folding – The Secret to Flakiness
Next up is our folding technique, which is where we give our biscuits that unmistakable flaky texture that we all crave! Gently turn your dough out onto a lightly floured surface—this helps prevent sticking while also adding a little more control during our next steps. Pat the dough into a rectangle about 1½ inches thick. Take a moment here; really appreciate how tactile and satisfying this process is!
Now comes the folding part, which involves taking the dough in half and pressing it down again into another rectangle of the same thickness. You’re going to repeat this folding process four to six times. Each fold creates layers in your dough—can you imagine how wonderful they’ll taste when they bake? This technique encourages steam to develop in the oven, leading to those glorious flaky layers we’re after. Don’t rush this step; allow each fold to be gentle yet purposeful. You’re creating something truly extraordinary!
Step 7: Cutting with Precision – The Biscuit Shape
Ah, now for one of my favorite parts—the cutting! Grab yourself a biscuit cutter (or even a glass if you’re feeling creative) and cut out your biscuits from that beautifully folded dough. It’s essential to press straight down without twisting; twisting seals off those precious layers we’ve just worked so hard on creating! Once you’ve cut as many biscuits as possible from one round of dough, gather up those scraps without fear—pat them back into shape for a second go at cutting.
As you place each biscuit onto your prepared baking sheet lined with parchment paper, take a moment to admire their rustic beauty. Space them about an inch apart so they have room to rise and expand while baking. This step ensures even cooking and helps achieve that lovely golden exterior we all adore!
Step 8: The Golden Touch – Baking Your Biscuits
With your baking tray lined full of biscuit cutouts, it’s time for the grand finale—baking! Preheat your oven to 425° F (that’s Fahrenheit!), placing the rack in the upper third of your oven for optimal heat circulation. This position ensures even cooking so you get those beautiful golden tops without undercooked bottoms.
Before sliding them into their warm home, consider brushing the tops with some milk or melted butter—it gives them that extra shine and flavor boost that’ll make everyone swoon as soon as they hit the table! Now, pop them in the oven for about 13-16 minutes; keep an eye on them during this time because every oven behaves differently. You’re looking for that lovely light golden brown color on top—a sure sign they are ready to emerge from their heated cocoon!
Don’t hesitate to trust your instincts; if they smell utterly intoxicating (which I promise you they will), it’s likely they’re done—just be sure not to rush this part! Letting them bake until perfectly golden allows those layers inside to puff up beautifully while keeping the outside crisp.
Conclusion:
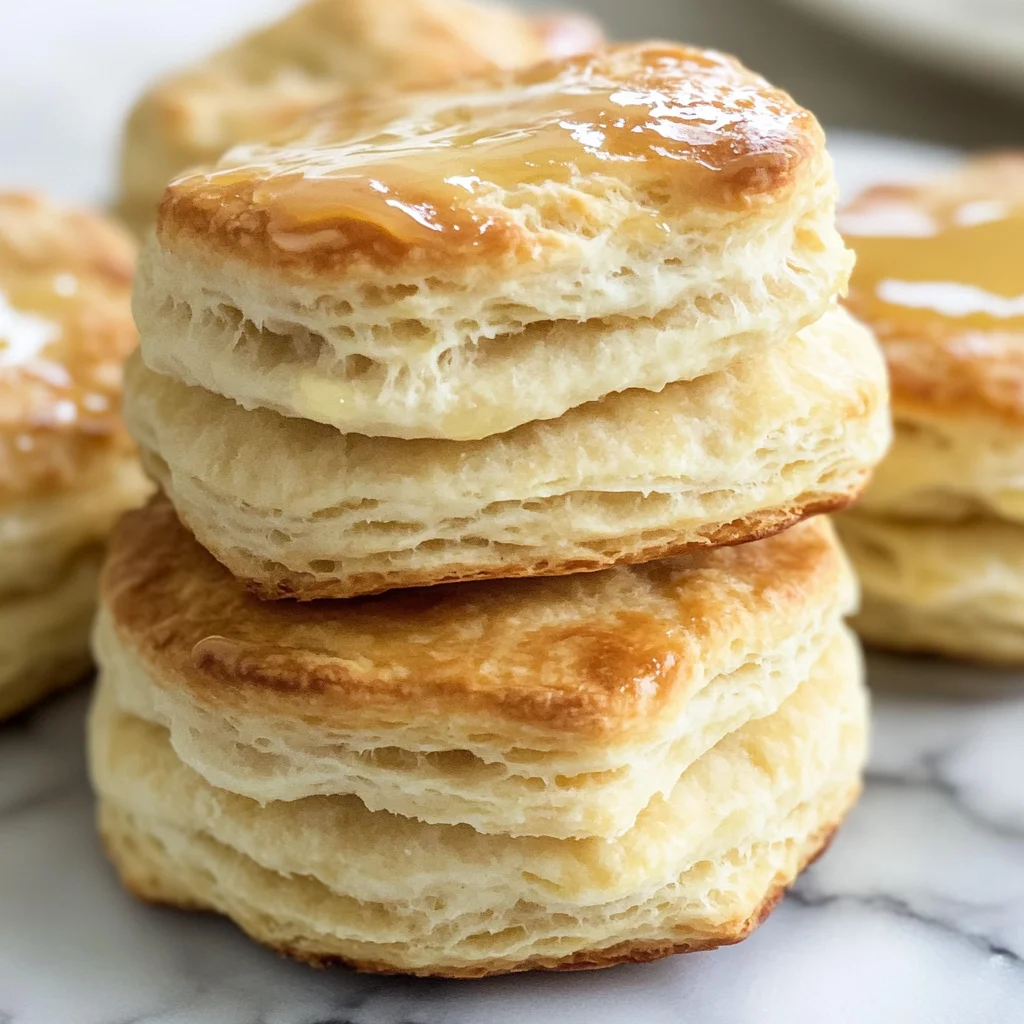
As we come to the end of our journey through making The BEST Biscuits Recipe, I can’t help but feel a sense of joy and pride over sharing this cherished recipe with you. It’s more than just combining flour and butter; it’s about creating memories around the table where laughter unfolds over warm biscuits slathered with jam or honey. Each biscuit is a golden treasure—a perfect balance between flaky layers and buttery richness that beckons you back for just one more bite. I hope my enthusiasm has ignited your passion for baking these delightful morsels!
This recipe is truly a must-try not only because of its taste but also because it embodies the joy of homemade food—accessible yet extraordinary. Picture this: You’ve just pulled these beauties from the oven; they’re puffed up high with golden tops glistening like tiny treasures waiting to be discovered. The moment you break one open, steam curls up invitingly, revealing tender layers inside that are calling out to be enjoyed with your favorite spreads or even alongside savory dishes like soups or stews. Each biscuit is an invitation to create moments that linger long after the last crumb has been savored.
Imagine savoring one with a generous dollop of berry preserves while sipping on your morning coffee, or serving them alongside roasted vegetables during dinner gatherings—they complement any meal beautifully! For an afternoon pick-me-up, pair them with fresh fruit and whipped coconut cream for something truly refreshing and delightful. And if you’re feeling daring one weekend morning? Try making mini breakfast sandwiches filled with avocado and egg—absolutely divine!
Feeling adventurous? This recipe is wonderfully adaptable! You can fold in shredded cheese for a savory twist or add herbs like rosemary or thyme for an aromatic flair that’s perfect during gatherings or family brunches. If you want something sweet, consider incorporating chocolate chips or dried fruits like cranberries! Each variation brings its own unique charm while still holding true to what makes these biscuits so special—flaky perfection that warms your heart and soul. So go ahead, bake these biscuits with love, share your experience with friends and family, and let’s keep this beautiful tradition alive!
The BEST Biscuits Recipe
There’s nothing quite like the aroma of freshly baked biscuits filling your home, evoking feelings of warmth and comfort. This recipe for The BEST Biscuits Recipe combines simplicity and flavor, using just six wholesome ingredients to create buttery, flaky biscuits that melt in your mouth. Perfect for breakfast, dinner, or as a snack, these delightful morsels are sure to become a staple in your kitchen. Whether you enjoy them plain, with jam, or alongside savory dishes, each bite offers a comforting taste of home.
- Prep Time: 15 minutes
- Cook Time: 15 minutes
- Total Time: 30 minutes
- Yield: Approximately 10 servings 1x
- Category: Breakfast
- Method: Baking
- Cuisine: American
Ingredients
- 2 ½ cups all-purpose flour
- 1 tablespoon baking powder
- 2 teaspoons granulated sugar
- ¾ teaspoon salt
- ½ cup unsalted butter (chilled)
- 1 cup whole milk (or buttermilk)
Instructions
- Chill the unsalted butter for at least 20 minutes before grating.
- Preheat your oven to 425°F (220°C) and line a baking sheet with parchment paper.
- In a large mixing bowl, whisk together the flour, baking powder, sugar, and salt until well combined.
- Grate the chilled butter into the dry mixture and gently toss until it resembles coarse meal.
- Add the milk or buttermilk and stir with a fork until just combined; do not overmix.
- Turn the dough onto a floured surface and pat it into a rectangle about 1½ inches thick. Fold it over several times to create layers.
- Cut out biscuits using a biscuit cutter and place them on the prepared baking sheet.
- Bake for 13-16 minutes or until golden brown.
Nutrition
- Serving Size: 1 biscuit
- Calories: 180
- Sugar: 2g
- Sodium: 300mg
- Fat: 7g
- Saturated Fat: 4g
- Unsaturated Fat: 3g
- Trans Fat: 0g
- Carbohydrates: 24g
- Fiber: <1g
- Protein: 4g
- Cholesterol: 15mg