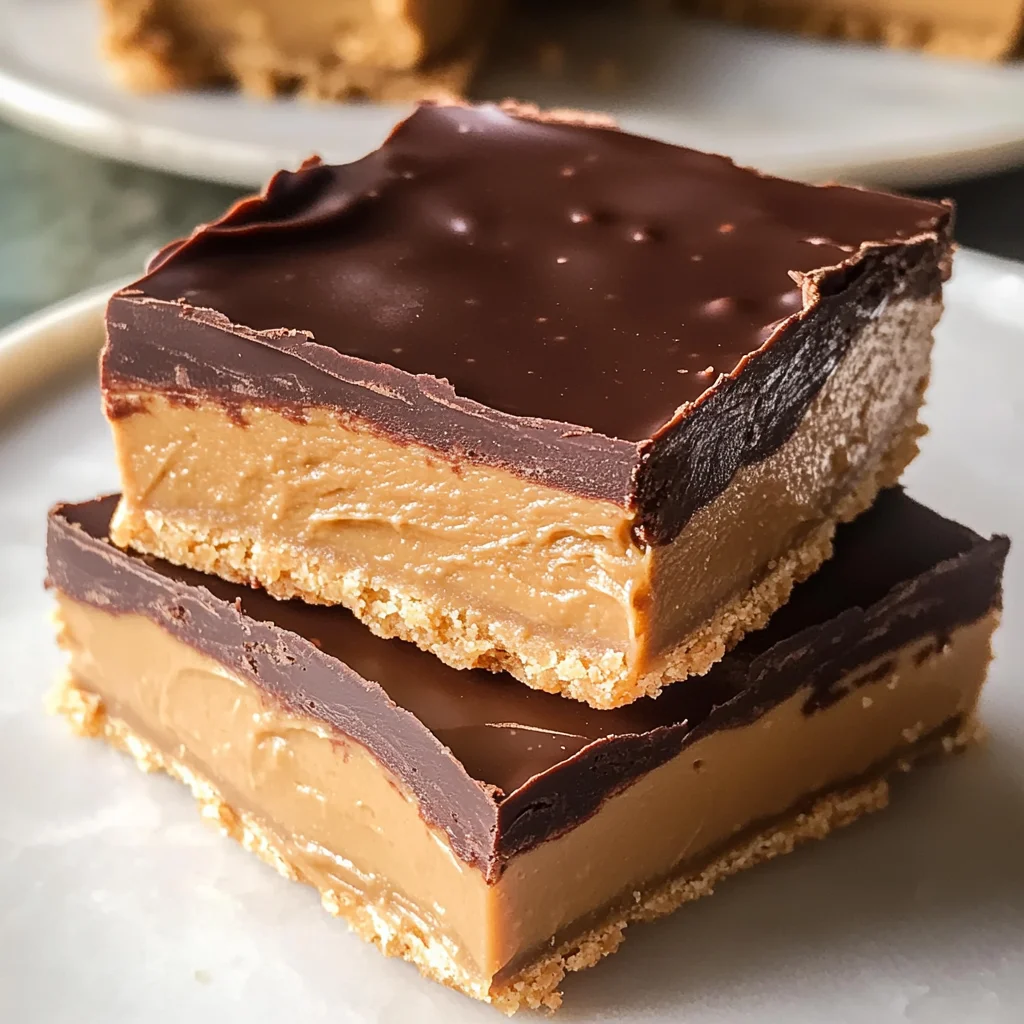
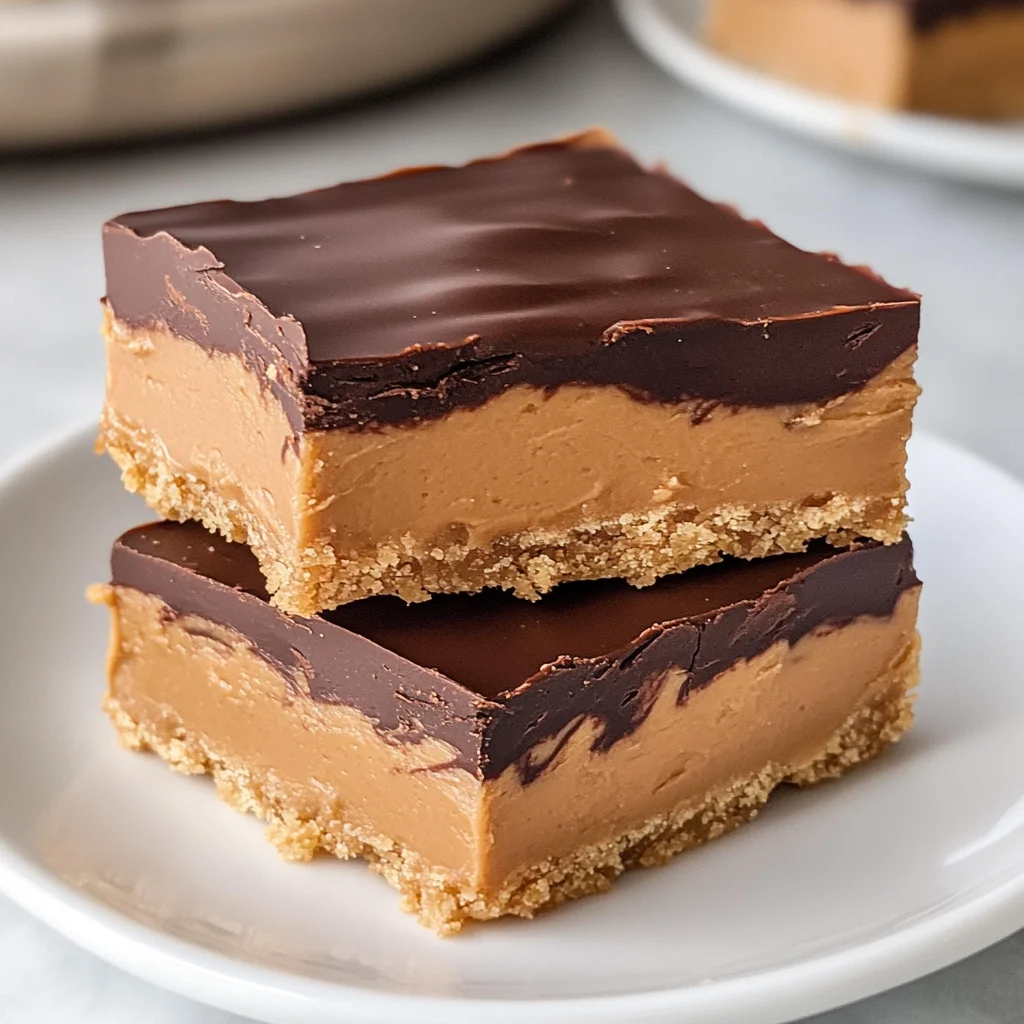
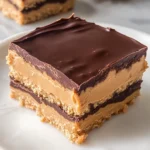
Buckeye Bars
If you’re looking for a delightful treat that’s quick to whip up and will impress your friends and family, you’ve come to the right place! These no bake Buckeye Bars are a fun twist on the classic Ohio candy. They combine the creamy goodness of peanut butter with rich chocolate in a perfectly shareable square. Whether it’s a busy weeknight or a family gathering, these bars are sure to bring smiles all around.
What makes this recipe so special is how effortlessly it comes together. You’ll find that it uses simple ingredients you probably already have at home, making it easy to satisfy those sweet cravings any time!
Why You’ll Love This Recipe
- Quick and Easy: With just 15 minutes of prep time, you can have these bars ready to chill!
- Family-Friendly: Kids love them, and they’re perfect for parties or school events.
- No Baking Required: Enjoy the deliciousness without any time spent in the oven.
- Make Ahead: These bars store well in the fridge, making them great for meal prep or last-minute dessert fixes.
Ingredients You’ll Need
Gathering these simple, wholesome ingredients will be a breeze! You’ll be amazed at how quickly you can put together this delicious dessert.
For the Base
- 8 tablespoons salted sweet cream butter (softened)
- 3 cups creamy peanut butter
- 4 cups powdered sugar
- 2 teaspoons pure vanilla extract
For the Topping
- 12 ounce package semi sweet chocolate chips
- 2 tablespoons vegetable oil
Variations
One of the best things about Buckeye Bars is how flexible they can be! Here are some fun ideas to switch things up:
- Add Some Crunch: Stir in chopped nuts or crushed pretzels for an extra layer of texture.
- Switch Up the Chocolate: Try using dark chocolate chips for a richer flavor or white chocolate for something different.
- Make It Festive: Add colorful sprinkles on top for birthdays or holidays to make them even more fun!
How to Make Buckeye Bars
Step 1: Prepare the Base
Start by creaming together the softened butter and creamy peanut butter in a large mixing bowl. This step is important because it ensures that your bars have that smooth and creamy texture we all love. Using an electric mixer will make this process super easy. Once combined, gradually add in the powdered sugar and vanilla extract until everything is mixed well.
Step 2: Spread It Out
Next, grab a baking dish (about 9×13 inches) and lightly grease it. Press your peanut butter mixture evenly into the bottom of the dish. This base is where all your flavors will start building up, so make sure it’s packed in nicely!
Step 3: Melt the Chocolate
In a microwave-safe bowl, combine the semi-sweet chocolate chips and vegetable oil. Heat them in 30-second intervals, stirring after each session until completely melted. The oil helps give your chocolate that nice glossy finish while keeping it pourable.
Step 4: Top It Off
Pour the melted chocolate over your pressed peanut butter layer. Use a spatula to spread it evenly across the top. This is where you get that rich chocolatey goodness that pairs so perfectly with peanut butter!
Step 5: Chill and Serve
Finally, pop your baking dish into the refrigerator for about two hours or until set. Once firm, cut into squares and enjoy! These no bake Buckeye Bars are perfect for sharing or enjoying all by yourself—no judgment here!
Pro Tips for Making Buckeye Bars
Making your own Buckeye Bars is an enjoyable experience, and with these tips, you can ensure they turn out perfectly every time!
- Use room temperature ingredients: This helps the butter and peanut butter blend smoothly, resulting in a creamier filling that sets beautifully.
- Press the mixture firmly: When spreading the peanut butter layer into the pan, make sure to press it down firmly. This will help create a solid base that holds together when cut into bars.
- Chill before cutting: Allowing the bars to chill for at least 2 hours after assembling will help them firm up, making it easier to cut them into neat squares without crumbling.
- Melt chocolate slowly: When melting the chocolate chips, do it gently either in a microwave in short bursts or over a double boiler. This prevents the chocolate from seizing up and ensures a smooth coating.
- Experiment with toppings: Feel free to get creative with toppings! Adding crushed nuts or a sprinkle of sea salt on top can enhance flavor and texture.
How to Serve Buckeye Bars
These delicious Buckeye Bars are perfect for sharing at gatherings or enjoying as an indulgent treat at home. Presenting them beautifully can elevate their appeal!
Garnishes
- Chopped nuts: A sprinkle of chopped peanuts adds a delightful crunch and enhances the peanut flavor.
- Drizzle of chocolate: A light drizzle of melted semi-sweet chocolate over each bar creates an elegant presentation and extra sweetness.
- Sea salt flakes: A few flakes of sea salt on top can enhance the flavors and give a gourmet touch.
Side Dishes
- Fresh fruit platter: A colorful assortment of seasonal fruits helps balance the richness of the bars and adds refreshing flavors.
- Vanilla ice cream: A scoop of creamy vanilla ice cream pairs perfectly with the rich chocolate and peanut butter layers, creating a delightful dessert experience.
- Coffee or tea: Serving these bars with a cup of coffee or herbal tea enhances their flavors and makes for a cozy dessert moment.
- Milkshake: For an indulgent twist, consider pairing these bars with a homemade milkshake. The creamy texture complements the rich flavors beautifully.
Now you’re all set to whip up these delightful Buckeye Bars! Enjoy sharing them with friends, family, or even just treating yourself!
Make Ahead and Storage
These Buckeye Bars are perfect for meal prep! You can whip them up in advance, making them a fantastic treat to have on hand for busy weeknights or unexpected guests.
Storing Leftovers
- Store in an airtight container at room temperature for up to 3 days.
- For longer freshness, refrigerate the bars; they will last up to a week.
- Keep the bars layered with parchment paper between each piece to prevent sticking.
Freezing
- Cut the bars into squares before freezing for easy access.
- Wrap each square tightly in plastic wrap, then place them in a freezer bag.
- They can be frozen for up to 3 months; just thaw in the fridge overnight before enjoying.
Reheating
- These bars are best enjoyed cold or at room temperature.
- If you’d like them slightly softened, let them sit out for about 15 minutes before serving.
- Avoid microwaving as it can alter their delicious texture.
FAQs
If you have questions about making these delightful Buckeye Bars, you’re not alone! Here are some common queries:
Can I make Buckeye Bars ahead of time?
Absolutely! In fact, these bars are great for making ahead of time and storing in the fridge. They taste even better after sitting for a day as the flavors meld together.
What can I substitute for peanut butter in Buckeye Bars?
If you’re looking for alternatives, consider using almond butter or sunflower seed butter. Both options will provide a different flavor but still maintain that creamy texture you love!
How do I know when my Buckeye Bars are set?
After preparing, allow your bars to chill in the refrigerator for at least two hours. This will help them firm up nicely and make cutting easier.
Are Buckeye Bars gluten-free?
Yes! As long as you ensure that all your ingredients are certified gluten-free, these delicious treats can be enjoyed by those following a gluten-free diet.
Final Thoughts
I hope you find joy in making these scrumptious Buckeye Bars! Their rich combination of peanut butter and chocolate makes them a truly special treat that’s perfect for any occasion. Whether it’s a family gathering or just a sweet indulgence after dinner, these bars are sure to please everyone. Enjoy creating this delightful dessert, and don’t hesitate to share your experience with friends and family!
Buckeye Bars
Discover the joy of making no-bake Buckeye Bars, a delightful treat that marries the creamy richness of peanut butter with luscious chocolate. Perfect for any occasion, these bars come together effortlessly and require minimal ingredients you likely have on hand. With just 15 minutes of prep time, you can whip up a batch that’s ideal for family gatherings or a sweet snack at home. Each bite delivers a satisfying combination of flavors and textures, making them a hit with kids and adults alike. Plus, they store well in the fridge, so you can enjoy them throughout the week!
- Prep Time: 15 minutes
- Cook Time: None
- Total Time: 0 hours
- Yield: Approximately 24 servings 1x
- Category: Dessert
- Method: No Bake
- Cuisine: American
Ingredients
- 8 tablespoons salted sweet cream butter (softened)
- 3 cups creamy peanut butter
- 4 cups powdered sugar
- 2 teaspoons pure vanilla extract
- 12 ounces semi-sweet chocolate chips
- 2 tablespoons vegetable oil
Instructions
- In a large mixing bowl, cream together softened butter and peanut butter until smooth.
- Gradually mix in powdered sugar and vanilla extract until fully combined.
- Grease a 9×13 inch baking dish and press the peanut butter mixture evenly into the bottom.
- In a microwave-safe bowl, melt chocolate chips with vegetable oil in 30-second intervals until smooth.
- Pour melted chocolate over the peanut butter layer and spread evenly.
- Refrigerate for about two hours or until set, then cut into squares to serve.
Nutrition
- Serving Size: 1 square (40g)
- Calories: 180
- Sugar: 14g
- Sodium: 85mg
- Fat: 10g
- Saturated Fat: 4g
- Unsaturated Fat: 6g
- Trans Fat: 0g
- Carbohydrates: 19g
- Fiber: 1g
- Protein: 4g
- Cholesterol: 10mg