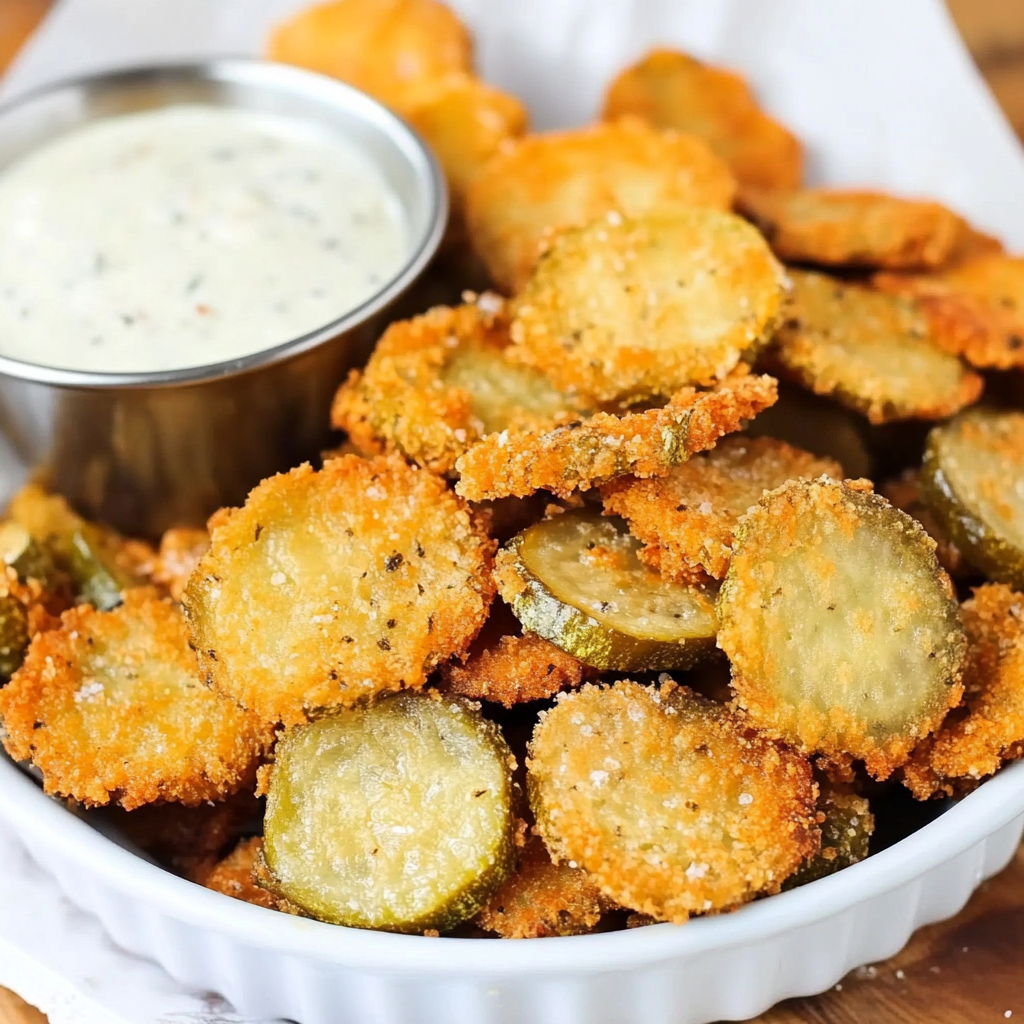
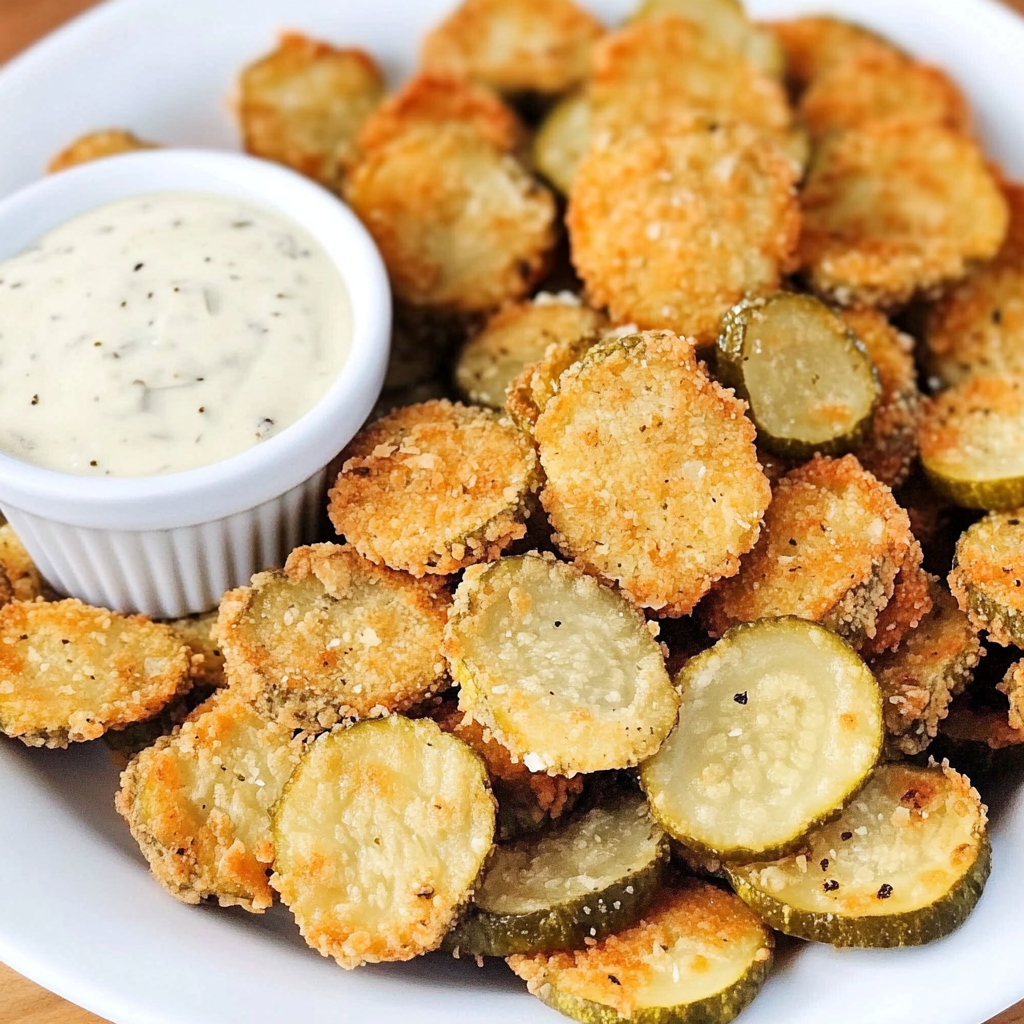
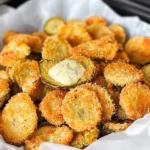
Fried Pickles
If you’re looking for a snack that’s both crispy and tangy, you’ve come to the right place! Fried pickles are not just a delightful treat; they capture the essence of comfort food in every bite. These little gems are perfect for busy weeknights, family gatherings, or even just a cozy night at home when you crave something special. Trust me, once you take that first bite of these crunchy delights, you’ll understand why they have a special place in my heart.
This recipe is incredibly easy to whip up and can be ready in under 30 minutes. So whether you’re sharing them with friends during game night or enjoying them solo on the couch, fried pickles are guaranteed to bring smiles all around!
Why You’ll Love This Recipe
- Quick to make: With just 15 minutes of prep time and 10 minutes of cooking, you’ll have delicious fried pickles ready in no time.
- Family-friendly appeal: Everyone loves the crunch and flavor of fried pickles – they’re sure to be a hit with kids and adults alike!
- Perfect for dipping: These crispy bites pair wonderfully with Ranch dressing or Marinara for an extra layer of flavor.
- Versatile for occasions: Whether it’s a casual snack or part of a larger gathering spread, these fried pickles fit right in.
- Simple ingredients: You probably have most of these wholesome ingredients in your pantry already!
Ingredients You’ll Need
Now, let’s gather our ingredients! This recipe calls for simple, wholesome items that you can easily find at your local grocery store. Get ready to enjoy some crispy fried pickles!
- vegetable oil (for frying)
- 1 (16-ounce) jar dill pickle slices
- ½ cup all-purpose flour
- 2 teaspoons garlic salt
- 1 teaspoon Italian seasoning
- ¼ teaspoon pepper
- ¾ cup water
- 1½ cups panko breadcrumbs
Variations
One of the best parts about this fried pickles recipe is its flexibility! You can easily customize it based on your preferences or what you have on hand. Here are some fun variations to try:
- Spice it up: Add some cayenne pepper or chili powder to the flour mixture for an extra kick.
- Change the coating: Try using crushed tortilla chips instead of panko breadcrumbs for a different texture.
- Go cheesy: Mix grated Parmesan cheese into the breadcrumb coating for a cheesy twist.
- Herb it up: Add fresh herbs like dill or parsley to the batter for added flavor.
How to Make Fried Pickles
Step 1: Heat the Oil
Fill a frying pan with about ½ inch of vegetable oil and heat it over medium-high heat until it reaches 350–375°F. Getting the oil hot enough is key because it ensures that your fried pickles will turn golden brown and crispy rather than soggy.
Step 2: Prepare the Pickles
While your oil is heating up, drain the dill pickle slices and place them on paper towels. Pat them dry gently to remove excess juice. This step helps achieve that perfect crunch by preventing too much moisture from interfering with the frying process.
Step 3: Make the Batter
In a shallow bowl, whisk together the all-purpose flour, garlic salt, Italian seasoning, and pepper. Then add water gradually while mixing until you have a smooth batter. This batter will help create a nice coating around each pickle slice.
Step 4: Coat with Breadcrumbs
In another shallow dish, place your panko breadcrumbs. Working in small batches, dip each pickle slice into the batter until coated evenly, then transfer it to the breadcrumbs. Make sure every side is well-coated; this will give your fried pickles that irresistible crunch!
Step 5: Fry Them Up
Carefully add the coated pickles into the hot oil in batches. Fry them for about 1–2 minutes on each side or until they are golden brown and crisp. Use a slotted spoon to remove them from the oil and place them on a paper towel-lined plate to absorb any excess oil.
Step 6: Serve and Enjoy
Serve your freshly made fried pickles immediately while they’re still warm! They taste amazing paired with Ranch dressing or Marinara sauce – perfect for dipping! Enjoy this delicious snack with family and friends; it’s sure to be a hit!
Pro Tips for Making Fried Pickles
Making crispy fried pickles is all about technique and a few clever tricks! Here are some pro tips to ensure your pickles turn out perfectly every time.
- Choose the right pickles: Opt for thicker slices of dill pickles, as they hold up better during frying and provide a satisfying crunch in every bite.
- Pat the pickles dry: Removing excess moisture from the pickle slices prevents the batter from becoming soggy, allowing for that delightful crunch you crave.
- Maintain oil temperature: Use a thermometer to monitor the oil temperature closely. Keeping it between 350–375°F ensures even cooking and prevents greasy pickles.
- Fry in small batches: Overcrowding the pan can lower the oil temperature quickly, resulting in less crispy fried pickles. Frying in smaller batches helps maintain that golden brown perfection.
- Experiment with seasonings: Feel free to customize the batter by adding your favorite spices like paprika or cayenne pepper for an extra kick of flavor!
How to Serve Fried Pickles
Serving fried pickles is all about presentation and pairing! They make a fantastic appetizer or snack and can be dressed up in many delightful ways.
Garnishes
- Fresh herbs: Sprinkling chopped parsley or dill on top adds a fresh pop of color and flavor.
- Lemon wedges: A squeeze of lemon juice brightens up the dish, enhancing the tanginess of the fried pickles.
- Chili flakes: For those who love a bit of heat, toss on some chili flakes as a garnish before serving!
Side Dishes
- Coleslaw: A cool, crunchy coleslaw complements the warm, crispy texture of fried pickles perfectly. The creaminess balances the tanginess beautifully.
- Sweet potato fries: These provide a sweet contrast to the salty savoriness of fried pickles. Plus, they add vibrant color to your plate!
- Vegetable platter with dip: Pairing fried pickles with fresh veggies and a light dip offers a refreshing contrast that rounds out your appetizer spread.
- Potato wedges: Crispy potato wedges seasoned with herbs are another great side, adding heartiness to your meal while maintaining that crispy texture everyone loves.
Enjoy these delicious fried pickles at your next gathering; they’re sure to be a hit!
Make Ahead and Storage
These crispy fried pickles are not only a delightful treat but also perfect for meal prep! You can make them ahead of time and store them for later enjoyment. Here’s how to keep your fried pickles fresh:
Storing Leftovers
- Allow the fried pickles to cool completely.
- Place them in an airtight container.
- Store in the refrigerator for up to 3 days.
Freezing
- Let the fried pickles cool down entirely before freezing.
- Arrange them in a single layer on a baking sheet.
- Freeze until solid, then transfer to a freezer-safe bag or container.
- They can be frozen for up to 2 months.
Reheating
- Preheat your oven to 400°F (200°C).
- Spread the frozen or refrigerated fried pickles on a baking sheet.
- Bake for about 10-15 minutes or until they’re heated through and crispy again.
FAQs
Here are some common questions about making delicious fried pickles!
Can I make Fried Pickles ahead of time?
Yes, you can prepare the battered and breaded pickles ahead of time. Just store them in the fridge until you’re ready to fry!
What dipping sauces go well with Fried Pickles?
Fried Pickles pair wonderfully with Ranch dressing, Marinara sauce, or even a spicy aioli. The tanginess complements the crunch perfectly!
How long do Fried Pickles last in the fridge?
Fried Pickles can last up to 3 days in an airtight container in the refrigerator. Just remember they’re best enjoyed fresh and crispy!
Can I use other types of pickles for this recipe?
Absolutely! Feel free to experiment with different types of pickles like spicy dill or bread-and-butter varieties for unique flavors.
Final Thoughts
I hope you find joy in making these crispy, golden fried pickles! They are sure to be a hit at any gathering, and their delightful crunch combined with that tangy flavor makes them truly special. Enjoy every bite, and don’t hesitate to share your own variations or tips! Happy cooking!
Fried Pickles
Crispy and tangy Fried Pickles come together in under 30 minutes! Perfect as an appetizer—give this delightful recipe a try today!
- Prep Time: 15 minutes
- Cook Time: 10 minutes
- Total Time: 25 minutes
- Yield: Approximately 6 servings 1x
- Category: Appetizer
- Method: Frying
- Cuisine: American
Ingredients
- Vegetable oil (for frying)
- 1 (16-ounce) jar dill pickle slices
- ½ cup all-purpose flour
- 2 teaspoons garlic salt
- 1 teaspoon Italian seasoning
- ¼ teaspoon pepper
- ¾ cup water
- 1½ cups panko breadcrumbs
Instructions
- Heat about ½ inch of vegetable oil in a frying pan over medium-high heat until it reaches 350–375°F.
- Drain the dill pickle slices and pat them dry with paper towels to remove excess moisture.
- In a shallow bowl, combine the flour, garlic salt, Italian seasoning, and pepper. Gradually mix in water until a smooth batter forms.
- Place panko breadcrumbs in another shallow dish. Dip each pickle slice into the batter, then coat evenly with breadcrumbs.
- Fry the coated pickles in batches for 1–2 minutes on each side until golden brown and crispy. Remove with a slotted spoon and place on paper towels to absorb excess oil.
- Serve immediately while warm with your choice of dipping sauce.
Nutrition
- Serving Size: 5 fried pickles (100g)
- Calories: 305
- Sugar: 2g
- Sodium: 902mg
- Fat: 12g
- Saturated Fat: 1g
- Unsaturated Fat: 9g
- Trans Fat: 0g
- Carbohydrates: 42g
- Fiber: 2g
- Protein: 6g
- Cholesterol: 0mg